Disassembly, Assembly and Repair Instructions
15
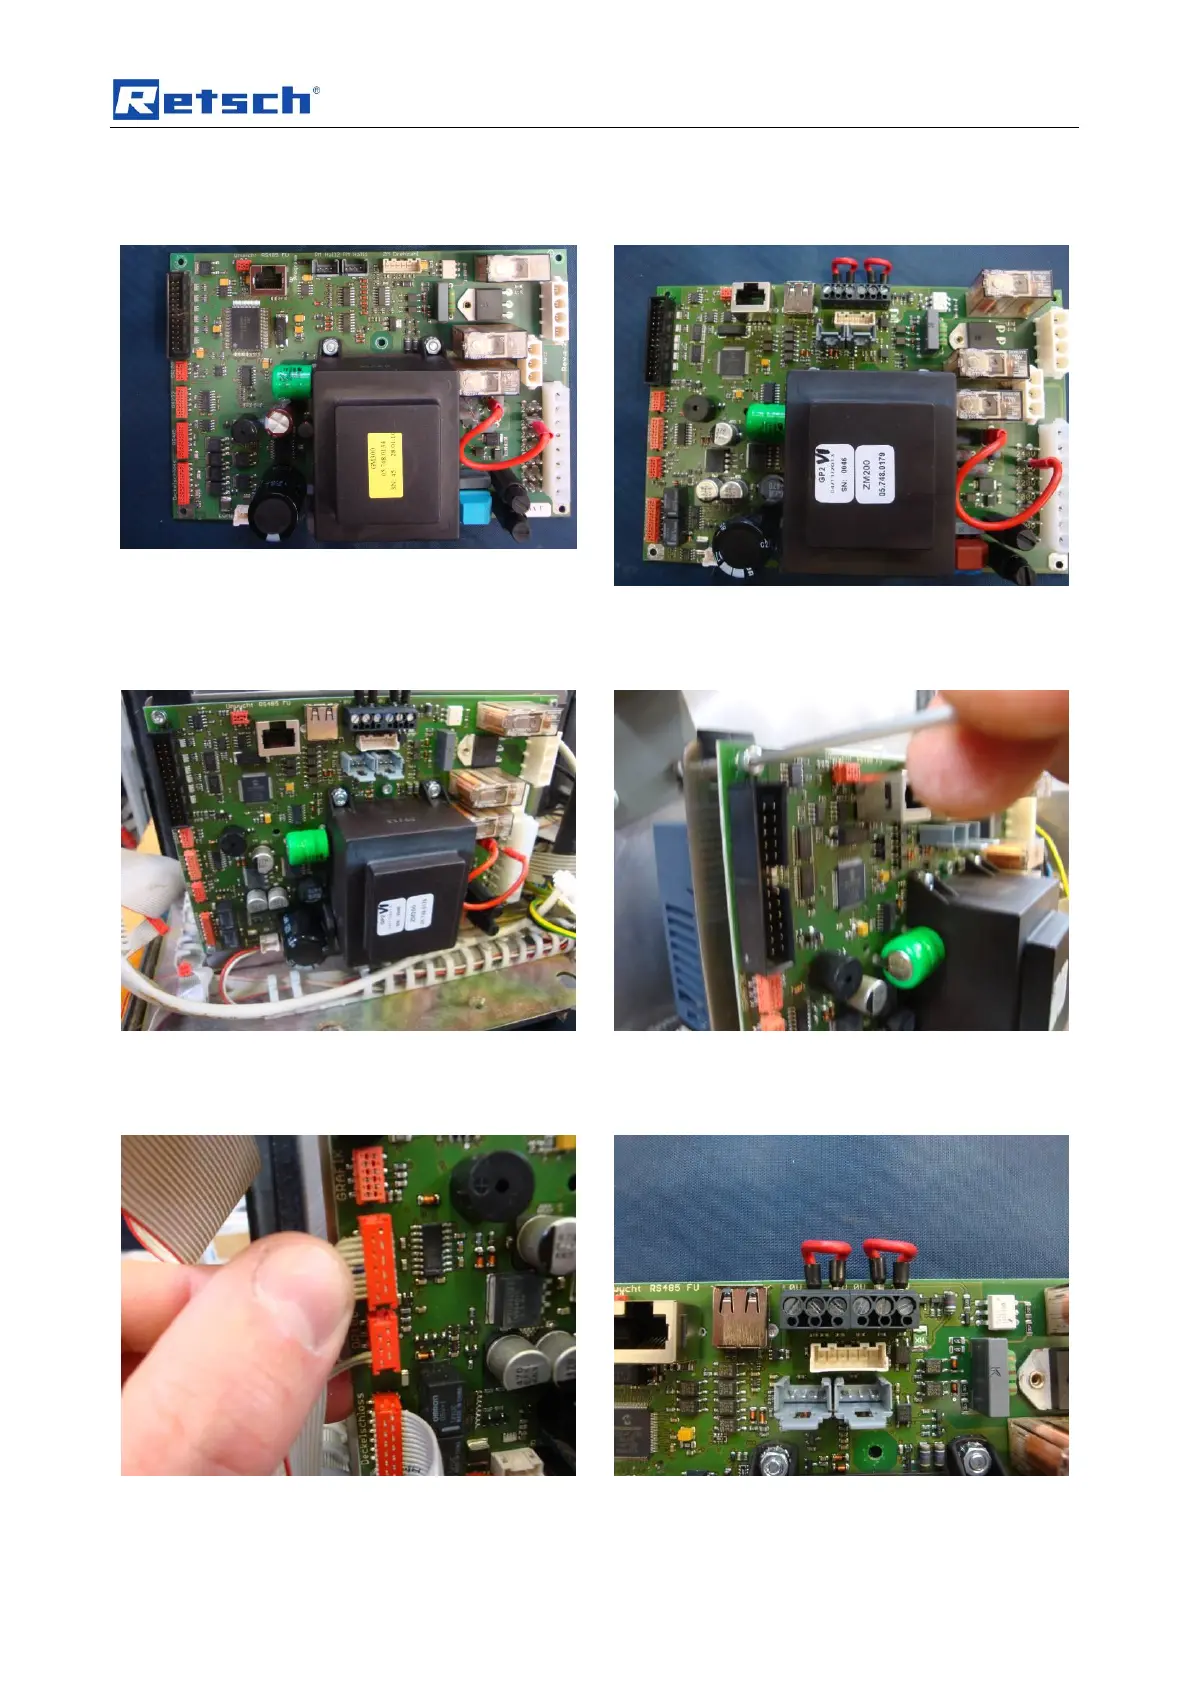
Old control board GP New control board GP 2
Remove the control PCB and replace it with a new
one.
Mount the new control PCB onto the component
carrier. It is important to use all 6 screws.
Now connect all plug-in contacts. Use the enclosed
circuit diagram as an aid. .
Take care about the two bridges for the safety scan
this is not required for the ZM200.