Operation – Using BumpTags
Starting a battery operation using BumpTags is as simple as:
1. Select the charger you want to use by touching the corresponding charger tab
2. Bump the battery on the “BUMP Zone” of the charger
3. Press the operation button at the bottom of the display to change to the desired operation, if needed
4. Connect the battery
5. Press ‘Go’
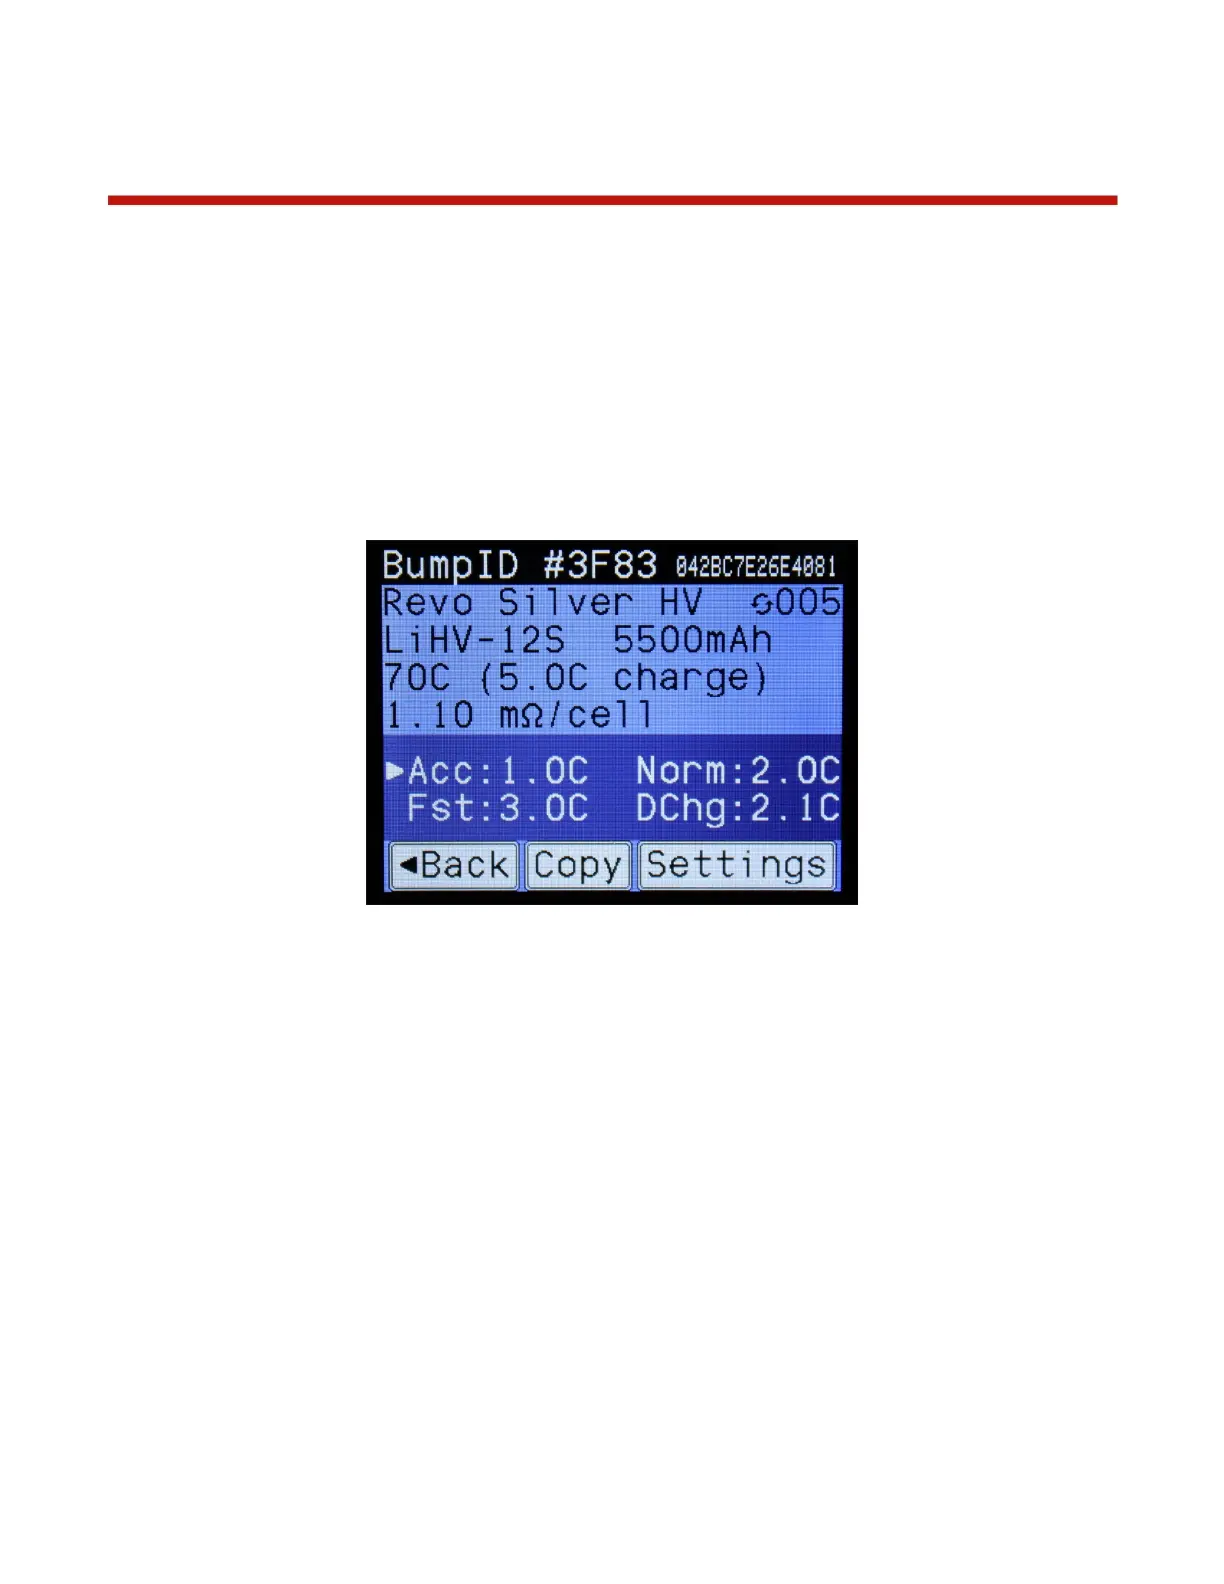
When you bump a BumpTag, all of the battery ratings and settings are read by the charger and the
following Battery Details screen is displayed.
Figure 5 - Battery Details Screen
The top line shows the unique identifier for this particular BumpTag. The long 14-digit hexadecimal
number is the complete ID, which is guaranteed to be unique. The short 4-digit hexadecimal number is a
“hash” of the complete ID – this value is most likely unique across all of your batteries (but not
guaranteed) and serves as a more convenient identifier that can be more easily recognized and written
on your battery, if desired. This is also the identifier that is shown on the Bump Setup screen, as well as
any other place in the user interface where an ID is needed (including in the mobile apps).
Factory Ratings (write-once) for the battery are displayed below the ID line, and the user Settings
(read/write) are displayed below Ratings. The arrow indicates which operation has been set as the default
for this BumpTag – in the example above it will default to an Accurate Charge operation any time this
BumpTag is used.
The value in the upper-right corner of the screen (with the circular arrows) is the charge counter. This
value tracks how many times this particular battery has been charged. The charge counter is stored in the
BumpTag itself and will only be incremented if 10% or more of the rated capacity has been added to the
battery. So if you need to immediately stop a charge for any reason (possibly to add another battery in a
parallel charge), the charge counter will not get falsely incremented.
The Copy and Settings buttons allow you to create a copy of this BumpTag or change its settings,
respectively. See the “BumpTag Configuration” section for more information.
 Loading...