29
RXGY-G02 SIDE WALL VENT
This termination for horizontal venting
only.
IMPORTANT: Do not install on the
prevailing winter wind side of the
s
tructure. Observe same clearances
specified for horizontal, standard
termination.
NOTE: Multi-venting-No common
venting.
NOTE: Install the vent and air intake
piping into the vent plate openings.
Seal all gaps between the pipes and
wall. Be Sure To Use Silicone
Sealant to seal the vent pipe to the
vent cap to permit field disassembly
for annual inspection and cleaning.
Also seal all pipe penetrations in wall.
To prevent possibility of condensate
freeze-up or recirculation, do not
i
nstall vent kits one above the
other.
NOTE: The vent illustration in Figure
21 can be used for Non-direct vent
terminations also.
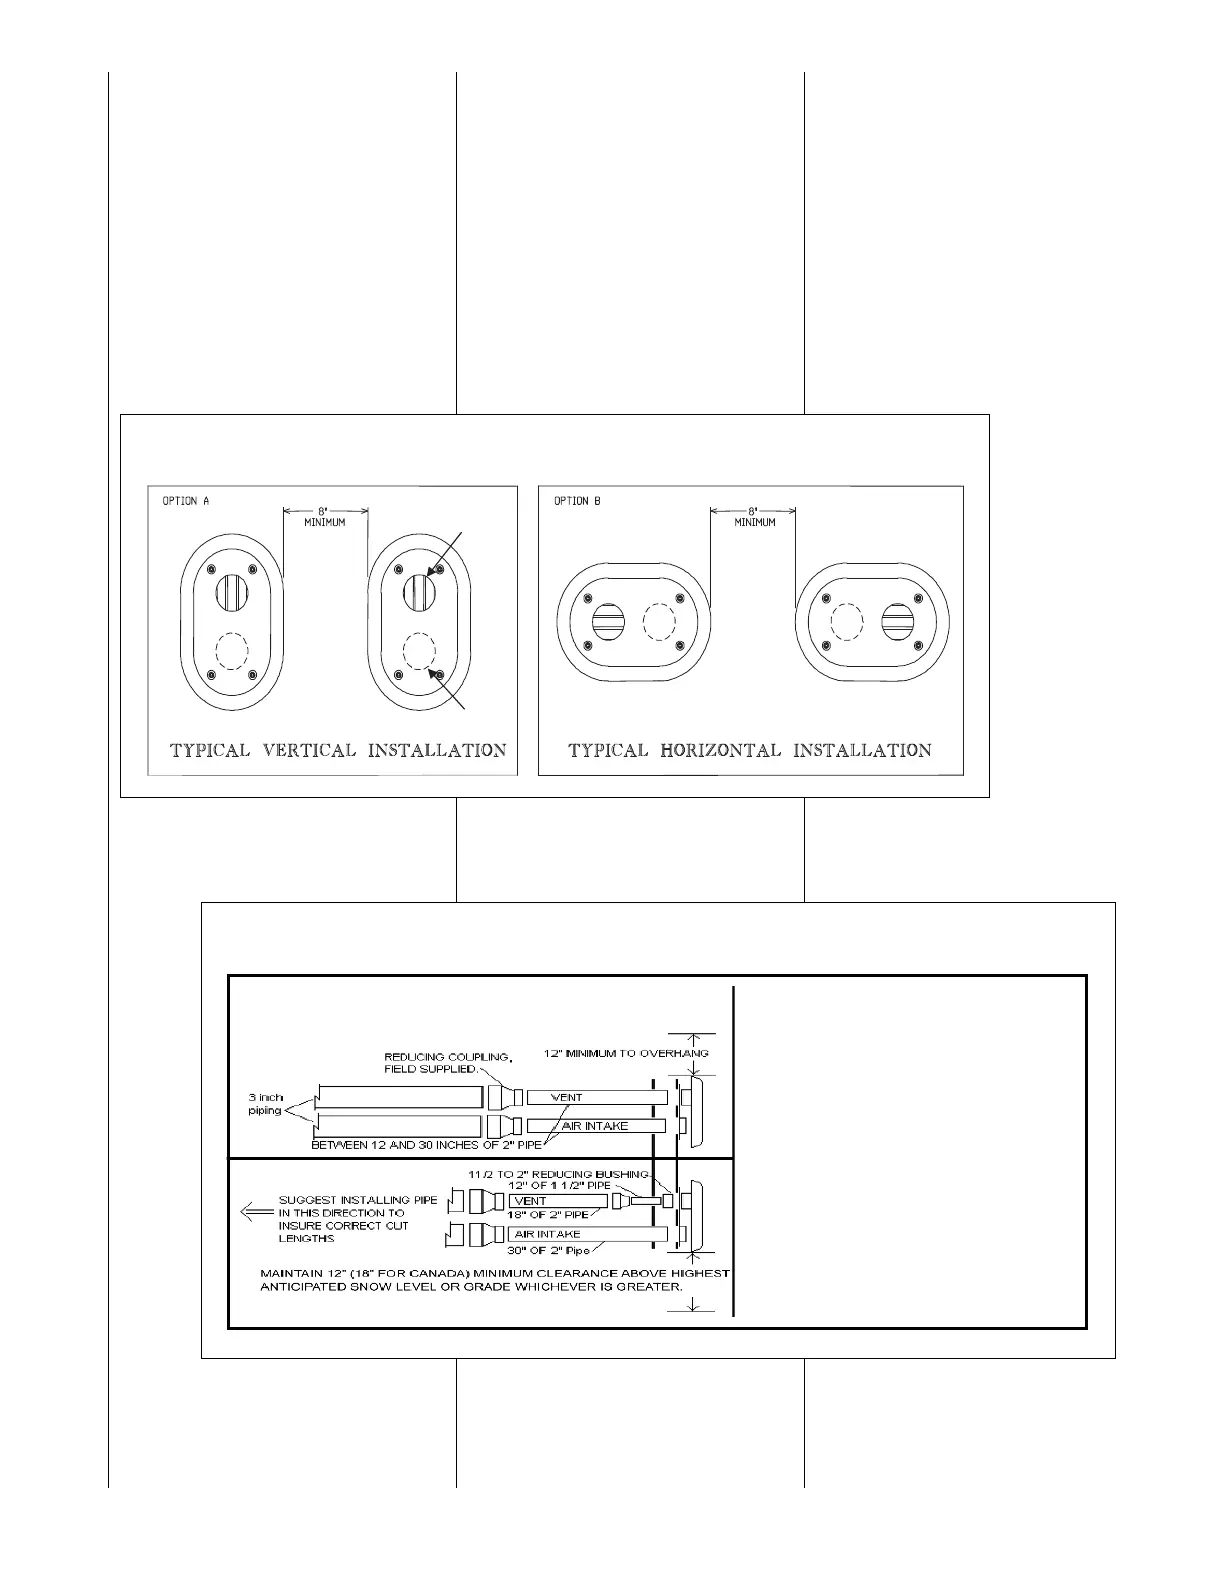
FIGURE 21
VENT KIT INSTALLATION OPTIONS
FIGURE 20
V
ENT KIT INSTALLATION OPTIONS
For 90000 thru 120000 BTUH models-
reduce to a length between 12 inches
and 30 inches of 2 inch pipe.
for 45000 thru 75000 BTUH models-
when 3 inch pipe is used: reduce last 30
inches to 18 inches of 2 inch pipe and
12 inches of 1-1/2 inch pipe to maintain
velocity.
Note: Vent should protrude a
maximum of 2-1/4” beyond vent plate.
Air intake should protrude a maximum
of 1 inch beyond vent plate.
Seal all wall cavities
 Loading...