6 7
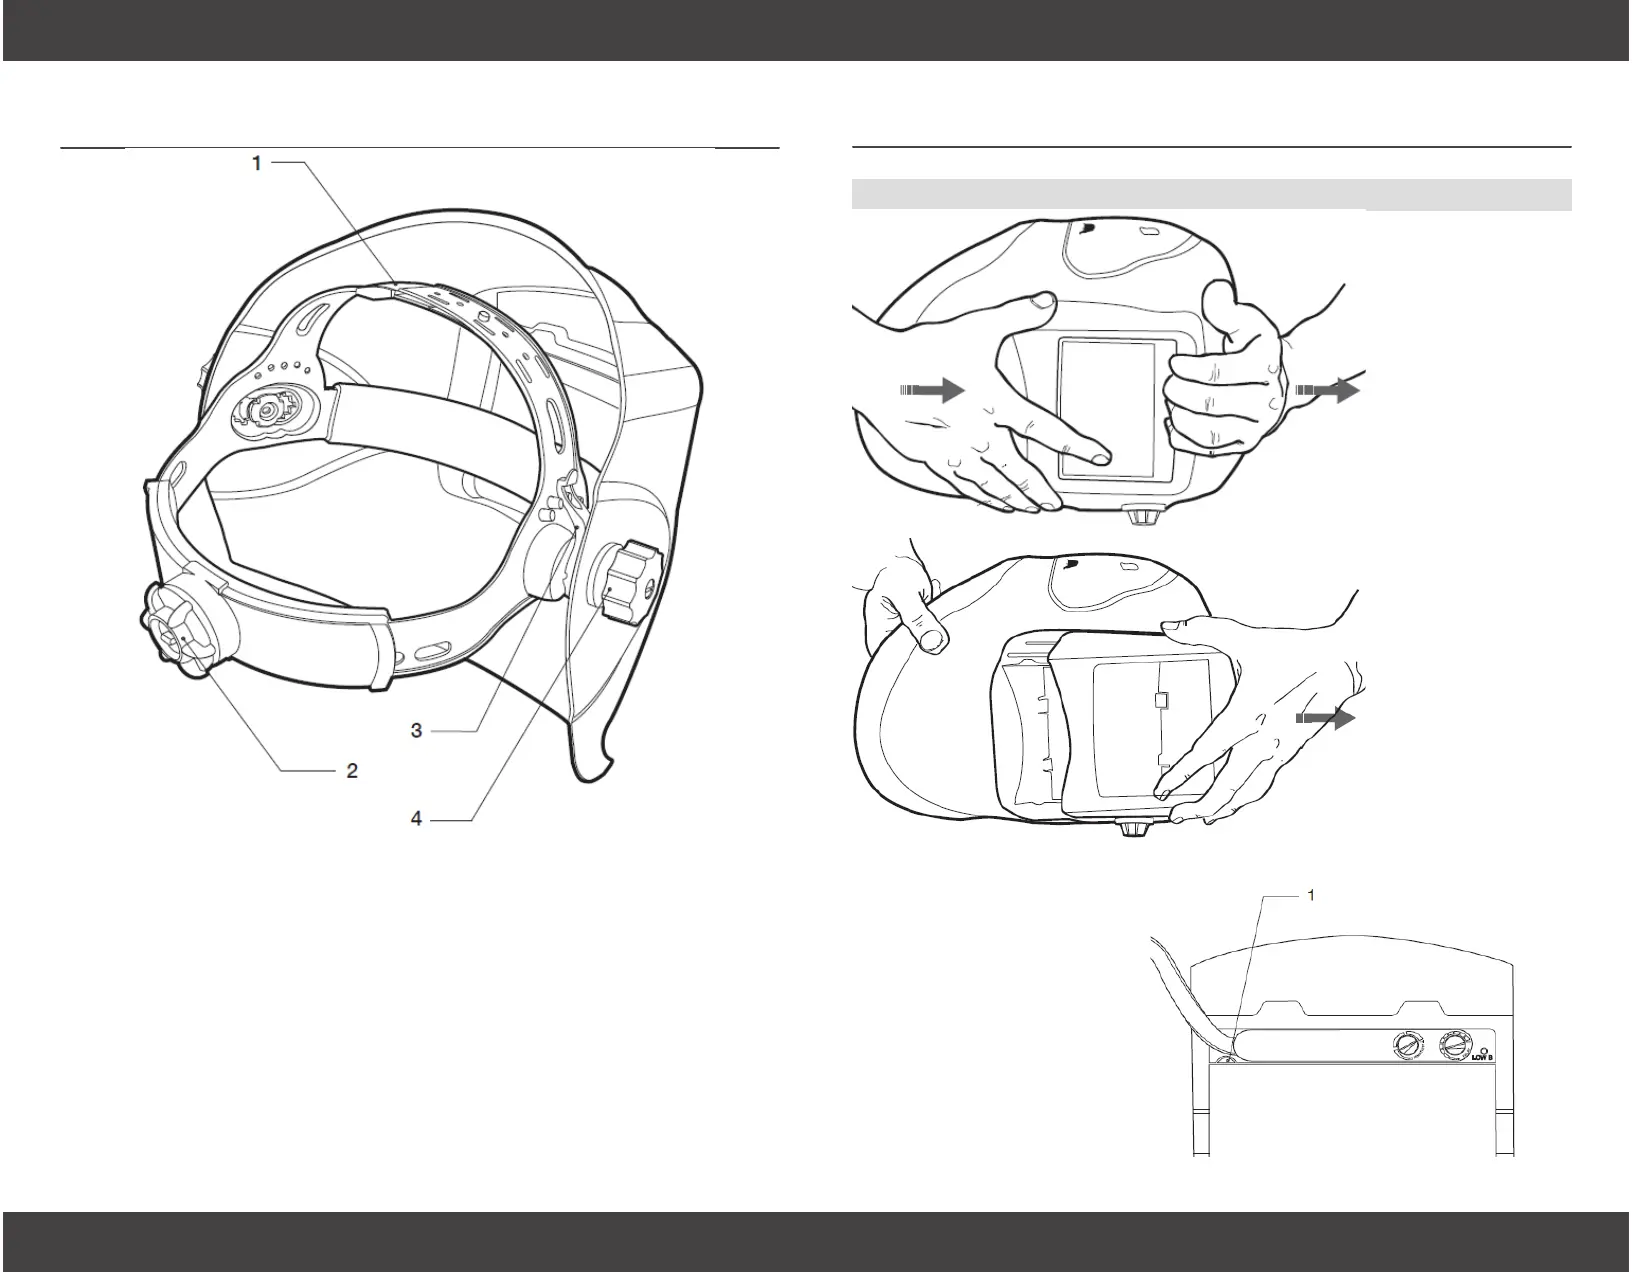
4.1 Exterior and Interior Lens Cover Replacement
The exterior lens
cover holder can
be removed by
sliding it o the
helmet.
Hand #1, place the
thumb and middle
nger on the bot-
tom corners of the
lens cover holder.
Hand #2, place
the base of the
palm on top of the
helmet and posi-
tion the ngers on
the upper inside
edge of the lens
cover holder. Then
in one motion,
slide the lens cover
holder towards the
top of the helmet.
Do not push down
on the lens or solar
panel.
The interior lens cover
can be removed by
prying it out using the
opening noted (#1) in
the illustration.
Replace the lens cover
making sure it is at
when reinstalled to
prevent fogging.
Section 4 - Lens Cover Replacement
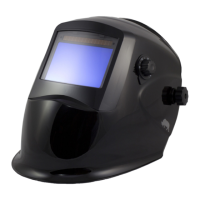
1. Over The Top Head-
gear Adjustment
Adjusts height on head for balance
and stability.
2. Headgear SnugFit
Adjustment
Adjusts headgear for a tight t.
Push in knob on the back of the
headband and turn left or right to
obtain desired setting.
Section 3 - Adjusting Headgear
3. Angle Adjustment
Five pins on both sides of the headgear provide dierent settings
for the forward tilt feature of the helmet. To change, loosen the
headgear knob on each side and change the angle adjustment
lever to the desired setting. Retighten headgear knobs.
4. Distance Adjustment
Allows the user to change the distance between the face and the
lens. Simply loosen both headgear knobs and press inward to free
from slots. Move forward or back to desired position and retighten.
Both sides must be in same position for correct operation.