EasyManua.ls Logo

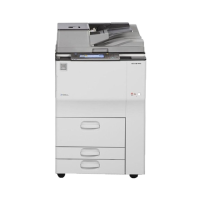
Ricoh Aficio MP 9001 User Manual

Ricoh Aficio MP 9001
60 pages
To Next Page IconTo Next Page
Page #1 background imageLoading...
Page #1 background image
Ricoh Product Line Segment 2 thru 6
www.ricoh-usa.com
MP/5000/5001, MP C5000/C6000/C6501, MP7000/8000, MP6001/7001, MP8001/9001, MP907EX

Other manuals for Ricoh Aficio MP 9001

Question and Answer IconNeed help?

Do you have a question about the Ricoh Aficio MP 9001 and is the answer not in the manual?

Ricoh Aficio MP 9001 Specifications

General IconGeneral
BrandRicoh
ModelAficio MP 9001
CategoryAll in One Printer
LanguageEnglish

Summary

Easy Reference User Guide

Ricoh Control Panel Overview

User Tools and Counter Access

Access system administrator tools and counter information.

Clearing Screen Modes

Clears screen to default settings.

Program Button Functionality

Stores frequently used job settings and screen display defaults.

Interrupt Job Function

Allows user to interrupt job in progress for new job.

Function Keys Status Indicators

Hard function keys have Red/Yellow status LEDs.

Simplified Display Mode

Magnifies fonts for easy viewing.

Color Copier Display Panel

Color Mode and Quality Specification

Specify color mode and quality for copies.

Confirming Current Settings

Confirm current settings on the display.

Paper Tray Status Indicator

Shows the status of the paper trays.

Reduce/Enlarge Ratios

Frequently used reduce/enlarge ratios that can be adjusted.

Finishing Options

Available finishing options like Sort, Stack, and Punch.

Key Color Feature

Key color is only available in simplified display mode.

Extended Feature Options

Includes margins, stamps, page numbering, covers & slip sheets.

Copying Documents

Placing Originals in Document Feeder

Instructions for placing originals in the document feeder.

Using the Glass Platen

Instructions for placing documents face down on the glass platen.

Selecting Document Type

Press original document type like Text, Text/Photo, or Photo.

Collating Documents

Press [sort] to collate documents if not highlighted.

Entering Finishing Options

Enter any finishing options desired for the copies.

Entering Number of Copies

Enter the desired number of copies for the job.

Sample Copy Function

Prints one set as a sample before completing the job.

Note on Multiple Copies

Press # key after last original for multiple copies from glass.

Copy Enhancements

Original Document Types

Select original type (Text, Text/Photo, Photo, Pale, Generation Copy) to enhance copies.

Photo Type Options

Specific photo types: Glossy, Printed, and Copied.

Auto Image Density Adjustment

Adjusts image density to lighten or darken the document.

Sort, Stack, and Rotate Sort Options

Sort/Shift Sort Functionality

Assembles copies in sets, maintaining page order, separates sets.

Stack Functionality

Groups copies of each page in a multi-page original.

Rotate Sort Functionality

Rotates every other copy set by 90 degrees.

Stapling Documents

Selecting Staple Position

Select the staple position that matches your job output from the touch screen.

Stapling Process Steps

Steps include pressing Finishing, selecting position, and pressing Start.

2 & 3 Hole Punching Options

Punching with Document Feeder

Instructions for placing originals in the ADF for punching.

Selecting Punch Hole Positions

Select one of the available punch hole positions.

Booklet Finisher Limitation

Cannot use the bypass tray when the Booklet Finisher SR4040 is attached.

Duplex Copying (2 Sided Output)

Orientation Selection

Select opening direction for originals and copies (Top to Top or Top to Bottom).

Duplex Copying Options

Select 1 Sided 2 Sided or 2 Sided 2 Sided for duplex copying.

Copying Mixed Originals

Placing Mixed Originals

Instructions for placing mixed size originals in the document feeder.

Checking Paper Stack Condition

Ensure paper is flat, clean, dry, and free of attachments.

Selecting Mixed Sizes Option

Press [Special Original] then [Mixed Sizes] to handle different paper sizes.

Paper Selection for Mixed Sizes

Handle multiple paper sizes by tray or select one size for all.

Clearing Modes After Use

Press [Clear Modes] when finished to return to normal copy mode.

Creating Margins

Margin Functionality

Reduces image to 93%, places it center, can combine with Reduce/Enlarge.

Selecting Reproduction Ratio

Select the desired reproduction ratio if necessary.

Reduction and Enlargement

Auto Reduce/Enlarge Feature

Automatically reduces or enlarges documents.

Selecting Paper Size

Select the paper size for the reduction/enlargement.

Reproduction Ratio Range

Machine selects reproduction ratios from 25-400%.

Directional Size Magnification

Horizontal and Vertical Fields

Enlarge documents by setting percentage proportions in horizontal and vertical fields.

Entering Ratio Values

Enter desired ratio using number keys and '#' key.

Edit/Stamp and Edit/Color Options

Edit Color Function

Erase, change, or adjust the color of copies.

Scan Position Adjustment

Move copy image up or down on the page.

Margin Adjustments

Move margins for hole-punching, stapling, or binding.

Stamps Functionality

Add background numbering, watermarks, or date stamping.

Erase Functionality

Clean edges, borders, and page centers.

Edit Image Functionality

Replicate, center, invert, or duplicate images.

Copy Quality Adjustment

Adjust contrast and image background.

Designate Functionality

Designate/Chapter Setup

Set up paper trays for designation sheets and specify chapter numbers.

Designate: Copy vs Blank

Choose to copy to a designation page or leave it blank.

Specifying Page Numbers

Enter page numbers for chapters, up to 20 locations.

Preset Stamp Feature

Stamp Type Selection

Select stamp type from COPY, URGENT, PRIORITY, etc.

Stamp Placement, Size, and Density

Choose stamp option, placement, size, and density.

Color Unit Stamp Capability

Color units can print stamps in color.

Image Repeat Feature

Repeating Images on a Page

Place a single page image on glass and repeat it multiple times on one page.

Image Repeat Steps

Steps include placing image, selecting options, entering ratio, and selecting paper size.

Image Repeat Instructions

Selecting Copy Paper and Ratio

Select the size of copy paper and the reproduction ratio for image repeat.

Repeating Image Percentage

Enter the percentage amounts to repeat the image on the page.

Margin Adjustment

Moving Margins

Move margins to the top, bottom, right, or left of the page for better placement.

Blank Space Requirement

Users must have adequate blank space when moving images.

Document Centering

Centering Process

Make copies with the image moved to the center of the copy paper.

Bypass Tray Limitation

Cannot use the bypass tray with this function.

Double Copies Feature

Double Copying Process

Place original and select Double Copies option.

Paper Size and Copy Count

Select paper size and enter desired number of copies.

Edit/Stamp Scan Position Adjustment

Adjusting Image Placement

Adjust image placement on glass for better output without moving document.

Using Directional Arrows

Use directional arrows to move the image in the desired direction.

Edit Stamp/Edit Color Erase Function

Erase Area Adjustment

Adjust width of area to erase for borders, centers, or edges.

Cleaning Edges and Borders

Clean single or multiple pages, edges, borders, and centers.

Page Numbering Feature

Page Numbering Formats

Select page numbering format and sequence.

Placement and Sequence

Choose numbering sequence and position of numbers.

Numbering Details

Specify first page, last number, and total pages.

Date Stamp Feature

Date Stamp Options

Select format, placement, and whether to stamp front page only or all pages.

Date Format Selection

Choose desired date format (MM/DD/YYYY, DD/MM/YYYY, etc.).

Dup./Combine/Series Functions

Duplex Options

Options for 1-sided+2-sided and 2-sided+2-sided duplexing.

Combine Pages Functionality

Combine multiple pages on single pages with various options.

Series Output

Output documents from 2-sided to 1-sided.

Book and Magazine Modes

Modes for copying books and magazines, including stapling and folding.

Combine Pages

Combining Single/Double Sided Pages

Combine single or 2-sided pages for multiple copies on one side.

Portrait/Landscape Orientation

Copy originals in portrait or landscape orientation.

Combine Options

Select 1 or 2 Sided, number of originals, and paper size.

Bypass Tray Note

Cannot use the Bypass tray with this Combine Pages option.

Cover/Slip Sheets

Adding Covers and Slip Sheets

Add covers, slip sheets, chaptering, and page inserts of different color paper.

Designate: Copy or Blank

Choose to insert blank pages or copy information onto pages.

Adding Covers

Setting Bypass Tray for Covers

Set Bypass tray as cover paper source via User Tools.

Changing Between 1 and 2 Sided Covers

Configure 1 or 2 sided covers via User Tools and Copy Features.

Selecting Front and Back Covers

Select Copy or Blank for front and back covers.

Book Copying

Book Copying Methods

Methods for single-sided and 2-sided book copying.

Using Series Button

Select [SERIES] button, then [Book - 1 sided] or [BOOK TO 2 SIDED].

Manual Adjustments for Book Size

Odd sized books may require manual adjustments.

Booklets & Magazine Modes

Magazine Mode Selection

Select Magazine mode for 5 or more page originals.

Booklet Mode for 4 Pages

Use [*Booklet] mode for 4 page originals.

Previewing Jobs

Press [Sample Copy] to preview job before running multiple sets.

Using the Bypass Tray

Opening and Loading Bypass Tray

Open the bypass tray and place copy paper, adjusting guides.

Specifying Paper for Bypass Tray

Press # key, select paper size and paper type for Bypass Tray.

Programming a Preset Function

Setting Default Settings

Make desired settings on the initial scanner screen to set as default.

Saving Defaults

Press [Program], [Program as Defaults], then [Program] to save.

Restoring Factory Defaults

Press [Restore Factory Defaults] to revert to original default settings.

TAB Copying

Tab Stock Placement

Set tab stock in trays 2 or 3, facing down, using the tab sheet holder.

Tab Copying Procedure

Place originals, select paper tray with tab paper, and press START.

Duplex Function Limitation

Duplex function cannot be performed on tab stock.

Using the INTERRUPT Option

Interrupting a Long Job

Use interrupt to stop a long copy job for urgent copies.

Restarting Interrupted Job

Replace originals and press Start to resume the interrupted job.

Sample Copy Feature

Checking Copy Settings

Use Sample Copy to check settings before a long copy run.

Accepting Sample Copy

If acceptable, press [Continue] to proceed with the job.

Suspend and Adjust Settings

Press [Suspend] to return and adjust settings if needed.

Sample Copy Availability

Feature available when [sort] is selected, not on Simplified screen.

Job Preset Function

Setting Next Job in Advance

Set up the next copy job in advance while a current job is in progress.

Starting Preset Job

Place originals and press Start to begin the preset job after current job finishes.

Switching Displays

Switch display to current copy job by pressing [To Copying Screen].

Simplified Display Mode

Larger Display for Easier Operation

Letters and keys displayed larger for easier operation.

Accessing Simplified Display

Press the Simplified Display button on the Main Screen.

Function Availability

Basic copier functions displayed; not all functions available.

Accessing the Document Server

Selecting Document Server Option

From the Copy Panel, select the Document Server option.

Document Server Usage

Used for storing documents for easy access and confidential printing.

Document Server Usage

Selecting Files for Printing

Select files to print from the Document Server.

Document Server Applications

Used for Confidential Printing, Print and Hold, Sample Printing, Forms printing, etc.

Document Server Displays

List and Thumbnail Views

View stored documents in list or thumbnail format.

File Management Options

Options to edit user/file info, delete files, and print specified pages.

Printing Stored Documents

Print one or multiple pages of a stored document.

Scan Job to Document Server

Placing Document for Scanning

Place document in feeder or on glass platen for scanning.

Document Options and Naming

Select options, enter user name, file name, and optional password.

Storing the Document

Press OK after each entry, then Start to store the document.

Print Job from Document Server

Selecting Document to Print

Select the desired document from the Document Server list.

Adding Print Options

Add options like Sort, Staple, or other print features.

Entering Copy Count

Enter the desired number of copies for the print job.

Password Protection Note

Password required before accessing password-protected documents.

Delete Job from Document Server

Selecting Document for Deletion

Select the document you wish to delete from the Document Server.

Confirming Deletion

Confirm deletion by pressing [Yes] after selecting [Delete File].

Printing Documents from Your PC

PrinterOn Overview

Information about PrinterOn for printing documents anywhere.

Wireless Print Solutions

Details on PrinterOn Envoy Server and Wireless Service.

Printing a Document

Opening Document and Selecting Driver

Open document, select File > Print, and choose Ricoh Print driver.

Entering Number of Copies

Enter the desired number of copies for the print job.

Adding Finishing Options

Press [Properties] to select finishing options like staple or duplex.

Printing to Document Server

Selecting Document Server Job Type

At Job Type, select Document Server from the dropdown.

Entering User Information

Enter user information like User ID, File Name, and Password.

Printer Properties and Job Types

Job Type Descriptions

Descriptions for Locked Print, Hold Print, Sample Print, Stored Print, and Document Server.

Locked Print Functionality

Temporarily holds jobs until a valid password is entered at the control panel.

Hold Print Functionality

Temporarily holds multiple print files until selected, no password required.

Accessing Confidential Documents

Listing Stored Files

Access the list of stored files from your computer via the Printer option.

Confidential Document Lists

Lists include Locked Print, Sample Print, Hold Print, and Stored Print jobs.

Retrieve Confidential Document at Copier

Accessing Locked Print Jobs

Press Printer, Print Jobs, then Locked Print Job List.

Entering Password and Printing

Select job, press Print, enter password, then press Start.

Note on Changes/Reprints

Cannot make changes or reprint jobs retrieved this way.

Scanning Documents

Selecting Scanner Function

From the Copier Panel, select the Scanner option.

Document Placement and Options

Place documents in feeder or on glass and select appropriate options.

Scanner Display Panel

Switching Scan Destinations

Switch between email and folder scan destinations.

Setting Scan Resolution and Type

Set resolution, scan size, and scan type.

File Type Selection

Set file types between PDF, TIFF, and JPEG.

Programming Email Destinations

Program email destinations into one-touch buttons.

How to Scan

Selecting Destination and Enhancements

Select destination (email/folder) and additional document enhancements.

Scan Settings Configuration

Configure scan type, resolution, scan size, feed type, and orientation.

File Naming and Type

Name your document and select file type if necessary.

Scan Settings

Selecting Scan Type

Select scan type (B&W, Grayscale, Full Color) and specific options.

File Type and Name Configuration

Configure file type (TIFF/JPEG, PDF) and file name.

User Selectable Options

Options can be changed prior to scanning for better output.

File Type and File Name

Selecting File Type

Select file type for single page or multi-page documents (TIFF, PDF).

Setting Start Number and File Name

Set start number and enter a file name for the scanned document.

PDF Encryption

Option for PDF encryption for scanned documents.

Scanning Options

Changing File Type by Document

Change file type based on the document type scanned.

Dropping Out Color

Select color to erase from documents (Red, Green, Blue).

Viewing the Job at Your Desktop

Email with Subject and Filename

View emails with subject, filename, and message added at MFP.

Attached File Named

The scanned file is named and attached to the email.

Faxing Documents From Copier

Select Fax Destinations

Storing Fax Destinations

Use numeric keypad to enter new fax destinations or select stored ones.

Sending Documents via Fax

Send single or multiple documents, 1 or 2 sided, with optional LAN fax driver.

Enhanced Fax Capabilities

Cover Sheet Editor

Create personalized fax cover sheets with company logo, slogan, etc.

Address Book Import/Export

Import/export address book data to/from other LAN-Fax drivers.

Transmission Status Check

Check transmission results via SmartDeviceMonitor or Web Image Monitor.

Preview Functionality

Check how the document appears on paper from the LAN-Fax driver.

Duplex Printing for Inbound Faxes

Print inbound fax documents on both sides of paper.

Simultaneous Save

Save fax document as TIFF directly to PC while sending.

Wireless Faxing

Fax from desktop via Wireless LAN option.

Fax Forwarding via Email

Forward incoming faxes to administrator's email or folder.

LAN Fax Capability Note

Requires Printer/Scanner Unit Type 9001 and Fax Option Type 9001.

Related product manuals