EasyManua.ls Logo

Ricoh Pro C9100 Series - User Manual

Ricoh Pro C9100 Series
2 pages
Print Icon
To Next Page IconTo Next Page
Loading...
Notes for Users
About This Machine
Getting Started > Guide to Names and Functions of Components > Rear and right view
Correction
Error Corrections
2. Earth leakage breaker
Protects users from electric shock. For details
about checking the earth leakage breaker, see
page 155 “Checking the Earth Leakage Breakers”.
2. Earth leakage breaker
Protects users from electric shock. For details
about checking the earth leakage breaker, see page
155 “Checking the Earth Leakage Breakers”.
A plate is usually on the part as shown in the figure.
Do not touch this plate as a customer engineer
removes it.
About This Machine
Getting Started > Guide to Functions of the Machine’s Options
Additional information
To deliver an envelope of 240 × 332 mm
When sending an envelope of 240 × 332 mm to Finisher SR5050 or Booklet Finisher SR5060,
attach the Z-fold support tray to the finisher shift tray.
1.
Attach the Z-fold support tray by inserting the two protrusions on its underside into the
holes on the finisher shift tray.
CWR001
About This Machine
Getting Started > Using the Ring Binder and the High Capacity Stacker > Using the Ring
Binder
Additional information
Be sure not to exit from Energy Saver mode or to switch the machine on when the ring binder door is
open and the binding unit is disconnected. Doing so will affect initialization, causing the ring binder
function to become unavailable (although other functions will be unaffected).
If you inadvertently do this, connect the ring binder’s binding unit again, close the door, and then turn
the power off and back on to restore normal operation.
About This Machine
Paper Specifications and Adding Paper > Loading Paper > Loading Paper into Trays 1, 2,
and the Wide Large Capacity Tray
Additional information
When using auto tray switching, covers, or slip sheets, the lamp on the front of the tray being used will
stay lit until printing is complete. While the lamp is lit, paper cannot be replenished.
About This Machine
Paper Specifications and Adding Paper > Changing the Paper Size > Changing the Paper
Size in Trays 1, 2, and the Wide Large Capacity Tray
Additional information
Do not push in the paper presser on the upper part of the side fence. If it is pushed in, return it to its
original position by hand.
When using paper between paper weight 1 and paper weight 3 (52.3-105.0 g/m
2
), set paper after
setting the base on the bottom of the tray.
About This Machine
Paper Specifications and Adding Paper > Changing the Paper Size > Changing the Paper
Size in Trays 1, 2, and the Wide Large Capacity Tray
Correction
Topic Error Corrections
Notes When you load paper that is thicker
than Paper Weight 5, load the paper and
set the auxiliary side fence. Align the
auxiliary side fence against the side of
the paper that is higher than the side
fence extension.
DET052
11
1.Side fence extension
Set paper first, and then set the auxiliary
side fence. Set the auxiliary side fence so
that it is flush against the side of the paper
on the side fence extension.
DET052
11
1.Side fence extension
About This Machine
Paper Specifications and Adding Paper > Recommended Paper > Recommended Paper
Sizes and Types
User Guide
Adding Paper and Toner > Recommended Paper > Recommended Paper Sizes and Types
Correction
Trays 1, 2, and Wide LCT (Trays 3 to 8)
*1, *14
Paper type and weight Paper size Paper capacity
Envelopes
*8 *11, *12, *13
240 × 332 mm, 235 × 120 mm,
120 × 235 mm, 105 × 241 mm,
110 × 220 mm
*15
*6 When the banner sheet tray is installed, up to 800 sheets of paper that is 420.0 - 700.0 mm (16.54
- 27.55 inches) long can be fed.
*14 Flattencurlssothattheytwithinthefollowingguidelines.
52.3
- 299.9 g/m
2
paper:Curlheight5mm(0.2inches)orbelow,Rover100mm(3.94inches).
300-400g/m2paper:Curlheight3mm(0.12inches)orbelow,Rover100mm(3.94inches).
*15 Flattenthecurlontheenvelope,thensetthedifferenceofthestackheightofthebottomofthe
envelopeandthestackheightoftheapportiontobe10mm(0.4inches)orbelow.
About This Machine
Paper Specifications and Adding Paper > Recommended Paper >Recommended Paper
Sizes and Types
User Guide
Adding Paper and Toner > Recommended Paper >Recommended Paper Sizes and Types
Additional information
When loading transparancies
When outputting to the high capacity stacker, specify the output tray as the stacker upper tray. For
details, see “General Features, Connecting the Machine/System Settings.
When setting colored paper
Depending on the color of the paper, the paper’s position may not be detected correctly, causing
the paper to jam.
When using light-colored paper, specify the paper type as [Color] in [Paper Setting].
When using black or dark colored paper, or when specifying the paper type as [Color] in [Paper
Setting] does not clear paper jams, specify the paper type as [Black].
When specifying the paper type as [Color] or [Black] does not clear paper jams, adjust [Illumi-
nation Mode for Color Paper Detection] in [Adjustment Settings for Operators]. For details, see
Adjustment Settings for Operators, Paper Settings.
To load sheets of paper whose sizes are A5 or 5
1
/
2
× 8
1
/
2
When delivering sheets of paper whose sizes are A5 or 5
1
/
2
× 8
1
/
2
, open the left mainframe front
cover and turn the lever for A5/Half Letter to the right.
 
DFT090DFT090
M2381044A

Other manuals for Ricoh Pro C9100 Series

Question and Answer IconNeed help?

Do you have a question about the Ricoh Pro C9100 Series and is the answer not in the manual?

Summary

Earth Leakage Breaker Safety

Checking the Earth Leakage Breakers

Details on the earth leakage breaker, its protective function, and access for customer engineers.

Envelope Delivery with Z-Fold Support Tray

Attaching the Z-Fold Support Tray

Instructions for attaching the Z-fold support tray for delivering 240 x 332 mm envelopes.

Ring Binder and Energy Saver Mode Precautions

Energy Saver Mode Operation

Important notes on avoiding ring binder function unavailability when exiting Energy Saver mode.

Auto Tray Switching Lamp Indicator

Paper Replenishment During Auto Tray Switching

Explanation of the tray lamp indicator and restrictions on paper replenishment during printing.

Paper Handling in Trays 1, 2, and Wide LCT

Paper Presser and Weight Settings

Guidance on setting the paper presser and handling paper weights 1 to 3 for proper feeding.

Loading Thicker Paper

Procedure for loading thicker paper, ensuring auxiliary side fences are correctly set.

Recommended Paper Types and Handling

Handling Transparencies and Colored Paper

Notes on using transparencies, handling colored or black paper, and adjusting detection settings.

Loading A5 and Half Letter Size Paper

Instructions for loading A5 or Half Letter size paper by operating a specific lever.

Paper Capacity and Specifications for Trays

Envelope and Specialty Paper Sizes

Table detailing paper sizes, types, and capacities for trays, including specific envelope dimensions.

Network Connectivity Issues

Troubleshooting Network Connection

Steps to resolve issues where the machine is unable to connect to the network.

Home Screen Image Data Errors

Invalid Image Data Size

Guidance on resolving errors related to invalid image data size for shortcut or home screen images.

Unsupported Image Format

Troubleshooting unsupported image formats for home screen images, specifying PNG as required.

Adjusting Image Density and Color Registration

Improving Color Reproduction

Procedure to improve CMYK and mixed color reproduction by adjusting image density and calibration.

Paper Handling for Special Types

Loading Coated, Label, and Film Paper

Important instructions for fan-folding coated, label, film, and tick paper before loading.

Handling Curled Paper

Guidance on using curl compensation settings or manually handling curled paper.

Magnet Paper Feeding Issues

Solutions for magnet paper feeding problems, including adding thick paper or extra sheets.

Overview

This document provides user notes and corrections for a multifunction device, focusing on its setup, paper handling, troubleshooting, and maintenance.

General Device Information

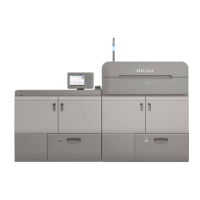
The device, identified by model number M2381044A, is a multifunction printer that supports various paper types and sizes, and can be configured with optional finishers like the Finisher SR5050 or Booklet Finisher SR5060, and a High Capacity Stacker. It features an Energy Saver mode and includes an earth leakage breaker for user safety.

Setup and Installation

Earth Leakage Breaker: The device is equipped with an earth leakage breaker to protect users from electric shock. A plate indicating its presence is usually on the part shown in the figure. Users are advised not to touch this plate as it is removed by a customer engineer. For detailed information on checking the earth leakage breaker, refer to page 155 of the manual, "Checking the Earth Leakage Breakers."

Connecting to the Interface: When connecting the interface cable, a plate is typically present on the part shown in the figure. Users should not touch this plate, as it is removed by a customer engineer. If the machine is unable to connect to the network, users should check that the machine is correctly connected to the network and that its settings are correct. Refer to "Interface Settings" in "Connecting the Machine/System Settings" for details on network connection and machine configuration.

Ring Binder Usage:

  • Important: Do not exit Energy Saver mode or switch the machine on when the ring binder door is open and the binding unit is disconnected. This will affect initialization and make the ring binder function unavailable (though other functions will remain unaffected). If this occurs, reconnect the binding unit, close the door, and then power off and back on to restore normal operation.

Paper Handling

The device supports a wide range of paper types and sizes, including envelopes, transparencies, and various paper weights.

Loading Paper:

  • Trays 1, 2, and Wide Large Capacity Tray: When using auto tray switching, covers, or slip sheets, the lamp on the front of the active tray will remain lit until printing is complete. Paper cannot be replenished while the lamp is lit.
  • Changing Paper Size: When changing paper size in Trays 1, 2, and the Wide Large Capacity Tray, do not push in the paper presser on the upper part of the side fence. If it is pushed in, return it to its original position by hand. When using paper between paper weight 1 and paper weight 3 (52.3-105.0 g/m²), set paper after setting the base on the bottom of the tray.
  • Thicker Paper (Paper Weight 5 or heavier): When loading paper thicker than Paper Weight 5, set the paper first, then set the auxiliary side fence. The auxiliary side fence should be flush against the side of the paper on the side fence extension.
  • Envelopes: The device supports envelopes of various sizes, including 240 x 332 mm, 235 x 120 mm, 120 x 235 mm, 105 x 241 mm, and 110 x 220 mm.
    • 240 x 332 mm Envelopes: When sending a 240 x 332 mm envelope to Finisher SR5050 or Booklet Finisher SR5060, attach the Z-fold support tray to the finisher shift tray. Insert the two protrusions on the underside of the Z-fold support tray into the holes on the finisher shift tray.
    • Curl Flattening: Flatten curls on envelopes so that the difference in stack height between the bottom of the envelope and the flap portion is 10 mm (0.4 inches) or below.
  • Curl Guidelines:
    • For 52.3-299.9 g/m² paper: Curl height 5 mm (0.2 inches) or below, R over 100 mm (3.94 inches).
    • For 300-400 g/m² paper: Curl height 3 mm (0.12 inches) or below, R over 100 mm (3.94 inches).
  • Banner Sheets: If the banner sheet tray is installed, up to 800 sheets of paper that is 420.0 - 700.0 mm (16.54 - 27.55 inches) long can be fed.

Recommended Paper Sizes and Types:

  • Transparencies: When loading transparencies, and outputting to the high capacity stacker, specify the output tray as the stacker upper tray. Refer to "General Features," "Connecting the Machine/System Settings" for details.
  • Colored Paper:
    • Depending on the color of the paper, the paper's position may not be detected correctly, leading to paper jams.
    • For light-colored paper, specify the paper type as [Color] in [Paper Setting].
    • For black or dark colored paper, if specifying [Color] does not clear paper jams, specify [Black].
    • If specifying [Color] or [Black] does not clear paper jams, adjust [Illumination Mode for Color Paper Detection] in [Adjustment Settings for Operators]. Refer to "Adjustment Settings for Operators," "Paper Settings" for details.
  • A5 or 5½ x 8½ Sheets: To load sheets of paper whose sizes are A5 or 5½ x 8½, open the left mainframe front cover and turn the lever for A5/Half Letter to the right.
  • Coated Paper, Label Paper, Film Paper, and Thick Paper (150.1 g/m² or heavier): Fan the stack of paper before loading it in the paper tray.
  • Curled Paper Compensation: If the machine has a function to compensate for curled paper, specify curl compensation in the machine's settings. Refer to the manuals supplied with the machine for configuration details. If there is no function for compensation, either place the curled side facing down or flatten the curled paper, and then set it in the tray.
  • Magnet Paper: If the last sheet of magnet paper does not feed correctly, it may be sticking to the metallic parts of the paper tray. In this case, load sheets of magnet paper by adding 10 or more sheets to the tray.

Troubleshooting

Image Data Issues:

  • "The image data size is not valid. See the manual for required data.": For details about file size for a Home Screen image, refer to "Displaying an Image on the [Home] Screen" in "Convenient Functions."
  • "The format of the image data is not valid. See the manual for required data.": The file format of the Home Screen image to be added is not supported. The file format for shortcut images must be PNG. Specify the image again. For details about file size for a Home Screen image, refer to "Displaying an Image on the [Home] Screen" in "Convenient Functions."

Adjusting Image Density: To improve color reproduction and achieve consistent quality, adjust image density and perform calibration. This procedure can also improve mixed color reproduction.

  1. Press the [User Tools] key.
  2. Press [Adjustment Settings for Operators].
  3. Press [Machine: Image Quality].
  4. Press [0207: Adjust Image Density Before Auto Color Calibration].
  5. Press [Image Density Adjustment: Manual Execute].
  6. Press [OK].
  7. When color density adjustment is complete, press [Exit].
  8. Press [Exit].
  • Important:
    • Ensure the transition time to energy saving mode is long enough to prevent it from activating during tone correction.
    • Do not print or specify settings from the operation panel during tone correction.
    • Complete the tone correction procedure promptly without intervals.
    • It is recommended to restart the tone correction procedure from the beginning if printing is carried out or intervals are taken during the procedure.

Maintenance

Regular maintenance helps ensure optimal performance and longevity of the device.

Adjusting Image Density and Color Calibration:

  • Perform image density adjustments and color calibration to maintain consistent color output quality. Refer to the color controller's manual for details on calibration.

Paper Handling Best Practices:

  • Always fan stacks of coated paper, label paper, film paper, and thick paper (150.1 g/m² or heavier) before loading them into the paper tray to prevent feeding issues.
  • Flatten curled paper or use the machine's curl compensation function if available.

This comprehensive overview should assist users in effectively operating and maintaining their multifunction device.

Ricoh Pro C9100 Series Specifications

General IconGeneral
BrandRicoh
ModelPro C9100 Series
CategoryAll in One Printer
LanguageEnglish

Related product manuals