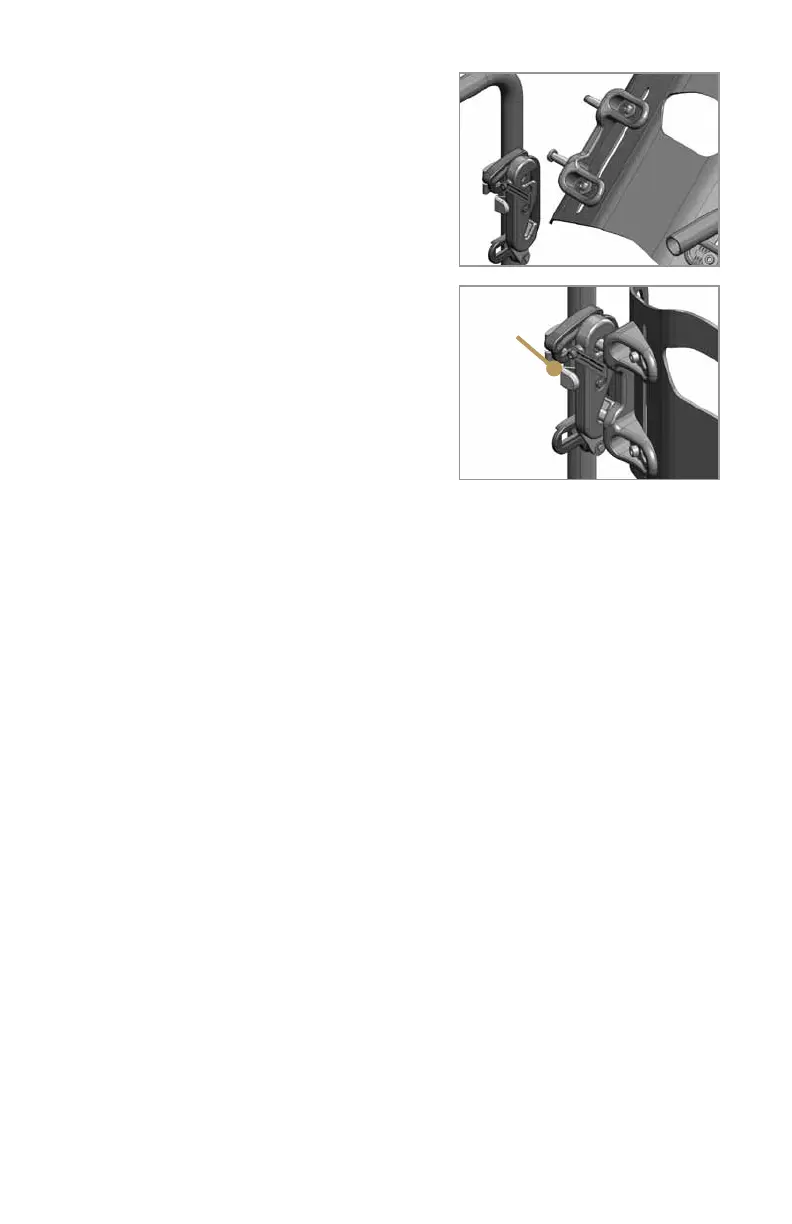
2. Push the back shell down and back firmly
to engage the top two attachment pins into the
upper receiver slots (Figure 21).
3. Check that both latch release buttons have
popped back, indicating that the latches are
engaged (Figure 21).
4. Tug the back shell forward to verify that it is
attached securely.
Care and Maintenance
of your Ride JAVA Back
Cleaning the JAVA Back
foam insert and cover
1. Remove the foam insert and cover from the
JAVA back shell.
2. Open the cover and remove the foam pad,
Flexa-just stays (make note of left and right,
and direction of bend), and flexa-just platform with pelvic wedges from the outer
cover. Note: Ride Designs recommends using a permanent marker to carefully
outline the position of the pelvic wedges so that you can reattach them in the same
positions if moved during cleaning.
3. Close the cover. Machine or hand wash the cover in warm water (regular
detergent, no bleach).
4. Hang dry.
5.Whenre-insertingtheFlexa-juststays,returnthemtotheircorrectpockets,
facing in the correct direction.
6. Insert the foam pad and Flexa-just platform with pelvic wedges. Be sure the
inserts are not folded or wrinkled inside the cover.
7. Close the cover and reattach the foam insert and cover to the back shell.
WARNING: Installing the Flexa-just stays or pelvic wedges in the wrong positions
might result in serious injury to the user.
Cleaning the JAVA back shell and hardware
Using a damp cloth or mild disinfectant, clean the shell, pelvic wedges, and
mounting hardware as needed.
CAUTION: Do not clean your JAVA Back with isopropyl alcohol or any other
chemical solvents.
10
Figure 20
Figure 21
Latch
release
button
popped
back