9
Initial wearing schedule
Prior to prolonged sitting, you should use your Ride JAVA Back for a short period
of time and visually check any area that contacts the back support. Any reddened
area should fade within 10-30 minutes. Contact your doctor or therapist if redness
persists for longer than 30 minutes. As long as skin inspections do not show red
areas persisting more than 30 minutes, you are safe to continue use. Make a
careful skin check at least daily, even after skin tolerance is established. Continue
to perform routine intermittent pressure relief techniques (forward lean) as advised
by your healthcare professional.
WARNING: If any redness associated with the use of the JAVA Back persists
for longer than 30 minutes, cease using and contact your therapist or doctor
immediately.
Follow-up
We recommend you have your seated posture and skin integrity checked by your
healthcare professional at least annually, or whenever you experience a change
in your weight, posture, or general condition that could impact your ability to sit
safely, comfortably, and functionally.
Retighten all of the fasteners regularly, and
periodically check the hardware for security
and wear.
Use of your Ride JAVA Back
Your Ride JAVA Back is designed to provide
optimal pelvic support and trunk balance while
allowing upper body freedom.
You can remove or attach the back shell
with one hand.
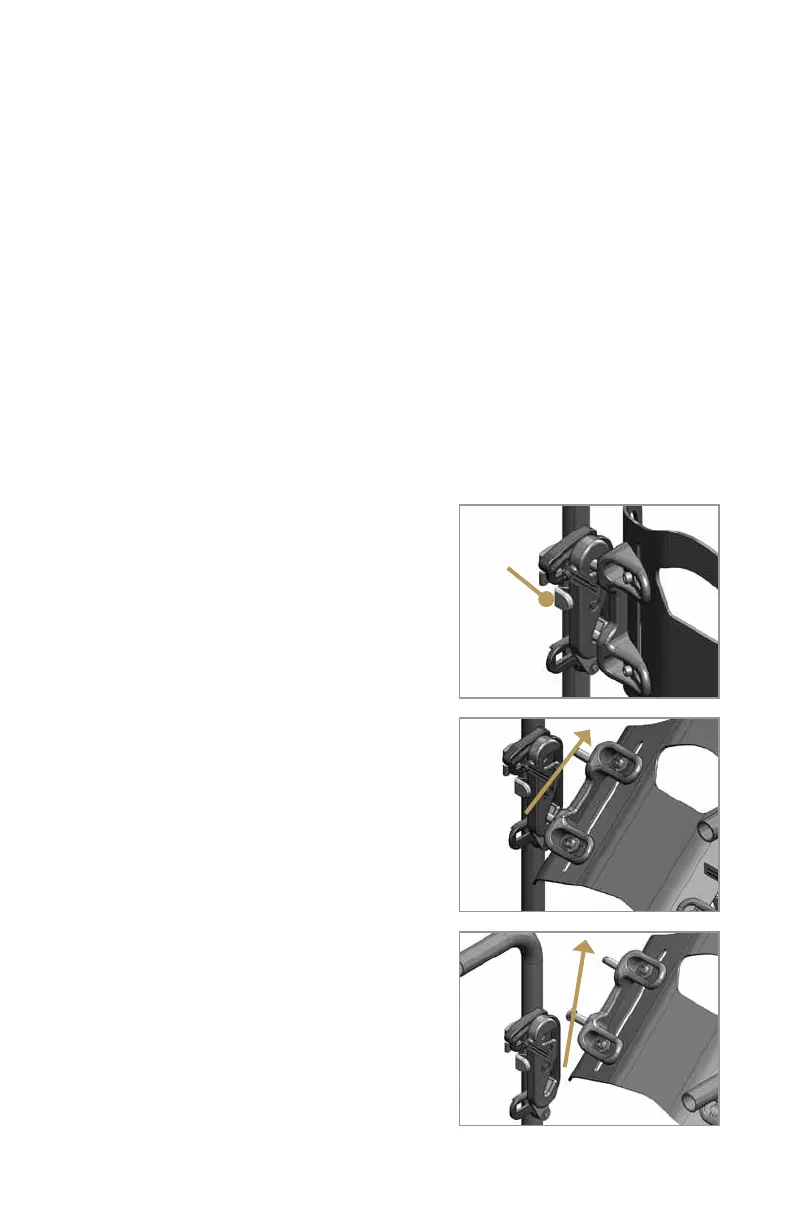
To remove the back shell from
the wheelchair
1. Push each of the two latch release buttons
on the mounting hardware (Figure 17).
2. Rotate the back shell forward then lift
upward (Figure 18 and 19).
To attach the back shell
to the wheelchair
1. Guide the bottom two attachment pins into
the lower receiver slots on the latch brackets
(Figure 20).
Figure 17
Figure 18
Figure 19
Latch
release
button
Rotate
forward
Lift
upward