III. Installing the Mounting Hardware
WARNING: No one should be seated in the wheelchair during the first four steps.
NOTE:Fastenertorquesnottoexceed35in.-lbs.
1. The Java Back ships with the
back shell engaged with the
mounting hardware to assist in
visualizing final assembly on
to the wheelchair.
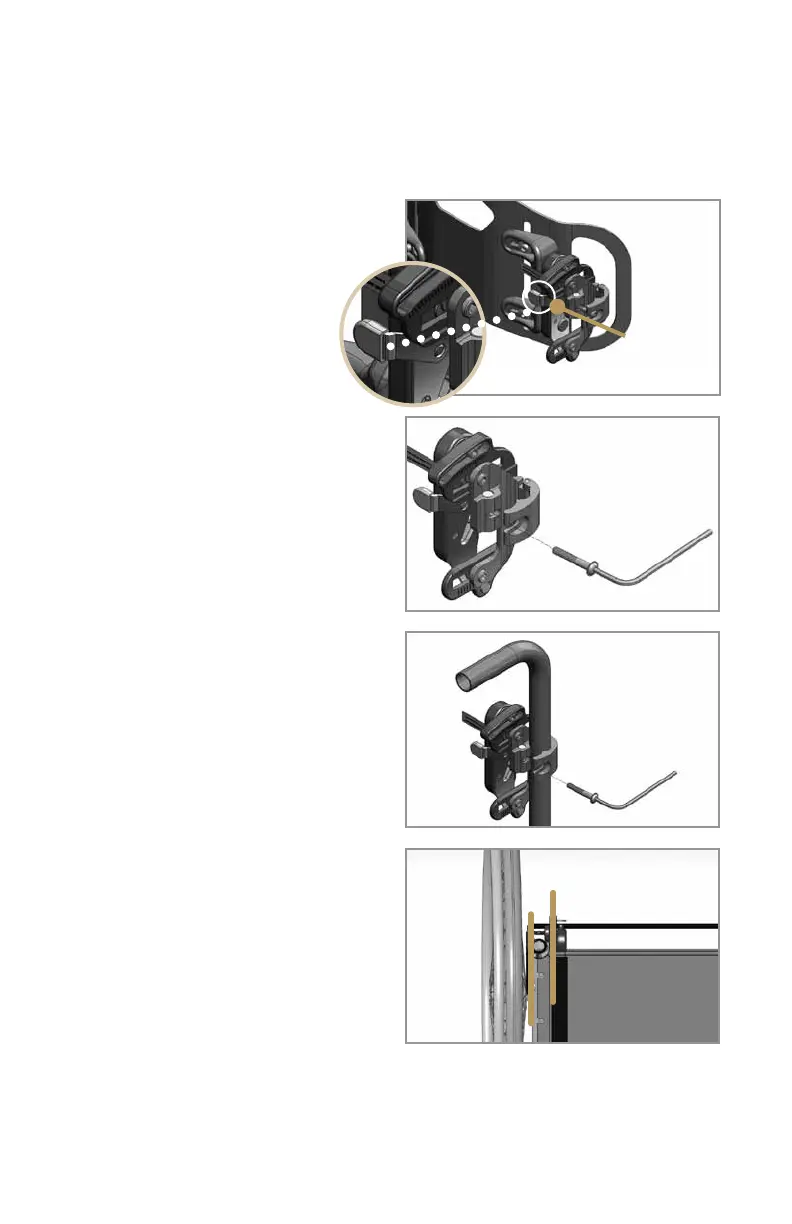
2. Press the release latch button
(Figure 2) on one of the hardware
assemblies to separate the mounting
hardware from the back shell.
3. Loosen the clamp screw and swing
it out of the recess in the clamp to allow
the clamp to open fully (Figure 3).
4. Position the clamp over the
appropriate (left/right) wheelchair
cane, pull the two halves of the clamp
together around the tubing. Swing the
screw back into position within the
clamp recess (figure 4). Orient the clamp
to approximate the desired back height.
You will adjust for correct back height
once the user is sitting in the wheelchair.
Rotate the hardware about the canes
so the hardware is square with the chair
(Figure5).
5. Repeatsteps2through4forthe
opposite clamp ensuring the clamp is
set at the same height as the opposite
side previously installed. Attach the
back shell by guiding the bottom
attachment pins into the lower receiver
slots and then pushing the top attach-
ment pins into the latch mechanism.
Be sure both latch buttons pop back,
and tug the back shell forward to verify
that it is secure.
6. Wheelchair frame widths can vary
from chair to chair. If you have any
trouble aligning the mounting brackets
with the attachment pins, you can easily
adjust the width of the JAVA Back to
fit perfectly.
3
Figure 2
Figure 3
Figure 4
Figure 5
Release
latch button
Hardware
square with chair