8
provided screw (A) and flat washer (B) from the outside of the back shell through
the vertical slot in the back shell and the horizontal slot in the trunk support, and
hand tighten into the threaded slot nut (C).
5.Repeatforadditionaltrunksupports.
6. Reattach the foam insert and cover.
7. The user can now return to the wheelchair for final adjustment of lateral trunk
support alignment.
8. When you have determined the final position of the trunk supports, tighten the
mountinghardwaresecurelywitha5mmAllenwrench.
X. Adjusting Dynamic Back Movement
NOTE: As supplied by Ride Designs,
the dynamic back adjustment is set to
allow maximum movement. To reduce
or eliminate dynamic back movement,
follow the instructions below.
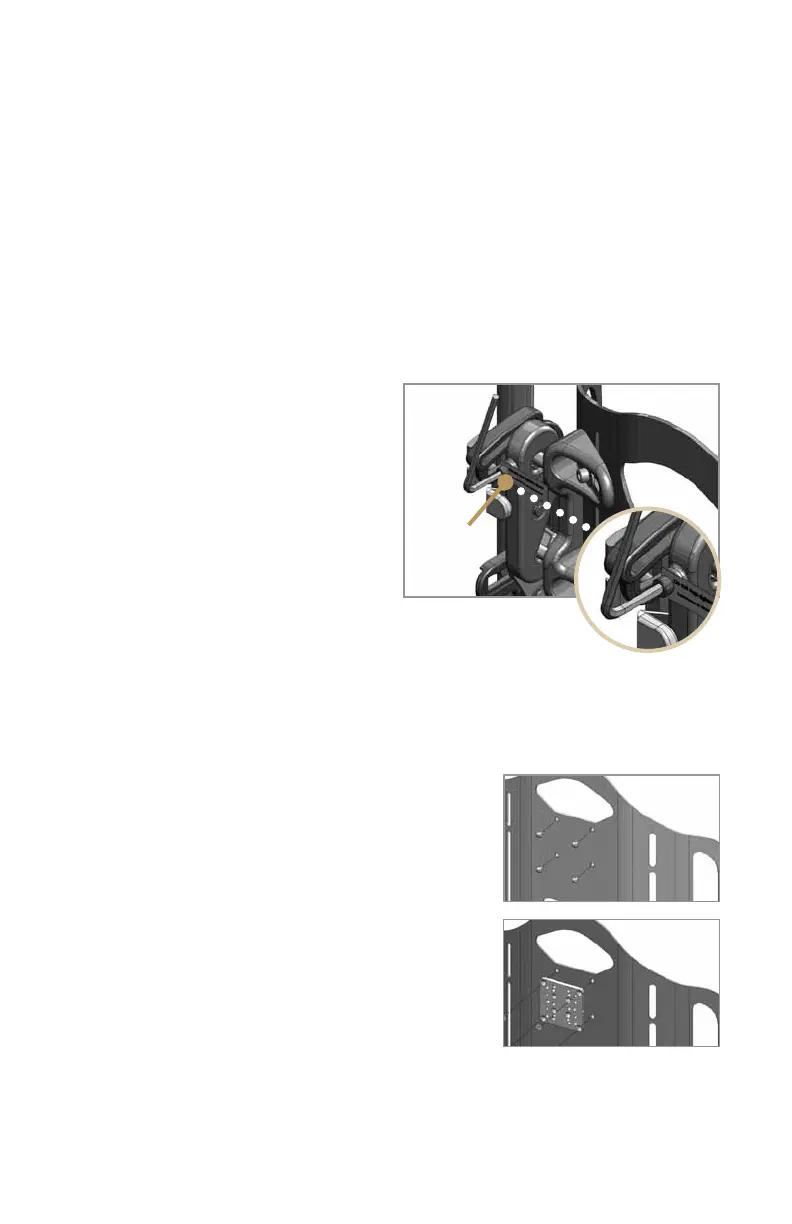
1. Use the 4mm Allen wrench to set
the amount of travel for dynamic back
movement (Figure 14).
2. With the adjustment screws turned
all the way in (clockwise), there is no
dynamic back movement. Turning the adjustment screws out
(counterclockwise) permits the back to move against spring tension.
CAUTION: If you choose an intermediate amount of dynamic back movement, be
sure that the screws on each side are adjusted equally by turning them all the way
in and then backing them out the same number of turns.
XI. Installing a Universal Headrest Mount
The tall JAVA back shell has provisions for attaching
a Universal Headrest Mount, which is available
through your Ride Designs supplier. The Universal
Headrest Mount accepts most commercially available
headrests. To attach the Universal Headrest Mount,
remove the four small plastic plugs from the threaded
inserts near the top of the back shell and use the
mountinghardwareprovided(Figures15and16).
XII. Ensure all Fasteners are secure
Usingthe4mmand5mmAllenwrenches,recheck
all of the fasteners and tighten them securely.
Figure 14
Figure 15
Figure 16
Dynamic
back
adjustment