This document is the owner's manual for the Ride1UP LMT'D gen2 E-bike, providing essential information for its safe operation, maintenance, and assembly. It emphasizes the importance of proper assembly and regular checks to ensure rider safety and the longevity of the e-bike.
Function Description:
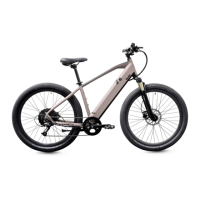
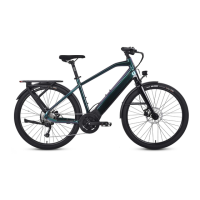
The Ride1UP LMT'D gen2 is an electric bicycle designed for use on paved roads and paths. Its primary function is to provide assisted cycling, combining human pedaling with an electric motor to enhance riding experience, especially for longer distances or uphill climbs. The e-bike features a torque sensor bottom bracket, which means the motor assistance is proportional to the rider's pedaling effort, offering a more natural riding feel. It is equipped with a KD218 LCD display that provides real-time information such as speed, mileage, and battery level, and allows the rider to adjust pedal assist levels. The e-bike also includes an air fork for suspension, which can be adjusted for stiffness or locked out for rigid riding on smoother surfaces or climbs. Hydraulic disc brakes are installed for reliable stopping power.
Usage Features:
- Pedal Assist System (PAS): The e-bike offers multiple pedal assist levels (0-3), allowing riders to choose the amount of motor assistance desired. Level 1 provides minimum power, while Level 3 offers maximum assistance. The torque sensor ensures that the motor's output is responsive to the rider's pedaling, making for an intuitive and efficient ride.
- Throttle: The throttle is active when the bike is powered on, providing immediate acceleration without pedaling. Riders are cautioned to be aware of the throttle's activation to prevent unintentional acceleration.
- Display Control: The KD218 LCD display serves as the central interface for controlling the e-bike's functions.
- Power On/Off: The bike is powered on or off by pressing and holding the POWER button for 2 seconds. The display automatically shuts down after 10 minutes of inactivity to conserve battery.
- Speed & Mileage Mode Switch: Pressing the POWER button allows riders to cycle through different display modes, including average speed, real-time speed, maximum speed, trip distance, odometer, and time.
- Backlight On/Off: The display backlight can be toggled on or off by pressing and holding the UP button for 2 seconds.
- Walk/Push Assist: For situations requiring walking alongside the bike, pressing and holding the DOWN button for 2 seconds activates a 4mph walk assist mode, which remains active until the button is released.
- Settings Adjustment: Holding the POWER button enters the settings menu, where parameters can be adjusted using the UP/DOWN buttons.
- Battery Management: The battery level is indicated on both the battery itself (via LED lights) and the LCD display, using a color-coded system (Blue for full, Green for half or less, Red for low).
- Air Fork Operation: The air fork's stiffness can be adjusted using an air valve and a shock pump (not a bicycle tire pump) to suit rider preference and terrain. A lockout dial on the top right of the fork allows the rider to make the fork rigid for climbing or smooth roads.
- Safety Protocols: The manual emphasizes several safety practices, including wearing a helmet, checking local laws, ensuring proper lighting for night riding, and avoiding riding under the influence. It also advises against using the e-bike for downhill riding or on rocky trails, limiting its use to paved or smooth surfaces.
Maintenance Features:
- Pre-Ride Inspection: Riders are instructed to perform a quick visual check of brakes and ensure all nuts and bolts are securely tightened before every ride.
- Regular Professional Checks: Due to the higher wear and tear on e-bike components, regular inspections by a professional bike shop are recommended.
- Component Replacement: Any worn or damaged parts, especially brake components, must be repaired or replaced immediately with genuine replacement parts.
- Tire Maintenance: Regular checks of tire pressures (referencing the sidewall for correct PSI range) and tread depth are crucial.
- Post-Accident Inspection: After any accident or crash, the e-bike must be inspected by a bike repair specialist to ensure it is safe to ride, as damage may not always be visible.
- Battery Care:
- Charging Environment: The battery must be charged in an ambient temperature, on a non-flammable and dry surface, away from heat, humidity, or flammable materials, and must not be covered.
- Unattended Charging: It is explicitly stated not to leave the battery unattended while charging or plugged into the charger for extended periods.
- Storage: For extended life, the battery should be stored with a 40-80% charge in a dry area with recommended temperatures of 50°-77°F. Monthly checks are advised to ensure the charge doesn't drop below 25%.
- Charger Port: The charger port must always be covered when not in use to protect against moisture, especially in wet climates.
- Brake Adjustment: After assembly, both front and rear brakes must be tested and adjusted as needed. The manual provides guidance on aligning the disc rotor between the brake pads to prevent rubbing.
- Derailleur and Shifter Adjustment: Riders are advised to verify and adjust the shifter and derailleur, especially if noise occurs during shifting or if shifting is not smooth. Proper adjustment of high and low limit screws is critical to prevent the chain from coming off and damaging components.
- Torque Settings: Detailed torque settings are provided for various components (saddle clamp bolt, crank arms, compression cap, stem/steerer clamp, handlebar clamp) to ensure proper and safe assembly.
- Spoke Tension: A table is provided with recommended spoke tension values for the front and rear wheels, indicating the importance of maintaining correct tension for wheel integrity.
- Warranty Information: The e-bike comes with a One-Year Limited Warranty covering product defects present at the time of handover. It does not cover normal wear and tear, misuse, or damage from improper assembly. Warranty claims require emailing support with photos/videos if appropriate. Ride1UP covers labor and parts for warranty claims within 30 days of purchase, and replacement parts for defective items within one year (owner responsible for labor after 30 days).