4
Assembly of the Sensor Link Rods
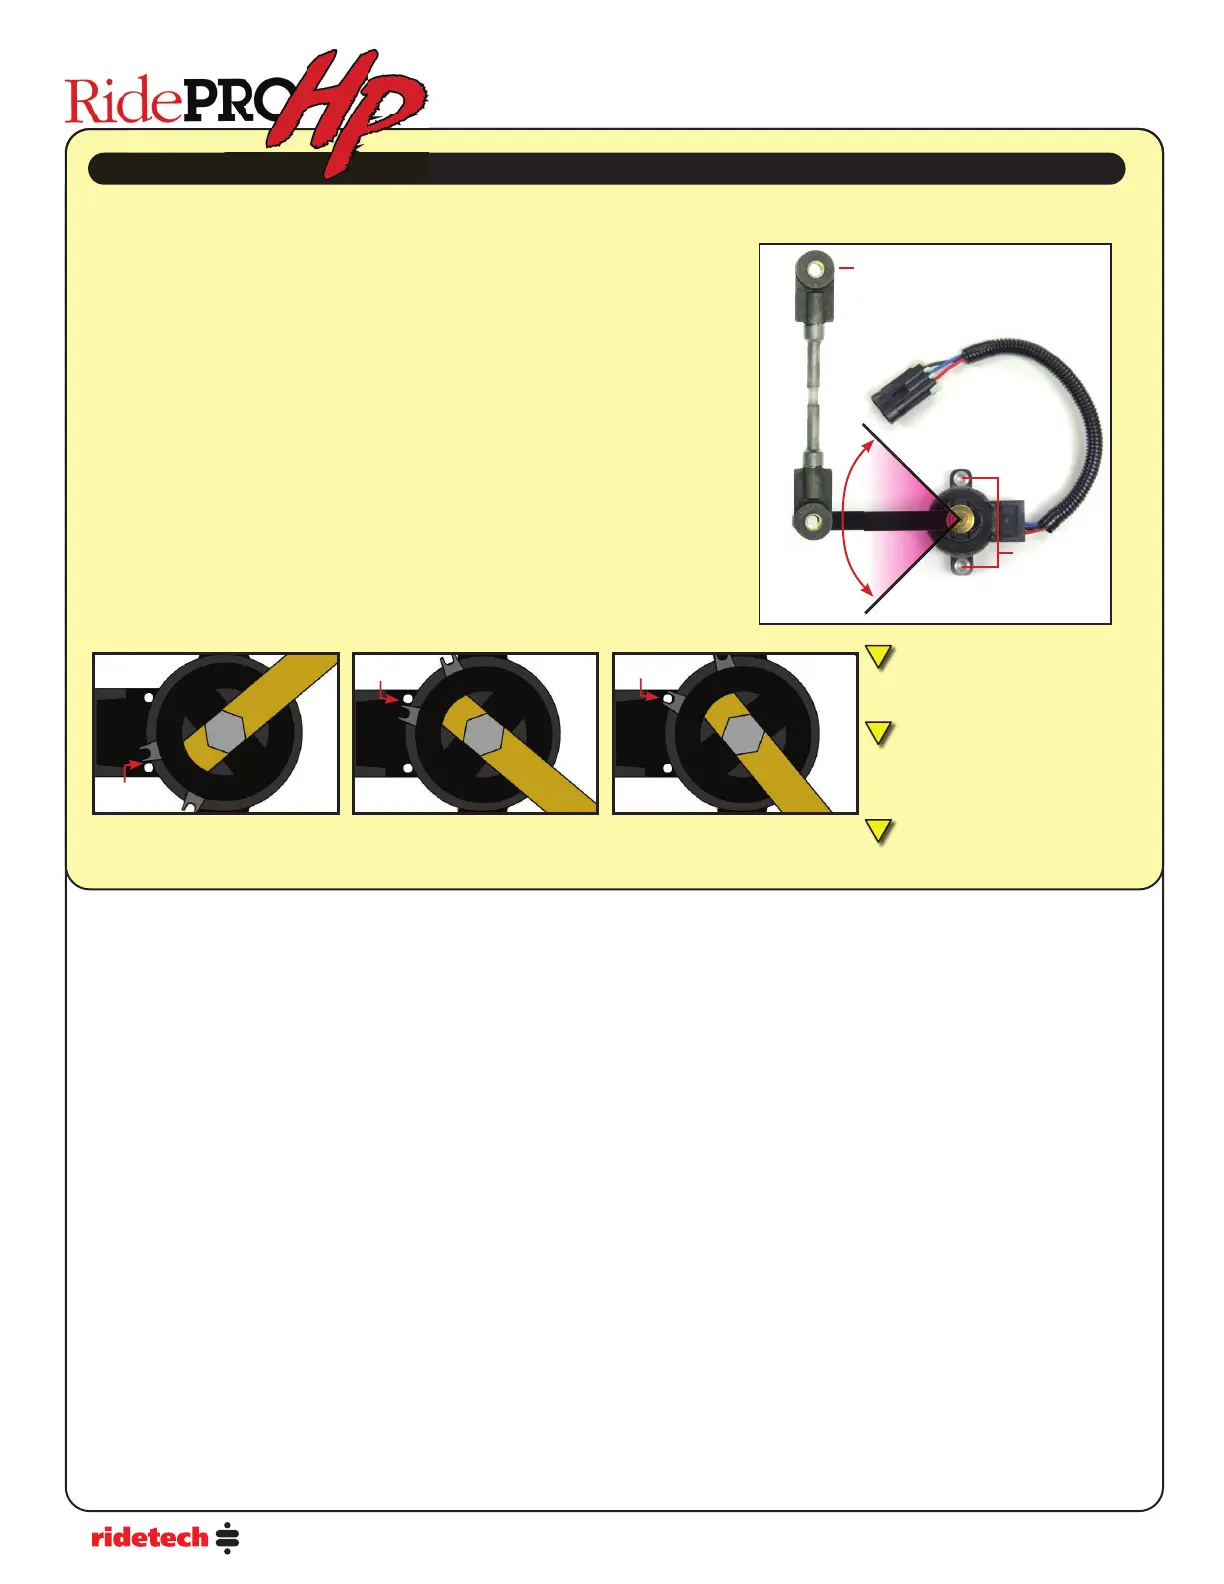
Travel Limits
Attach to
Chassis
90º of
e ective
range
Attach to suspension
Good
Good
TOO FAR
Ride Height Sensors
If the electrical range of travel
is exceeded, the system may
function erratically or not at all.
Also note that if the sensor
has very little travel, the
system may not perform to its
potential.
It may be necessary to shorten
the sensor arm to increase
travel.
• The RidePRO-HP system uses 4 height sensors (one at each wheel). They are weather proof and may be mounted in any position as well as
“clocked” in any position. (There is not a di erence between the left and right sensors.) These sensors are typically mounted to the chassis /
frame rail.
• A linkage with rubber ends connects the sensor arm and a suspension component. On
most front suspensions, the linkage will attach to the upper or lower control arm. On most
rear suspensions, it will attach to the axle or control arm.
• The main goal when mounting the sensor is to achieve as much sensor rotation as
possible without exceeding the sensors limits.
• Although the sensor arm will rotate 180 degrees, it must remain in the middle 90 degrees
throughout suspension travel. See diagram below for sensor travel limits.
• It may be necessary to shorten the sensor arm and drill a new hole to ensure the arm is
rotating enough during suspension travel to accurately determine vehicle height.
• The sensor arm can also be removed from the sensor and clocked in four di erent
positions. It may also be necessary to bend the sensor arm and/or linkage to achieve
proper clearance and alignment.
• The sensor will be mounted to the frame using ¼” self tapping screws or bolts. A special
shouldered bolt is supplied to attach the rubber rod ends to the suspension and the
sensor arm; this will avoid over tightening.
• Make sure the sensor has adequate clearance from all suspension components throughout
suspension travel. Check tire clearance, lock to lock and throughout suspension travel.
External RidePRO-HP Sensor Installation