

C
Christina MartinezSep 10, 2025
Why does RIDGID Metal Detector unit act erratic and won’t power down?
- AAdriana Frazier MDSep 10, 2025
The batteries may be low. Replace them with fresh batteries and power the unit back on.
Why does RIDGID Metal Detector unit act erratic and won’t power down?
The batteries may be low. Replace them with fresh batteries and power the unit back on.
Why are lines jumping all over the screen on my RIDGID Diagnostic Equipment while tracing?
If lines are jumping all over the screen while tracing with your RIDGID Diagnostic Equipment, it could be due to a weak signal or interference. Ensure the transmitter is well connected and grounded, and point the SR-60 at either lead to ensure a complete circuit. You can also try using a higher frequency, connecting to a different point in the line, or switching to inductive mode. Attempt to identify and eliminate any sources of noise, like bonded grounding. Finally, check that the SR-60 batteries are fresh and fully charged.
What to do if my RIDGID Diagnostic Equipment SR-60 will not pick up the signal?
If your RIDGID Diagnostic Equipment SR-60 isn't picking up a signal, verify that you've set the correct mode and frequency. Examine the circuit for potential improvements. Consider relocating the transmitter, changing the grounding or frequency, or adjusting the Signal Focus Control settings.
How to fix RIDGID Diagnostic Equipment SR-60 when it locks up?
If your RIDGID Diagnostic Equipment SR-60 locks up during use, power the unit off, and then back on. If the unit will not switch off, remove the batteries. If batteries are low, replace them.
What to do if my RIDGID Diagnostic Equipment SR-60 will not power on?
If your RIDGID Diagnostic Equipment SR-60 will not power on, check the orientation of the batteries and ensure they are charged. Also, inspect the battery contacts to make sure they are in good condition. It is possible that the unit may have blown a fuse, requiring factory service.
Why is the display dark or light on my RIDGID Diagnostic Equipment?
If the display on your RIDGID Diagnostic Equipment appears completely dark or completely light when switched on, try powering the unit off and then back on. If the issue persists, adjust the LCD screen contrast.
How to adjust sound on RIDGID Metal Detector?
Adjust the sound level in the sound menu. Verify the Proximity Signal is greater than zero.
What to do if lines are jumping all over the screen in the mapping display of RIDGID Metal Detector?
Lines jumping all over the screen indicates that the SR-60 is not picking up the signal or there is interference. Make sure that the transmitter is well connected and grounded. Point the SR-60 at either lead to be sure that there is a complete circuit. You can also try a higher frequency, connecting to a different point in the line, or switching to inductive mode. Try to determine the source of any noise and eliminate it, or check SR-60 batteries are fresh and fully charged.
What to do if RIDGID Metal Detector SR-60 will not pick up the signal?
Check that the correct mode and frequency is set. Examine the circuit for possible improvements. Try relocating the transmitter, changing the grounding or frequency, or modifying the Signal Focus Control settings.
What to do if RIDGID Metal Detector SR-60 locks up during use?
If the SR-60 locks up, power the unit off, and then back on. If the unit will not switch off, remove the batteries. If batteries are low, replace them.
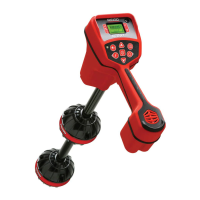
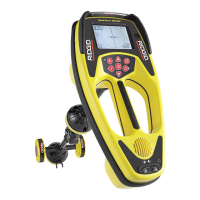
Title of the operator's manual for the SeekTech SR-60.
Essential safety guidelines to follow before operating the SR-60.
Covers safety precautions for the work environment, electrical hazards, and battery handling.
Guidelines for operator safety including alertness, protective gear, and traffic awareness.
Details on how to service and repair the SR-60 unit.
Initial steps for setting up and using the SR-60.
Description of the three primary operating modes: Active, Passive, and Sonde.
Overview of the elements displayed on the SR-60 screen.
General display elements visible across different SR-60 modes.
Specific display elements for Active and Passive Line Tracing modes.
Unique display elements specific to Sonde locating.
List of default frequencies available for SR-60 operation.
Detailed explanation of the SR-60 keypad buttons and their functions.
How to select, activate, and manage frequencies for SR-60 use.
Information on battery life and low battery indicators.
Process for making frequencies available for use.
Procedure for tracing lines using a transmitter.
Explanation of key indicators used for line tracing.
How to measure depth accurately in line tracing modes.
Conditions that affect depth reading accuracy.
Understanding signal readings and optimizing tracing.
Using OmniSeek for simultaneous passive frequency band detection.
Guidance for effective passive line tracing.
First step in locating a sonde: finding its general area.
Second step: precisely locating the sonde using poles and equator.
Final step: confirming the sonde's location for accuracy.
How to measure depth when locating a sonde.
Using SimulTrace to trace pushcable and sonde simultaneously.
Controlling various SR-60 settings through the menu system.
Managing available frequencies for SR-60 operation.
Adjusting the SR-60's screen backlight settings.
Adjusting the screen contrast for better readability.
Configuring visual indicators like Race Track, Watermark, and Signal Focus.
Using the No-Signal icon to reduce display confusion.
Adjusting the Tracing Line's distortion display sensitivity.
Accessing and managing frequencies within the menu.
Using the distortion line for field analysis.
Factors affecting the accuracy of locating measurements.
Proper procedures for transporting and storing the SR-60.
Guidance on installing and using SR-60 accessories.
Instructions for cleaning and maintaining the SR-60.
Default operational settings for the SR-60.
List of standard items included with the SR-60 locator.
List of optional accessories available for the SR-60.
| Display | LCD |
|---|---|
| Operating Temperature | -4°F to 122°F (-20°C to 50°C) |
| Battery Life | Up to 12 hours |
| Mapping Display | Yes |
| Omnidirectional Antennas | Yes |
| GPS | No |
| Power Source | Rechargeable battery |
| Depth Range | Up to 15 ft (4.5 m) |
| Water Resistance | IP54 |