Flex™ H6 User Guide
Page 6 of 29
RIEKER INC • 34 MOUNT PLEASANT ROAD • ASTON • PA • 19014 • USA
610-500-2000
fax: 610-500-2002
support@riekerinc.com
www.riekerinc.com
The information and material presented may not be published, broadcast, rewritten, or redistributed without the expressed wri
tten consent of Rieker
Inc.
The content presented is provided for informational purposes only and subject to change.
7 Rieker
®
All Rights Reserved.
FORM NUMBER: H60009_12/14 UPDATED:
5/15/18
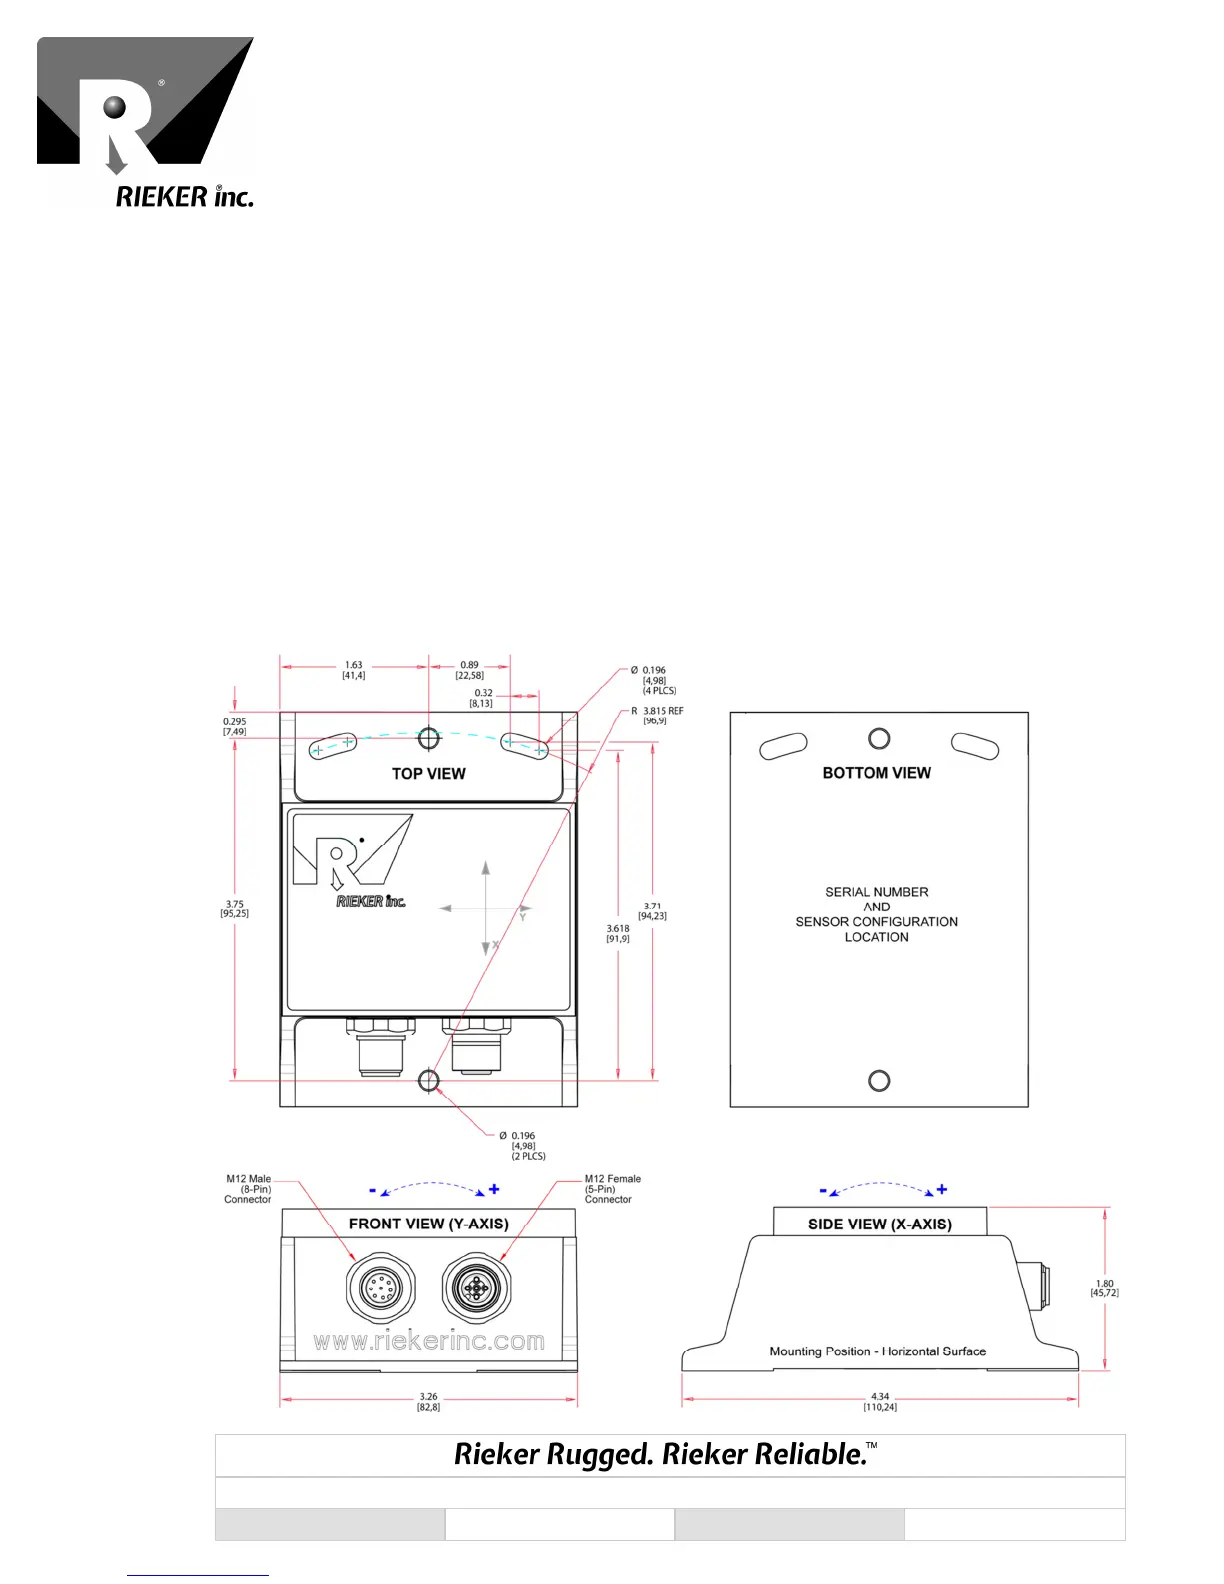
H6 Installation and Wiring
Notes:
• The factory default settings for mounting position (either horizontal or vertical) must be selected at
time of order.
• Default output polarity shown is configurable at the factory (defined at time of order) or by the end
user via the Flex Dev Kit that includes Rieker Flexware app, sold separately.
• Special H6-MM Multi-Mount model (available exclusively through Digi-Key) allows the end user to
select between horizontal and vertical mounting positions via a special Flex Dev Kit that includes
Rieker Flexware app, sold separately through Digi-key.
1.
On the mounting plane, prepare surface with three tapped holes 3.815” [96.9mm] apart for #9
mounting screws. NOTE that the single hole on side with the two slots is not meant to be used for
mounting
2.
Mount inclinometer to mounting plane using #9 mounting screws.
FIGURE 1: H6 Dimensions and Mounting (Inches [Mm])