Do you have a question about the Rightline Gear 100S10 and is the answer not in the manual?
Pack carrier fully to prevent wind damage and secure hook-&-loop closures for waterproofing.
Remove the (4) attachment straps' car clips before attaching to a roof rack.
Decide if attaching straps to side rails or cross bars for proper connection.
Wrap strap around rack, thread end through loop, and pull tight.
Thread straps up through slot A and down through slot B of the buckles and tighten.
Tie off strap ends to prevent flapping in the wind and re-tighten regularly.
Begin attachment without a roof rack by starting with the car clips on the (4) straps.
Line up the side buckles with the vehicle doors for strap placement.
Hold the straps with the car clips facing towards the vehicle before threading.
Open vehicle doors and hook the car clips under the door frame weather molding.
Tighten straps evenly, shut the vehicle's doors over the clips/straps, and tie off ends.
Run a strap's loop through the backside of a car clip.
Thread the strap's end through its own loop for securement.
Pull the strap's end to tighten the strap around the car clip.
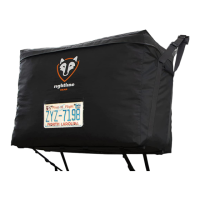
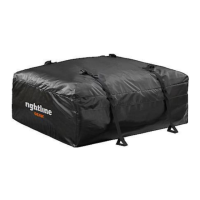
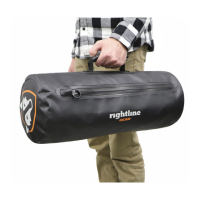
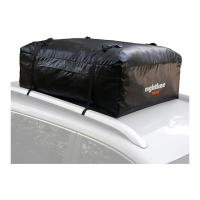
The Rightline Sport Car Top Carrier is a versatile and waterproof gear storage solution designed for vehicles, offering secure attachment options both with and without a roof rack. Its primary function is to provide additional cargo space, protecting contents from the elements during travel.
The carrier is designed to expand a vehicle's cargo capacity, allowing users to transport luggage, camping gear, or other items securely on the roof. Its aerodynamic shape helps minimize wind resistance and noise, contributing to a smoother driving experience. The carrier is engineered to be 100% waterproof, ensuring that all contents remain dry, provided that all hook-and-loop closures are properly secured. This waterproof capability is crucial for protecting sensitive items during adverse weather conditions. The design emphasizes secure attachment to the vehicle, whether utilizing existing roof racks or directly to the door frames, ensuring stability and safety during transit.
Proper packing is essential for the carrier's performance and longevity. Users are advised to pack the carrier full to eliminate excess material that could flap in the wind and cause damage. If the carrier cannot be packed completely full, the front corners should be filled, and any excess material should be pulled down over the sides and secured firmly with the carrier's straps. This method prevents wear and tear caused by flapping fabric. When loading, items should be placed within the aerodynamic shape of the carrier, with shorter items at the front and taller items at the rear. Sharp-edged items should be positioned in the middle, surrounded by softer items to prevent damage to the carrier's fabric. The zipper should be closed from front to rear as the carrier is filled. After zipping, the protective flap must be folded down to secure the hook-and-loop closures, ensuring they completely overlap those on the carrier for maximum waterproofing. If securing the closures is difficult, it indicates that the carrier is overpacked. Before placing the carrier on the vehicle, the roof should be cleaned of all dirt and debris to prevent scratching and ensure a stable base. The carrier should be placed on the vehicle with its non-zippered end facing forward.
For vehicles equipped with a roof rack, the attachment process involves using the carrier's straps with the rack's side rails or cross bars. The Car Clips, which are included with the attachment straps, are not used in this configuration and should be removed. Users must decide whether to attach the straps to the roof rack's side rails or cross bars. If attaching to side rails, the straps connect to the side buckles of the carrier. If attaching to cross bars, the straps connect to the front and rear buckles. Each strap is attached by wrapping it around the rack, threading its end through its loop, and pulling it tight. The straps are then threaded up through slot A and down through slot B of the buckles and tightened evenly. It is crucial to tie off any excess strap ends to prevent them from flapping in the wind, which can cause noise and potential damage. Users are instructed to re-tighten the straps after a few miles of driving and to check them regularly throughout the trip to maintain secure attachment.
For vehicles without a roof rack, the Car Clips are essential for attachment. The process begins with the Car Clips already on the four attachment straps. The side buckles of the carrier should be aligned with the vehicle's doors. For a 4-door vehicle, one strap will attach to the door frame weather molding in each of the four doors. For a 2-door vehicle, two straps will attach to the door frame weather molding in each of the two doors. The straps, with the Car Clips facing towards the vehicle, are threaded up through slot A and down through slot B of the buckles. The vehicle's doors are then opened, and the Car Clips are hooked under the door frame weather molding. The straps are tightened evenly, and the vehicle's doors are shut over the clips/straps. As with the roof rack attachment, any excess strap ends should be tied off to prevent flapping. Regular re-tightening of the straps after a few miles and continuous checks throughout the trip are necessary to ensure secure attachment.
A key maintenance feature highlighted in the manual is related to noise generated by the straps. If a strap makes noise while driving, users are advised to loosen the strap, reposition it slightly, and then re-tighten it. This simple adjustment can resolve issues related to wind vibration and ensure a quieter ride. The carrier's waterproof integrity relies on all hook-and-loop closures being secured, which is a critical aspect of its maintenance and performance. Regular checks of the straps and closures are part of routine maintenance to ensure the carrier remains securely attached and waterproof.
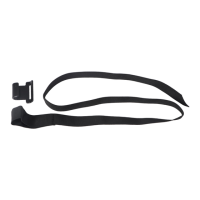
If the Car Clips are ever removed from the attachment straps, the manual provides clear instructions for re-connecting them. This involves running a strap's loop through the backside of a Car Clip, then threading the strap's end through its loop. Finally, the strap's end is pulled to tighten the strap around the Car Clip. This process is repeated for all four straps, ensuring the clips are correctly re-attached for future use, particularly when attaching the carrier to vehicles without a roof rack.
The Rightline Sport Car Top Carrier is designed for ease of use, durability, and reliable performance, offering a practical solution for expanding vehicle storage while prioritizing the protection of cargo and the safety of travel.
| Product Type | Car Top Carrier |
|---|---|
| Capacity | 10 cu ft |
| Attachment Method | Straps to roof rack or door frame |
| Water Resistance | Water-resistant |
| Mounting Type | Roof |
| Dimensions | 36" L x 30" W x 16" H |