100763_M24
Rimage 2000i™ User Guide
7. Slide the left side panel into place.
8. Position the back panel on the system.
9. Install and tighten the Torx T10 screws (Qty. 6) to secure the back panel.
10. Connect the cables at the back of the system.
• Power cord.
• USB cable
11. Power on the Rimage 2000i.
12. Press the recorder buttons to close the recorder trays.
Clean the Ink Cartridges
This functionality allows you to clean the ink cartridge nozzles. The nozzles may become clogged from dried ink, causing poor
print quality.
1. Access Printing Preferences. Refer to page 15.
2. Select the tab.
3. On the tab, select Service ToolBox. The Service ToolBox dialog box opens.
4. Select Clean Cartridges. The Cleaning Cartridges window opens.
5. Select Light to clean the ink cartridge nozzles with the least amount of ink. When the cleaning is complete, a message
displays in the eld at the bottom of the Cleaning Cartridges window.
Note: Print a test disc after you clean the ink cartridge nozzles. If print quality is still poor, repeat step 1 - step 5,
selecting Medium or Heavy in step 5.
6. Select OK. The Cleaning Cartridges window closes.
7. Select OK. The Rimage Service ToolBox dialog box closes.
8. Select OK. The Preferences window closes.
Replace Consumables
This section provides information about replacing the fan lter and ink cartridges in the Rimage 2000i.
Replace the Fan Filter
The fan lter is a consumable item. You must change the fan lter every month. Use the following procedure to change the fan
lter.
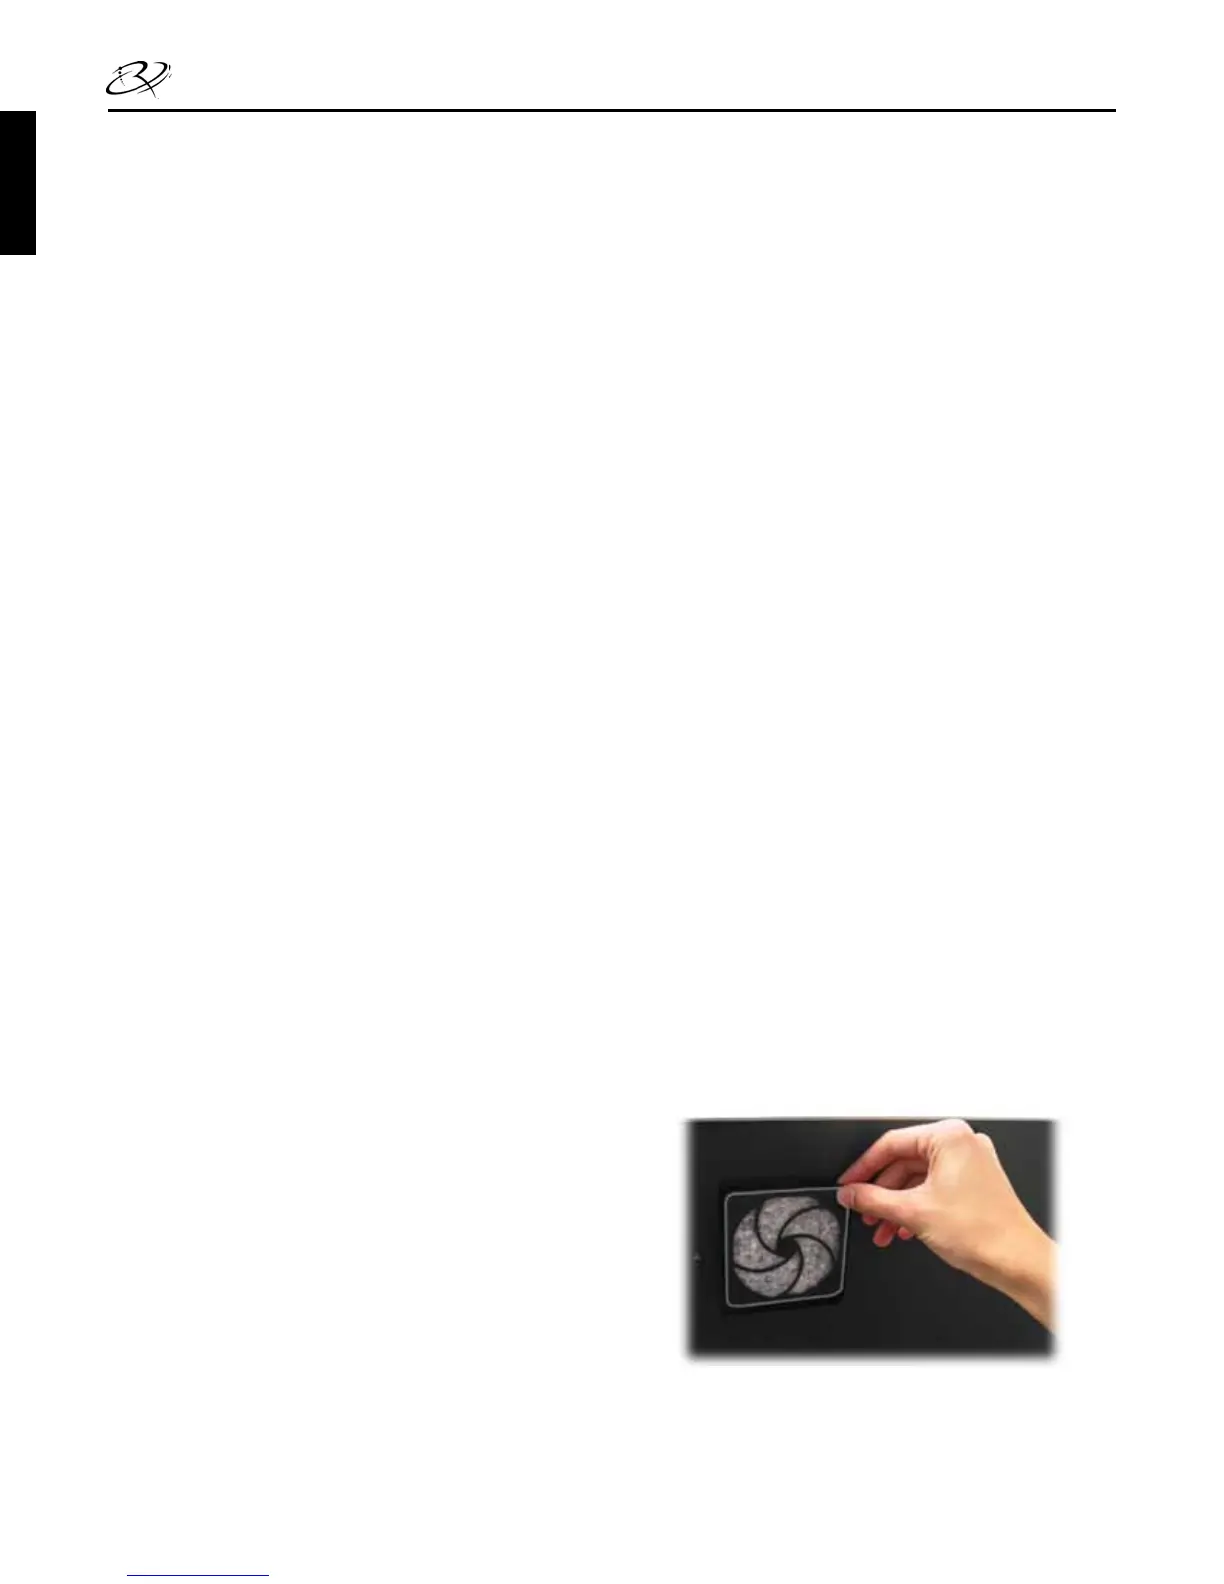
1. On the back of the Rimage 2000i, rmly grasp a corner of
the fan lter retainer.
2. Gently pull the fan lter retainer away from the back of
the Rimage 2000i.
3. Remove the fan lter.
4. Place the new fan lter in the fan lter retainer.
5. Firmly press the fan lter retainer into the slots on the
back of the Rimage 2000i until it snaps into place.
EnglishEnglish


 To Next Page