10
11
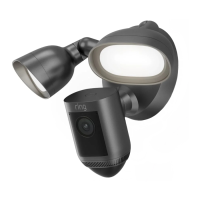
Mount the light fixture.
Tuck the power wires into the junction box, then align
the two holes on the light fixture with the threaded
posts on the plastic mounting plate. Slide the light
fixture onto the posts and push it firmly into place.
Secure your fixture using two of the hex cap nuts from
Bag G over the ends of the threaded posts. Remove
the reversible bit from the included screwdriver and
use the handle to tighten the hex cap nuts.
Once your Floodlight Cam is secured, apply a
weatherproof silicone caulk or sealant (not included)
around the outside, where the Floodlight Cam and
junction box meet.
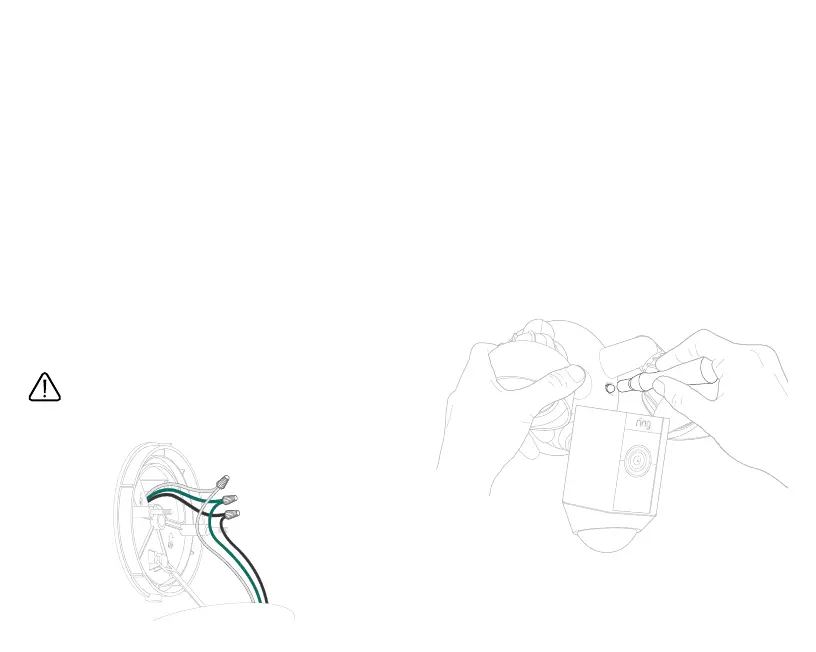
Connect the wires.
The green wire on your Floodlight Cam is the ground
wire. With power still o at the breaker, use a wire nut
from the bag marked “G” to connect the green (or
ground) wire from your Floodlight Cam to the green
wire coming from your junction box.
The white wire on your Floodlight Cam is a neutral
wire. Use another wire nut from the bag marked “G” to
connect the white wire from your Floodlight Cam to the
white (or neutral) wire coming from your junction box.
The black wire on your Floodlight Cam is a hot wire.
Use another wire nut from the bag marked “G” to
connect the black wire from your Floodlight Cam to
the black (or hot) wire from your junction box.
Give all 3 wire connections and wire nuts a gentle tug
to make sure they are secure.
WARNING: If you can’t easily identify the wires coming
out of your junction box, or have diculty with or
are uncomfortable connecting them, consult with
a licensed electrician.