5. Press “ ” or “ ” button on the Past Data Display screen to view the results for
the past data in the le.
6. To check the measurement parameters used for the measurement, press “Info”
button.
Note
When the maximum memory capacity is exceeded, the oldest measurement les
are deleted and progressively replaced by newer data (rotating deletion).
Viewing data on a computer
When the internal memory of the KC-52 is connected to the computer as a Remov-
able Disk, measurement data stored in the internal memory can be viewed on the
computer. The raw measurement data is cumulative count and no number concentra-
tion conversion.
Copying data to SD memory card
All data stored in the internal memory of the unit can be copied to an optional SD
memory card in a single operation.
Printer
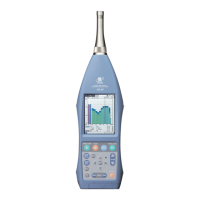
Connection to a printer
Connect the USB port of the KC-52 to the USB port of the optional printer.
Important
It is not possible to connect a printer and use the serial interface or multi-
point system interface at the same time.
After using the printer, do not immediately change the connection to a
computer. Otherwise the USB port may be damaged.
Change the setting of the printer to the 16-dot font (by setting DIP-SW2 of
the printer to “11011111”). Other wise the p r i ntou t will not be formatted c or-
rectly. For information on how to make this setting, refer to the documenta-
tion of the printer.
For details, please refer to the chapter of “Printer” of the instruction manual.
Serial interface
The KC-52 can be communicated with the computer by using the USB port.
For details, please refer to the chapter of “Serial interface” of the instruction manual.
Multi-point system
This unit incorporates the proprietary Rion multi-point system interface which allows
connection to a multi-point monitoring system.
For details, please refer to the chapter of “Multi-point system” of the instruction manual.
Maintenance
Internal contamination of sensor
When the internal sensor has become contaminated, performance will decrease and servicing
may become necessary. It is advisable to avoid measurement of air containing mist, moisture
droplets, very large particles, bers and similar, or a very high number of particles. Also take
care to always store the unit with the inlet cap in place. After measurement of air with high
particle number concentration, you should purge the unit using the supplied zero count lter. For
details on purging, please refer to page 13 of the instruction manual.
Replacement of consumables
The laser diode, pump, exhaust lter and internal battery are consumable parts. Regarding re-
placement of these parts, please contact the supplier.
Laser service life detection
When the laser output level is still within speci cations but the laser is nearing the end of its ser-
vice life, the [LASER] icon in the touch panel display ashes in green as a warning indication.
It is recommended to have laser maintenance performed within one month after this indication
has appeared.
Battery service life
As the internal battery is being recharged many times, the operation time available with a full
charge will gradually become shorter. When the available operation time has dropped to about
one half of the time that was available when the unit was rst purchased, the battery has reached
the end of its service life. The battery cannot be replaced by the user. Please contact the supplier.
Servicing and calibration
To assure continued measurement precision, checking and calibration of the unit should be per-
formed in regular intervals (such as once per year). For information about servicing and calibra-
tion, please contact the supplier.
Transpor t
When the unit is to be returned to Rion for servicing, or when it is otherwise to be transported,
be sure to use only the original packing material. Incorrect packing can lead to internal damage
of the unit.
The unit incorporates a lithium-ion battery. The customer is responsible for complying with any
applicable rules and regulations concerning transport of such products.
Cleaning main unit
- When cleaning main unit, use neutral detergent and wipe up with soft cloth. Please make sure
not to erase the printings, paintings, and markings when cleaning main unit.
- The printings, paintings, and marking on the main unit are very important information for
safety operation and serious accidents might be caused if operated without them.
USB cable (A to mini B)
Connect the USB connector
USB conversion connector
Connect a USB connector
of a printer
E04SR170730A
Troubleshooting
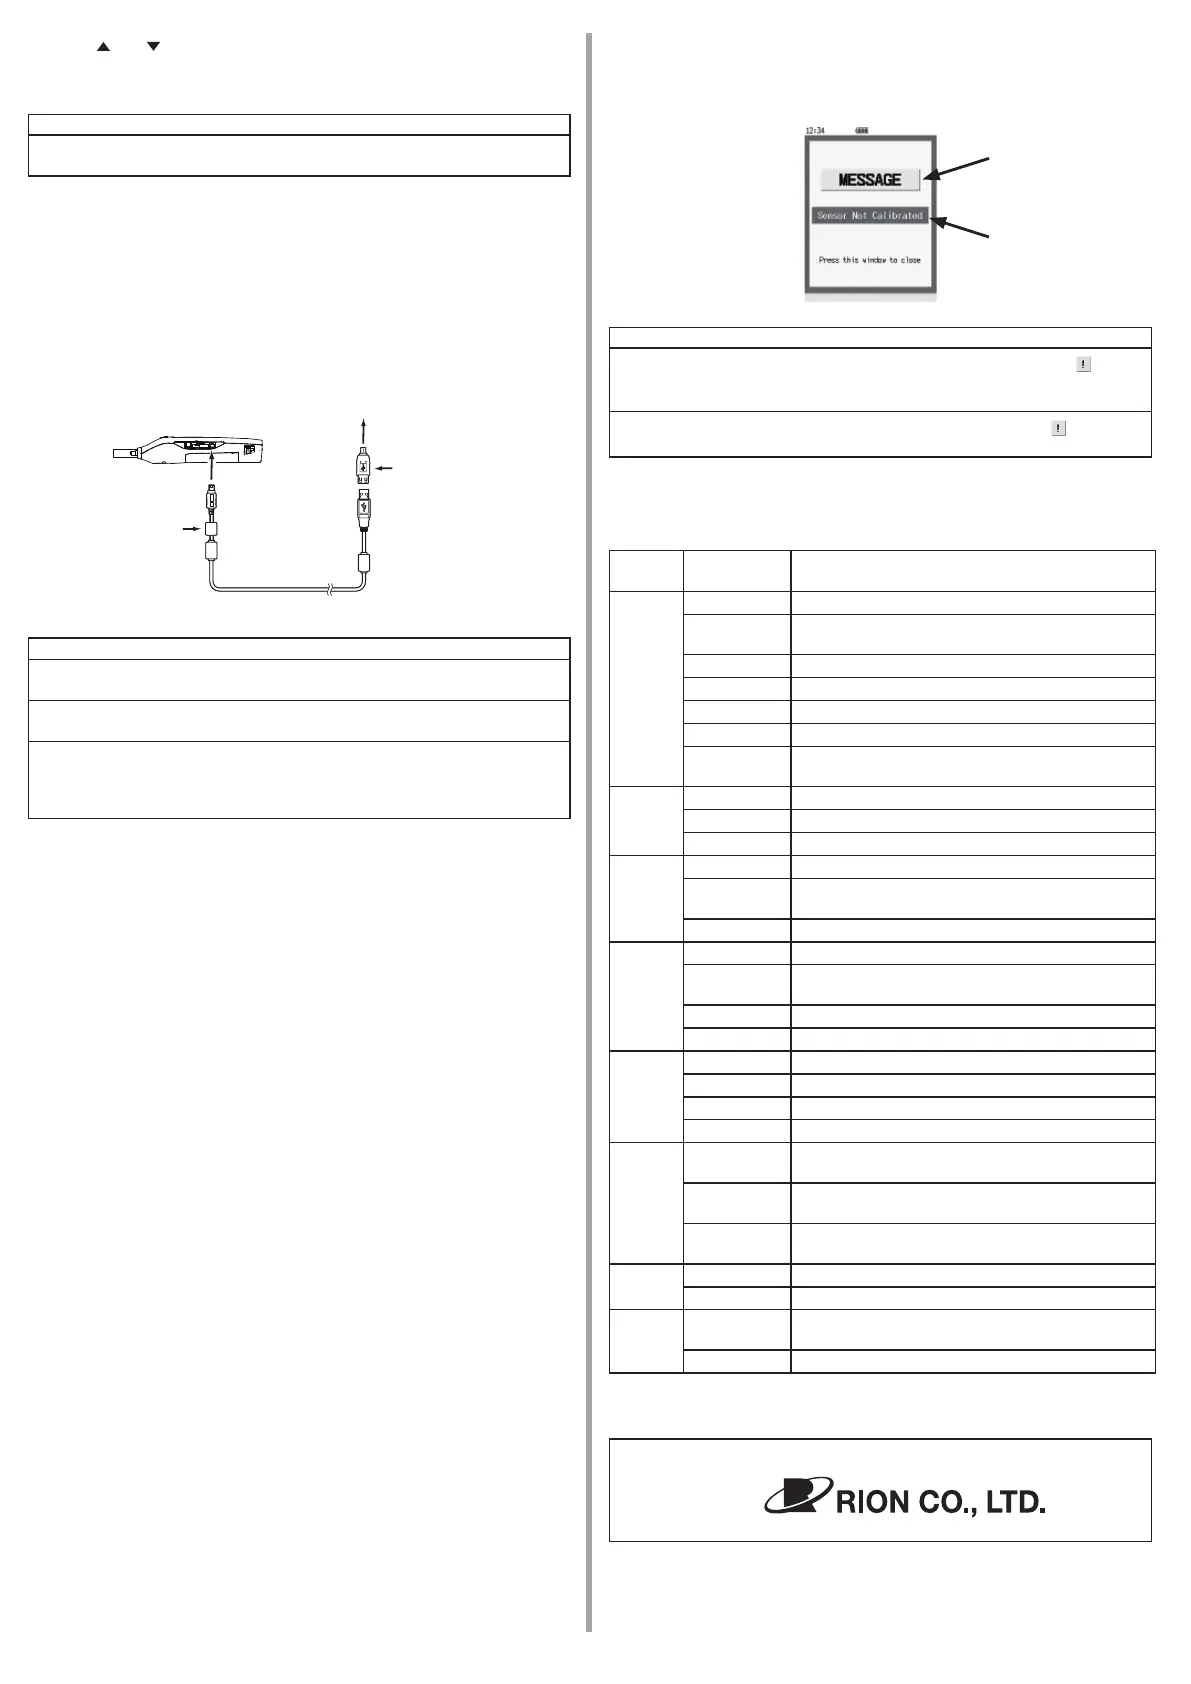
About pop-up screens
Error messages and similar information are provided on popup screens that are shown as
an overlay to the regular display contents.
Note
If the popup screen says “Press this window to close”, the popup icon
appears
in the upper right of the screen when you press the popup screen or any button
(except in Remote mode).
Even after a popup screen has been closed, pressing the popup icon
will display
it again.
Problem list
Problem situations are listed below.
For speci c troubleshooting methods, please refer to the chapter of “Troubleshooting”
of the instruction manual.
Message
categories
Problem description
General
problems
- Unit does not operate.
MESSAGE
The message “Please set date and time.” appears on
startup.
MESSAGE The message “BUSY” appears.
MESSAGE The message “BACKUP ERROR” appears on startup.
- The [COUNT] icon in the status area ashes red.
- Display indication is not bright enough.
-
The [REMOTE] icon in the status area light, and the
“START” button is not accepted.
Circuit
related
problems
PROTECTED The message “BOOT ERROR” appears.
PROTECTED The message “STOPED MEAS.” appears.
- The color of the screen turns blue.
Sample
air
related
problems
- The [FLOW] icon in the status area ashes green.
WARNING
The message “FLOW ERROR” appears, and the
[FLOW] icon in the status area ashes red.
PROTECTED The message “PUMP FAIL” appears.
Laser
related
problems
MESSAGE The message “Sensor not calibrated” appears.
WARNING
The message “LASER FAIL” appears, and the [LA-
SER] icon in the status area ashes red.
- The [LASER] icon in the status area ashes green.
- The [LASER] icon in the status area go out.
External
memory
problems
MESSAGE The message “NO MEMORY” appears.
MESSAGE The message “MEMORY FULL” appears.
MESSAGE The message “MEMORY ERROR” appears.
MESSAGE The message “DATA FORMAT ERROR” appears.
Internal
memory
problems
MESSAGE
The message “MEMORY FULL” appears when the
SD memory card has not been inserted in the unit.
MESSAGE
The message “MEMORY ERROR” appears when the
SD memory card has not been inserted in the unit.
MESSAGE
The message “NO MEMORY” appears when the SD
memory card has not been inserted in the unit.
Battery
problems
MESSAGE The message “LOW BATT.” appears.
- The charging status LED lights up in red.
USB
problems
-
Changing the [I/O] setting to “Removable Disk” or
“Serial” has no effect.
- The connected printer does not operate.
* All company names and product names mentioned in this concise manual are trade-
marks or registered trademarks of their respective owners.
Manufacturer
3-20-41 Higashimotomachi, Kokubunji, Tokyo 185-8533, Japan
Popup screen
example
Message
categories
Message
No. 55613 20-04

 Loading...