3
2. Pump Protection
The pump should be protected from the weather, oods, chemicals, dust, vermin,
insects etc. It is highly recommended that the pump be housed in a weather proof,
well vented enclosure. If the pump is not adequately housed the warranty may be
deemed void.
3. Not recommended for connection with a mains Pressure
Hot Water System
4. Pipe Installation
Pumps can be damaged if care is not taken when connecting pipes. Pipes should be
supported so that the pump casing is not strained by the weight or misalignment.
We recommend the pump and pipe are coupled using exible type polythene pipe,
rubber hose or a multi-directional barrel union. This union coupling can also be used
to remove the pump for service should it be necessary without having to cut pipes.
Pipe ttings should be carefully screwed onto the pump making sure not to cross-
thread or overtighten. We recommend the use of a moulded pipe tting to connect
to the pump as this avoids possible damage to the pump threads and unnecessary
replacement of parts.
For best results use teon tape to join seal joint. Satisfactory sealing can be achieved
by hand tightening ttings ensuring that no leaks are evident once under pumping
pressure.
5. Locating the Pump
Find a location for your pump as close to your water source as possible.
Ensure that this location is on a seperate footing from your home. To do this you can
mount the pump on a concrete tile or concrete base.
6. Power Source
Arrange for an electrician to install an outdoor 10A GPO electrical outlet within 2
metres of the pump if there is not one there already.
7. Suction
This is the most important part of the installation as errors will cause signicant
problems for the system in performance and longevity.
IMPORTANT: A gate valve must be installed at the tank outlet.
8
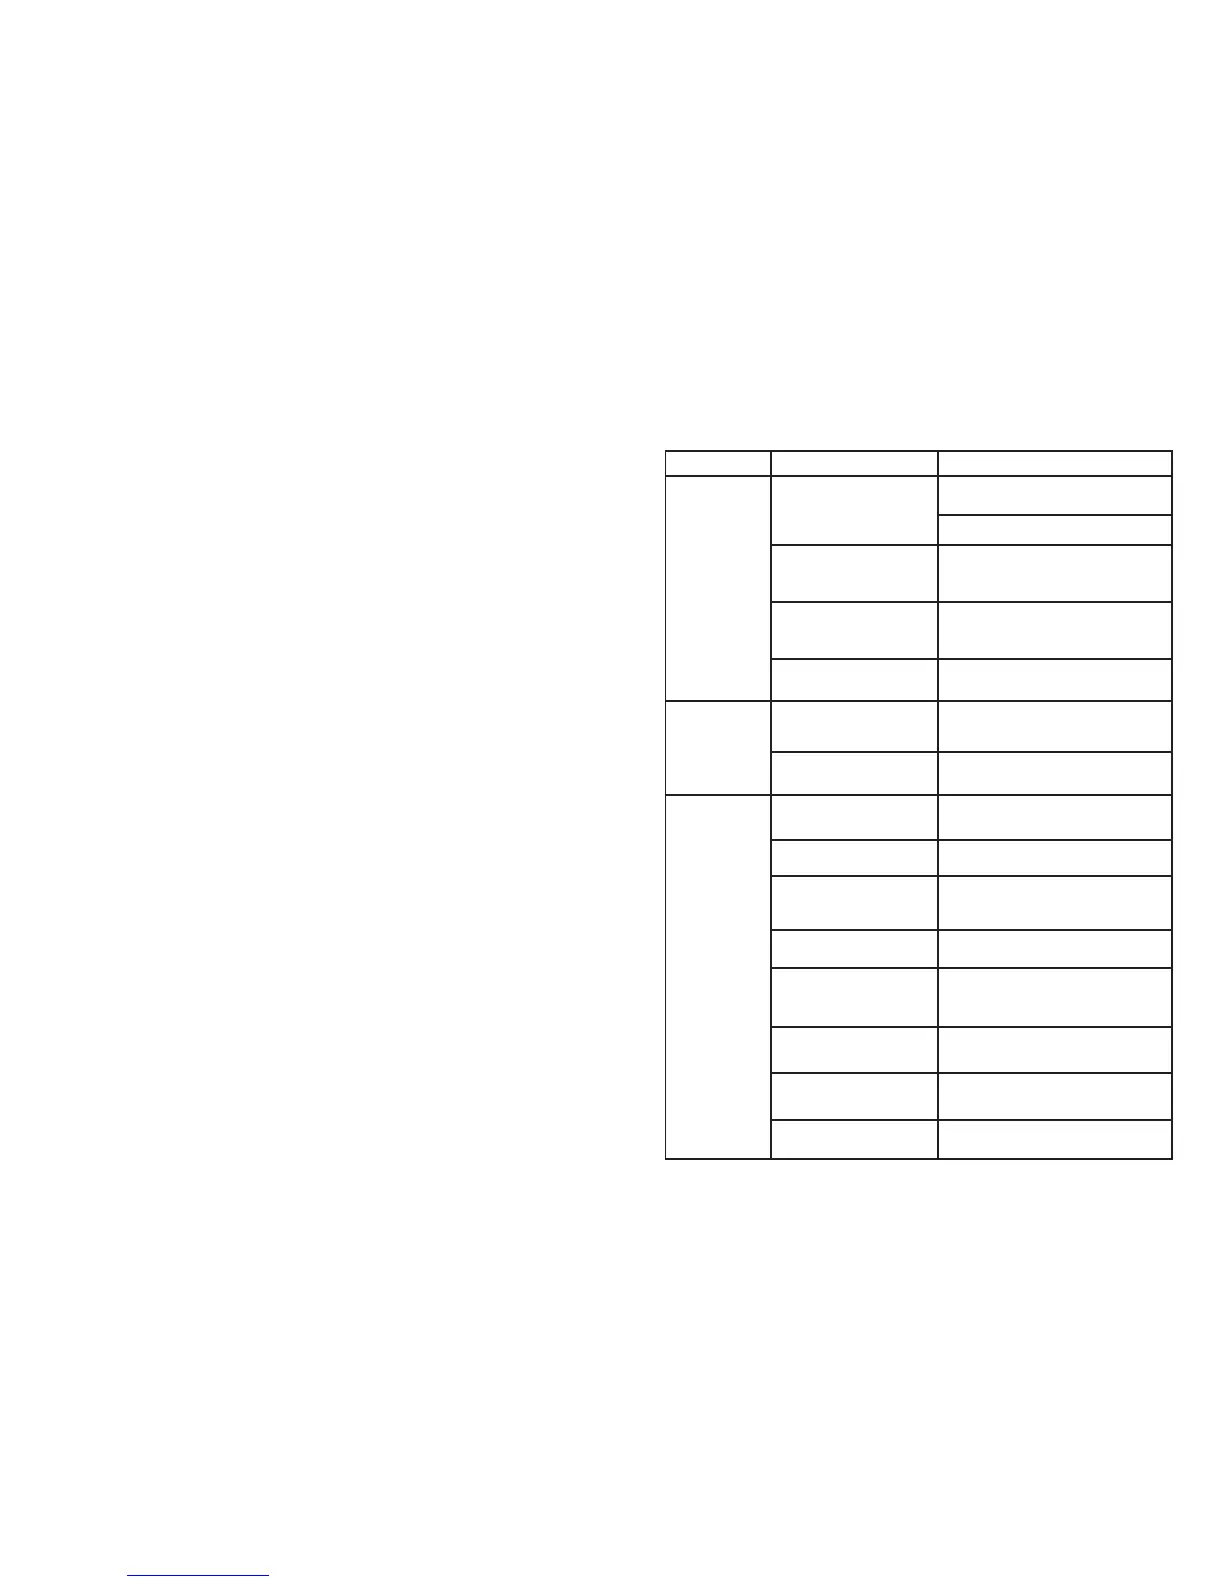
Symptom Cause Remedy
Pump does not
Start
No Electricity
Ensure that the pump is connected to a
live outlet.
Check Circuit breakers and Fuses
Pressure Controller has
detected that there is not
water in tank.
Check that there is enough water in the
tank, then press the “reset” or “Start”
button on the pressure controller.
Pump is blocked Disconnect the pump from the power
outlet, and check the pump housing and
discharge for foreign matter.
Defective Capacitor Call qualifed service technician
Pump will not
stop, even
though there is
no taps open.
Debris is caught in the
pressure controller
Take the pressure controller to your
dealer for service.
There are leaks in the
household plumbing
Find and x leaks
No Water From
Pump
Pump is not primed Ensure that pump body and suction line
are lled with water before starting.
Suction line is leaking Check the suction line for leaks
especially at joints.
Blockages in the pump or
discharge
Disconnect the pump from the power
outlet, and check the pump housing and
discharge for foreign matter
Valves Closed Check all valves on the tank, pump, and
outlets.
Not enough water in the
tank to pump.
Wait until there is more water in the tank.
Press the ‘reset’ or ‘start’ button on the
pressure controller.
Pump does not produce
enough pressure
Check and clean pump
Pressure Switch is out of
adjustment
Check system pressure and adjust
accordingly
In-Line lters or tap lters
are blocked
Clean lters
Troubleshooting
 Loading...