RJM Music Technology, Inc.
www.rjmmusic.com
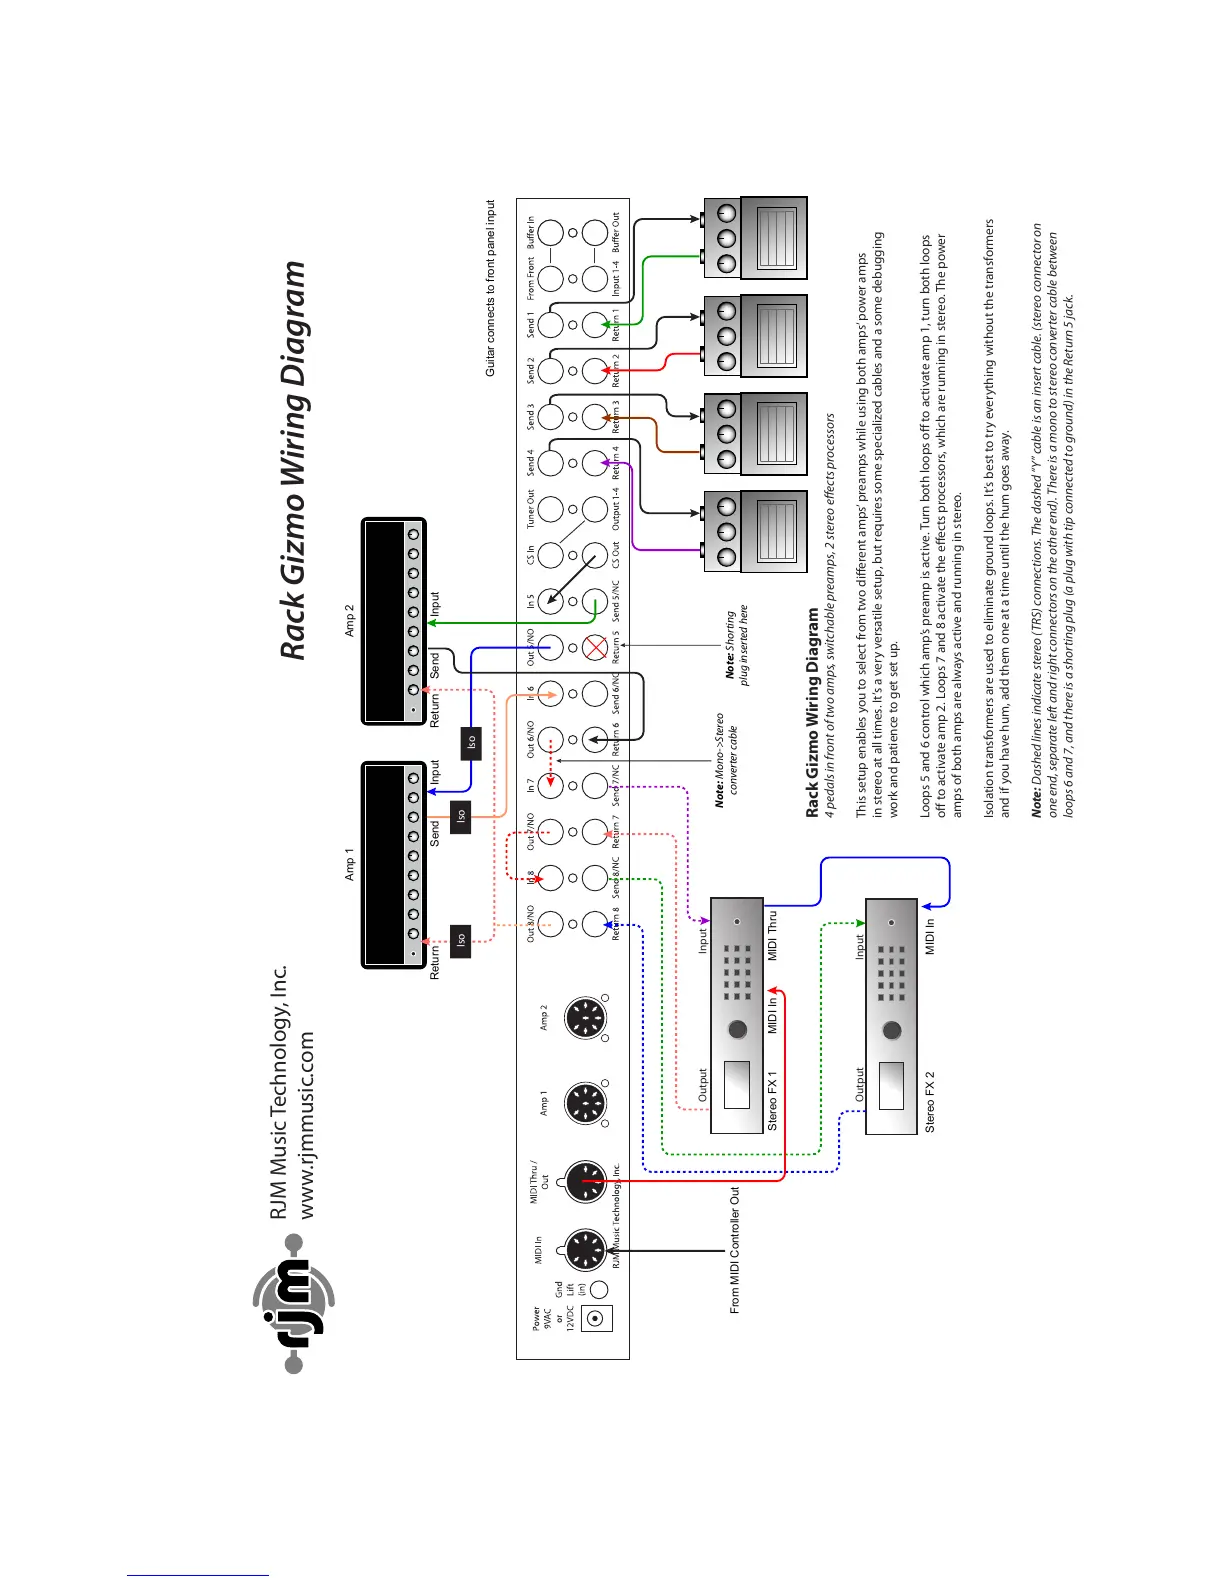
Rack Gizmo Wiring Diagram
Rack Gizmo Wiring Diagram
4 pedals in front of two amps, switchable preamps, 2 stereo eects processors
This setup enables you to select from two dierent amps’ preamps while using both amps’ power amps
in stereo at all times. It’s a very versatile setup, but requires some specialized cables and a some debugging
work and patience to get set up.
Loops 5 and 6 control which amp’s preamp is active. Turn both loops o to activate amp 1, turn both loops
o to activate amp 2. Loops 7 and 8 activate the eects processors, which are running in stereo. The power
amps of both amps are always active and running in stereo.
Isolation transformers are used to eliminate ground loops. It’s best to try everything without the transformers
and if you have hum, add them one at a time until the hum goes away.
Note: Dashed lines indicate stereo (TRS) connections. The dashed “Y” cable is an insert cable. (stereo connector on
one end, separate left and right connectors on the other end). There is a mono to stereo converter cable between
loops 6 and 7, and there is a shorting plug (a plug with tip connected to ground) in the Return 5 jack.
Guitar connects to front panel input
Output Input
InputOutput
Stereo FX 2
Stereo FX 1 MIDI Thru
MIDI In
MIDI In
Amp 1 Amp 2
Return ReturnSend SendInput Input
Iso
Note: Mono->Stereo
converter cable
Iso
Iso
Note: Shorting
plug inserted here
 Loading...