English 8 of 20
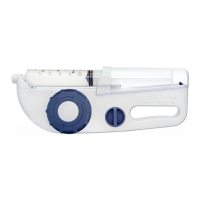
Insert Needles/Check for Blood Return:
1 Prepare Sites 2 Insert 3 Secure 4 Pull Back
5 Watch
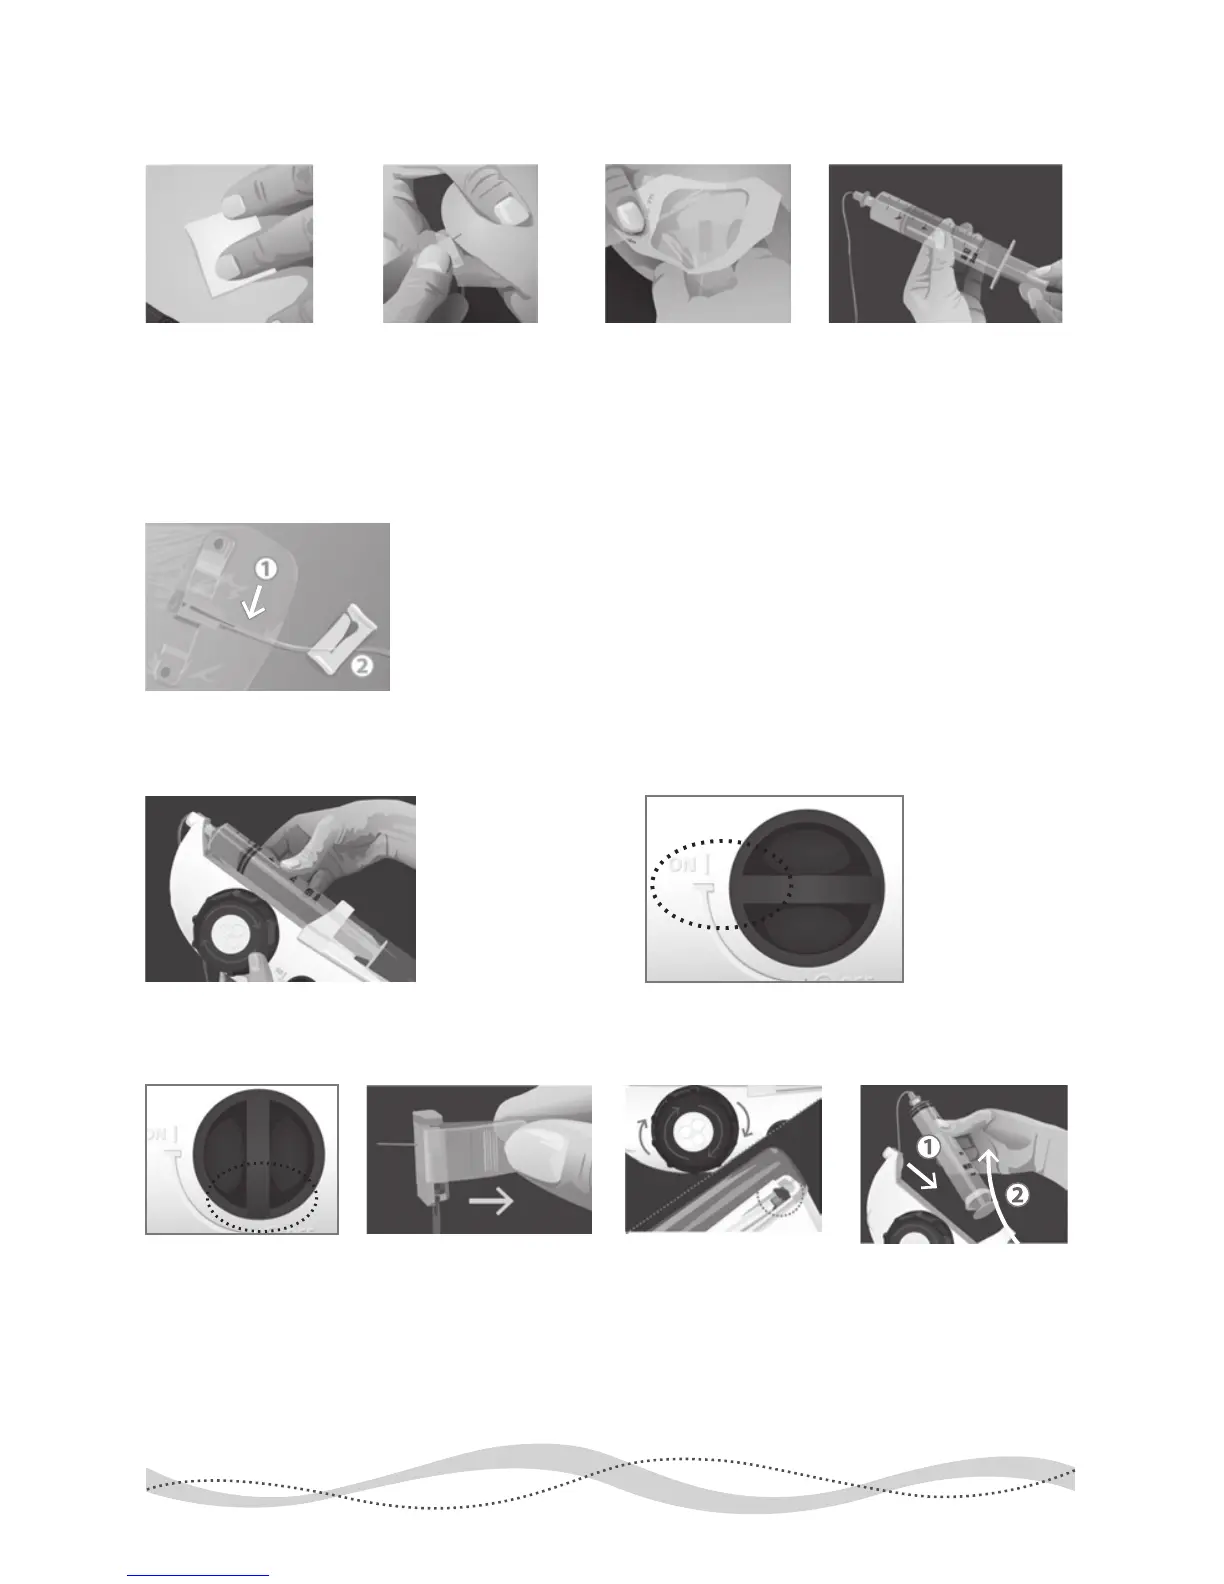
Begin Infusion:
1 Insert Syringe 2 Turn ON
After Infusion is Complete:
1 Turn OFF 2 Remove Needle(s) 3 Wind Back 4 Remove Syringe
1.
Watch to make sure no red/pink appears in tubing near your sites.
2.
If blood return exists, clamp the ow to that site and call your
healthcare provider to determine if the dose can be run using the
remaining sites. If so, continue. If not, remove all needles, attach a
new needle set and start again from step 6 of Prepare section.
Select your site(s),
cleanse with alcohol
and let dry. Carefully
remove shield from the
needle tip, with care
not to touch the needle.
Pinch the skin and
insert each needle
into the subcutaneous
tissue at a 90˚ angle.
Secure needle(s)
with adhesive
dressing.
Remove the syringe
from the syringe driver.
Check for blood return
by gently pulling back
on the syringe plunger.
With syringe
gradations facing
up, insert the
syringe back into
the syringe driver.
Turn the syringe
driver’s ON/OFF
switch to the
ON position.
Once infusion is
complete, turn the
syringe driver’s
ON/OFF switch to
the OFF position.
Hold needle in place
and peel back any ad-
hesive/dressing around
it. Remove needle(s) in
a straight motion,
opposite the direction
you inserted it.
Wind the large knob
until the black tab is
at the end of its track.
1. Pull syringe away from
the syringe driver’s nose
and, 2. remove syringe
from the syringe driver.
Cleanse each site and
cover with a bandage.
Discard all sharps and
biologics as required.