10 Easy Install Steps...
Note: Experiment with the camera posion before using the adhesive. You can ensure
the camera is poinng at the correct angle by using the RoadHawk Vision App to see a
live preview from the camera.
Install the camera at the top of your windscreen. Make sure the lens is not obstructed
by any materials on the windscreen. Install the camera so that it is not in view from
the driving posion. This is to ensure that the RoadHawk Vision’s super wide-angled
lens can capture as much of what is in front of it as possible.
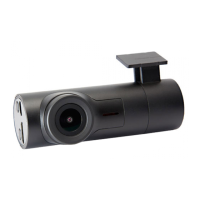
Installing the RoadHawk Vision camera:
1: Choose an area towards the top of the
windscreen and behind the rear view
mirror for the camera to sit.
2: Clean the screen with glass cleaner and
allow drying me.
3: Peel the adhesive backing away from the
camera mount and place rmly on the screen.
4: Leave the mount to bond for a few minutes.
5: Route the power cable neatly around the
windscreen. In some vehicles you might
be able to hide the cable completely by
pushing it into the gap between the
rubber and the screen.
6: Run the cable around the side of the
dashboard and underneath towards the
cigaree lighter socket. Use the cable
es to hide any remaining cable behind
the dash.
7: Aach the camera to the mount and face
it forwards. Keep the camera as level as
possible. (in a Truck or Bus, aim the
camera slightly down)
8: Plug the power cable into the camera.
9: Plug the cable into the vehicle’s accessory socket.
10: You are ready to start driving in the
knowledge that you are protected by
RoadHawk Vision’s complete video and
data protecon.
Now you have the RoadHawk Vision camera installed,
you can use the RoadHawk Vision app to see a live
image from the camera. Gently twist the camera unl
you get a level, forward facing image.
NOTE: It is possible for the RoadHawk Vision camera
to be hardwired to your vehicle. RoadHawk supply
an oponal “Hard Wiring Kit” to allow for this. It
is recommended to have an authorised vehicle
electrician carry out this work.
We recommend connecng the camera to an
ignion LIVE circuit so the camera only operates
when the vehicle is running. Connecng to a
permanent ‘live’ will make the camera run 24/7
and this will reduce the life expectancy of the
MicroSD Card.
Some vehicles have “always on” accessory sockets.
We recommend unplugging the camera from these
sockets when not in use.
Step 3
Step 4
Step 5
Step 6
Step 7
Step 9
7 8