17
DE/EN/FR
Abkürzungen: Mittelüssiger Sekundenkleber (SK), Holzleim (HL), 10min EpoxyHarz (EH)
Abbreviations: Medium-bodied superglue (SK), wood glue (HL), 10min epoxy resin (EH)
Abréviations: Colle cyanoacrylate mi-liquide (SK), colle à bois (HL), résine époxyde (EH) 10min.
BAU- UND BETRIEBSANLEITUNG / INSTRUCTIONS AND USER MANUAL / MANUEL D´UTILISATION
01
TRAGFLÄCHE / WING / AILES
KIT
02
KIT
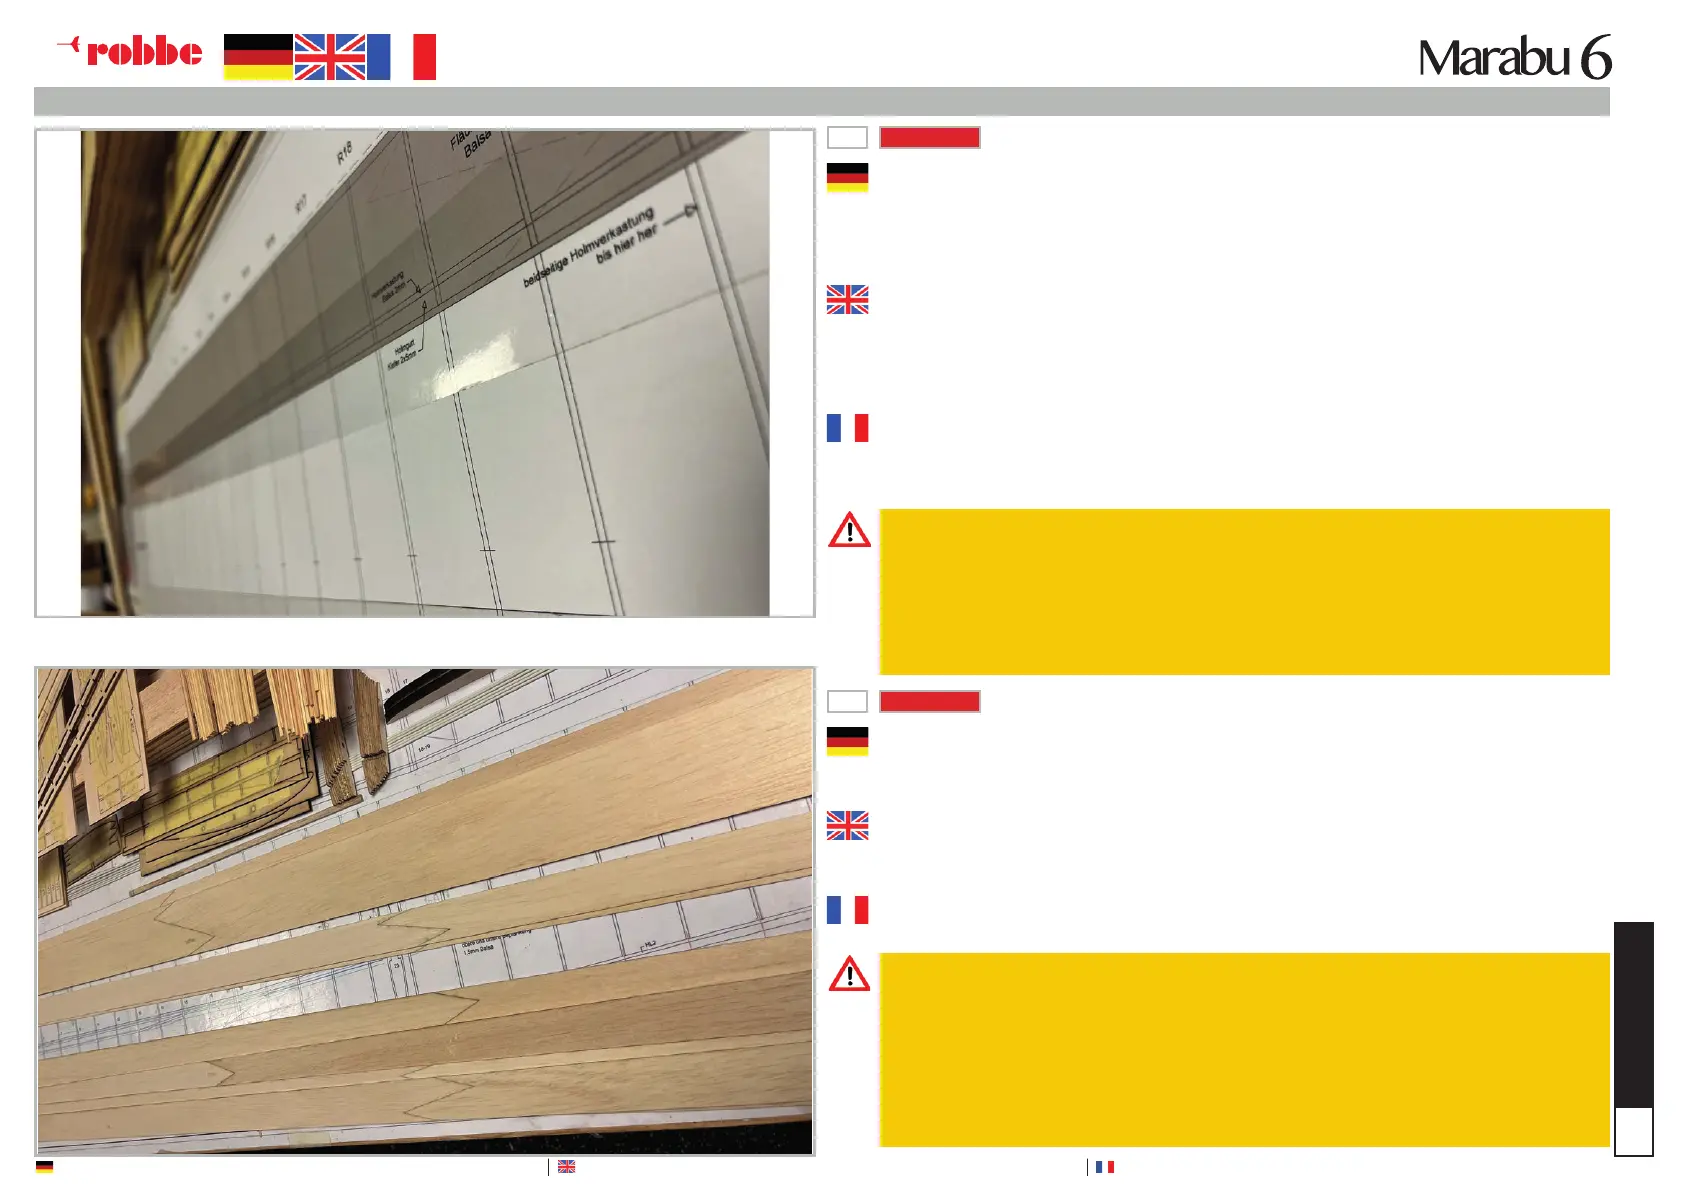
Bauplan wieder an den Klebestellen der Holzteile mit transparentem Paketklebeband schüt-
zen. Die beiden Steckungsstähle, 4mm und 3mm, im Schraubstock eingespannt, in die erfor-
derlichen V-Form biegen – 12°.
Unteren und oberen Holmgurt aus 2x5 Kieferleisten über dem Bauplan bzw. an einer geraden
Linie ausgerichtet, zusammenkleben.
Protect the construction plan again at the gluing points of the wooden parts with transparent
parcel tape. Clamp the two steel bars, 4 mm and 3 mm, in a vice and bend them into the
required V-shape - 12°.
Glue together the lower and upper spar chord from 2x5 pine strips aligned over the building
plan or on a straight line.
Protéger à nouveau le plan de construction aux endroits de collage des pièces en bois avec
du ruban adhésif transparent. Plier les deux tiges en acier à emboîter, 4mm et 3mm, serrés
dans l‘étau, dans la forme en V requise - 12°.
Coller les membrures inférieure et supérieure de 2x5 lattes de pin sur le plan de construction.
Gleiches Prozedere mit den Endleisten (1mm Balsa) und der vorderen Nasenbeplankung der
Fläche (1,5mm Balsa).
Follow the same procedure with the end strips (1 mm balsa) and the front nose planking of the
wing (1.5 mm balsa).
Même procédure avec les baguettes d‘extrémité (1mm de balsa) et le bord d‘attaque de
l‘aile (1,5mm de balsa).
Achtung: Nach dem Aushärten, den Gurt unbedingt in der Höhe kontrollieren und wenn
nötig auf 2mm runterschleifen!
Caution: After curing, check the height of the belt and grind down to 2 mm if necessary!
Attention:Après le durcissement, contrôler impérativement la hauteur de la bande et la pon-
cer si nécessaire jusqu‘à 2 mm !
Achtung: Die Fläche wird am Rücken liegend aufgebaut!! Ober und Unterseite bei den Be-
zeichnungen nicht verwechseln!
Caution: The wing is assembled lying on its back! Do not confuse the top and underside with
the designations!
Attention:La surface est construite en position couchée sur le dos ! Ne pas confondre les
désignations de la face supérieure et de la face inférieure !