25
DE/EN/FR
Abkürzungen: Mittelüssiger Sekundenkleber (SK), Holzleim (HL), 10min EpoxyHarz (EH)
Abbreviations: Medium-bodied superglue (SK), wood glue (HL), 10min epoxy resin (EH)
Abréviations: Colle cyanoacrylate mi-liquide (SK), colle à bois (HL), résine époxyde (EH) 10min.
BAU- UND BETRIEBSANLEITUNG / INSTRUCTIONS AND USER MANUAL / MANUEL D´UTILISATION
16
TRAGFLÄCHE / WING / AILES
KIT
17
KIT
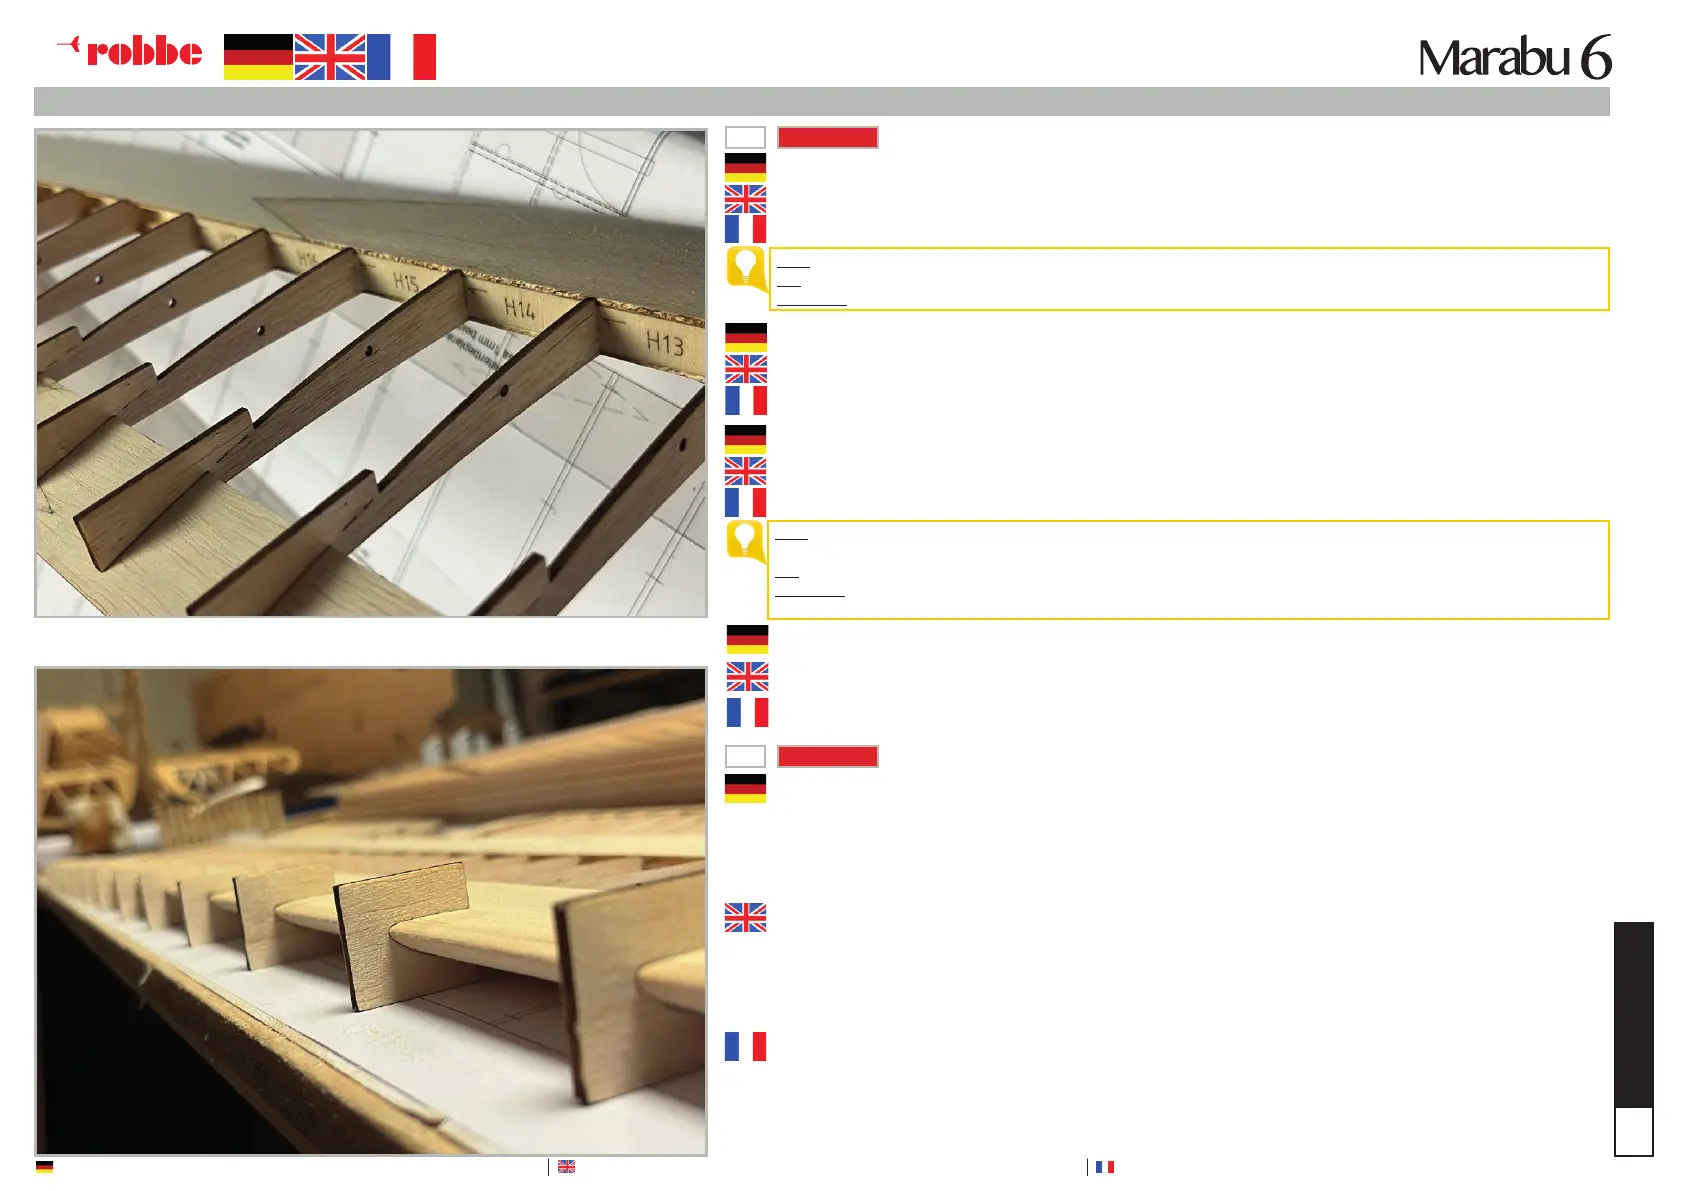
Die hintere Holmverkastung (H1 bis H17) wir mit Leim eingeklebt.
The rear spar connectors (H1 to H17) are glued in with wood glue.
Le renfort arrière (H1 à H17) est collé avec de la colle.
Das Aufkleben der Deckrippe erfolgt am besten dann, wenn beide Flächenhälften zusammengesteckt und gegeneinan-
dergepresst werden können. Als Trennschicht zwischen den Rippen kann transparentes Paketklebeband verwendet wer-
den. Die Verklebung erfolgt hier mit aufgedicktem Harz, um auch gleich entstandene Spalte aufzufüllen. Die Flächenhälfte
ist somit rohbaufertig. Die Nasenleiste wird mithilfe der beiliegenden Schablonen prolgetreu hergestellt. Zum Abschluss
wird noch FL1 auf der Flächenoberseite an der Endleiste im Wurzelbereich aufgeklebt (HL). Mit der anderen Flächenhälfte
wird in gleicher Reihenfolge aufgebaut. Ist die Fläche fertig geschliffen, ist das Spaltmaß an der Flächensteckung zufrie-
denstellend, kann mit dem Folieren begonnen werden.
The cover rib is best glued on when both halves of the wing can be pushed together and pressed against each other.
Transparent parcel tape can be used as a separating layer between the ribs. Bonding is carried out here with thickened
resin to ll any gaps that have formed.
The wing half is now structurally completed. The leading edge is produced true to prole using the enclosed templates.
Finally, FL1 is glued to the top of the wing at the end strip in the root area (HL).
The other half of the wing is assembled in the same order. Once the wing has been sanded and the gap dimension at the
wing joint is satisfactory, the foiling can begin.
Le collage de la nervure de couverture s‘effectue de préférence lorsque les deux moitiés de la surface peuvent être as-
semblées et pressées l‘une contre l‘autre. On peut utiliser du ruban adhésif transparent comme couche de séparation en-
tre les nervures. Le collage s‘effectue ici avec de la résine épaissie an de combler les fentes qui se sont formées. La moitié
de la surface est donc prête pour le gros œuvre. Le nez est fabriqué selon le prol à l‘aide des gabarits fournis. Pour nir,
on colle encore FL1 sur la face supérieure de la surface au niveau de la baguette nale dans la zone de la racine (HL). La
construction se fait dans le même ordre avec l‘autre moitié de la surface. Lorsque le ponçage de la surface est terminé et
que l‘écart au niveau de l‘emboîtement de la surface est satisfaisant, l´entoilage peut commencer.
TIPP: Der Pfeil auf den Bauteilen zeigt immer Richtung Randbogen!
TIP: The arrow on the components always points in the direction of the wing tip!
CONSEIL: La èche sur les éléments de construction est toujours dirigée vers l‘arc de bord!
Die Rippenfüsse werden abgetrennt.
The ribbed feet should be cut off.
Les pieds des côtes sont coupés.
Die obere Wurzelbeplankung ergänzt (HL).
The upper root planking supplemented (HL).
Compléter la partie supérieure (HL).
TIPP: Die beiden Teile zuerst auf der ebenen Bauplatte zusammenkleben und danach auf der Fläche an-
passen und aufkleben.
TIP: First glue the two parts together on the at building board and then adjust and glue them to the wing.
CONSEIL: Coller d‘abord les deux parties sur la plaque de construction plane, puis les ajuster et les coller sur
la surface.
Nun folgt noch die Deckrippe (R0) und der Randbogen (3x 8mm und 1x 3mm Balsa) (HL). Überstehende
Leisten und Beplankung vorher mit der Endrippe bündig schleifen.
Now follows the deck rib (R0) and the wing tip (3x 8mm and 1x 3mm balsa) (HL).
Sand protruding strips and planking ush with the end rib beforehand.
Il ne reste plus que la nervure de pont (R0) et l‘arc de bord (3x 8mm et 1x 3mm Balsa) (HL).
Poncer au préalable les baguettes et le parement qui dépassent pour qu‘ils soient à eur de la nervure nale.
 Loading...