Assembly instructions
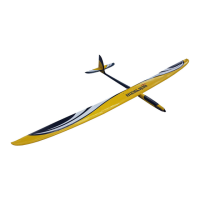
U 47
Order No.
1114
- Fit the screw 19.2 in the machine gun mount 19.1 and fix it
to the deck. Secure the screw with a drop of Loctite (F).
- Glue the machine gun barrel 19.3 to the shoulder braces
19.4.
- Place the two yoke components 19.5 against the gun barrel
and glue them to the gun mount.
- Drill out the hand-wheel 19.6 and glue it to the left-hand
yoke component together with the shaft 19.7.
36
Stage 20, installing the RC system, parts 20.1 - 20.24
Part No. Description Material Size in mm No. off Notes
20.1 Tube Plastic 20 long 6
20.2 Dowel Beech 6 ø x 30 6
20.3 Extension lead —- 400 long 4 Not included
20.4 Receiver —- Ready made 1 Not included
20.5 Receiver battery, 4.8 V —- Min. 1 Ah 1 Not included
20.6 Double-sided tape Plastic 1.6 x 19 x 50 4
20.7 Aerial sleeve Metal 1
20.8 Whip aerial Steel wire 1 ø x 330 1
20.9 Aerial connector Metal 1
20.10 Plug / insulator —- 2 mm ø 6/3 Not included
20.11 Battery —- 6 V/5 Ah 2 Not included
20.12 Connecting lead —- 1 mm
2
2 Not included
20.13 Socket / insulator —- 6/3 Not included
20.14 Connecting lead —- 1 mm
2
2 Not included
20.15 Solder tag —- Ready made 6
20.16 Connecting screw Brass M3 x 10 2
20.17 Shakeproof washer Steel 3 ø 2
20.18 Nut Brass M3 4
20.19 Speed controller —- Ready made 1 Not included
20.20 Relay —- Ready made 1 Not included
20.21 Self-tapping screw Steel 2.2 ø x 6.5 2
20.22 Connecting lead —- 1 mm
2
1 Not included
20.23 Propeller, R/L Plastic 35 ø 1 each
20.24 Rubber band --- 1 x 6 x 60 4
- Cut the pieces of tube 20.1 to form the cable guides (F).
- Cut the six dowels 20.2 to length and glue them in the cen-
tral holes in the battery bulkheads.
- Connect the four extension leads 20.3 to the servos and the
switch harness. Run the switch harness cable forward on
the right-hand side, and the servo cables on the left. Slip
three pieces of plastic tube 20.1 on each pair of cables.
- Run the four extension leads through the holes and ope-
nings in the base frame and connect them to the receiver
20.4 and the receiver battery 20.5, taking care to connect
them to the appropriate sockets.
- Attach the receiver and receiver battery using strips of
double-sided tape 20.6.
- Run the receiver aerial (attached to the receiver) through
the base plate, route it to the rear along the I-beam strip and
run it upwards. Remove the last 30 cm from the wire and
solder the socket 20.7 to the cut end. Glue the socket to the
rear pipe cover on the inside.
- Solder the whip aerial 20.8 to the plug 20.9. Form a loop in
the top end of the aerial to avoid the danger of eye injury.
- Run the motor power cables 5.7 forward through two pieces
of tube on the right-hand side. Glue the right-hand tubes in
place in such a position that the cables are well supported
but the connectors are still easily accessible.
- Solder the plugs 20.10 to the motor cables but do not fit the
insulator at this stage.
- Attach the connecting cables 20.12 and sockets 20.13 to
the batteries 20.11 and push the insulator into place. Check
that battery polarity is correct.
- Make up the connecting lead for the front and rear batteries
from parts 20.14, 20.10 and the solder tags 20.15. Do not
connect the batteries yet.
- Glue the plug insulator (20.10) securely to the base plate
and the side panel 1.12.
- Fit connecting screws 20.16 to the black and red wires
20.14 and fix them to the base plate using the shakeproof
washers 20.17 and nuts 20.18.
- Mark the positive (+) terminal with a red felt-tip pen, and the
negative (-) terminal with a black pen.
- Glue the left-hand tubes 20.1 to the underside of the base-
plate.
- The model does not use a BEC system, so it is necessary
to remove the red wire from the receiver plug attached to
the speed controller 20.19 and insulate the bare end.
- Remove the connectors fitted to the thick cables attached to
the speed controller.
- Attach the sockets 20.13 to the blue / white cables and push
the insulator into place.
 Loading...