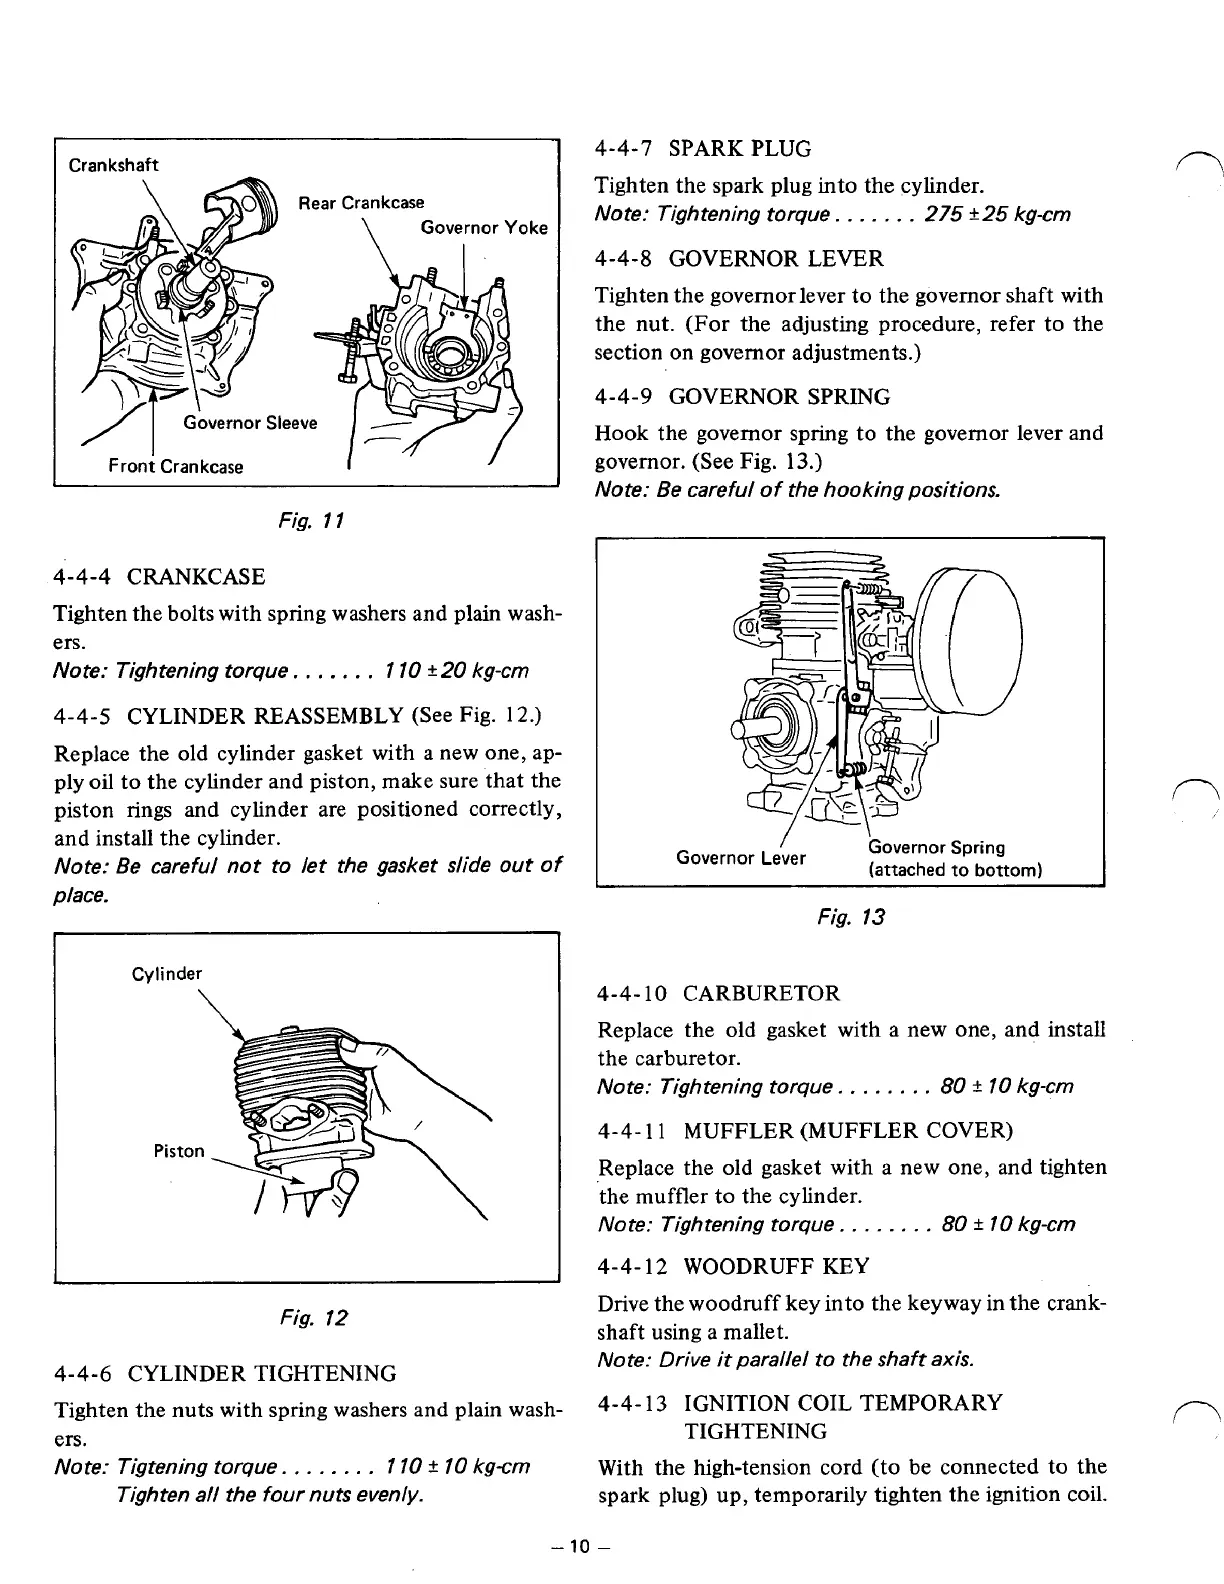
Crankshaft
I
Rear Crankcase
\
Governor
Yo
I
Governors'
E
1
ke
Front Crankcase
I
'I
Fig.
1
1
4-4-4
CRANKCASE
Tighten the bolts with spring washers and plain wash-
ers.
Note: Tightening torque
.
.
.
.
.
.
1
10
f
20
kg-cm
4-4-5
CYLINDER REASSEMBLY
(See
Fig. 12.)
Replace the old cylinder gasket with a new one, ap-
ply oil to the cylinder and piston, make sure that the
piston
rings
and
cylinder are positioned correctly,
and install the cylinder.
Note: Be careful not to let the gasket slide
out
of
place.
Cylinder
Fig.
12
4-4-6
CYLINDER TIGHTENING
Tighten the nuts with spring washers and plain wash-
ers.
Note: Tigtening torque.
.
. .
.
.
.
.
1
10
k
IO
kg-crn
Tighten all the four nuts evenly.
4-4-7
SPARK PLUG
Tighten the spark plug into the cylinder.
Note: Tightening torque.
.
. .
. .
.
275
+25
kg-crn
4-4-8
GOVERNOR LEVER
Tighten the governor lever to the governor shaft with
the nut. (For the adjusting procedure, refer to the
section on governor adjustments.)
4-4-9
GOVERNOR SPRING
Hook the governor spring to the governor lever and
governor. (See Fig.
13.)
Note: Be careful of the hooking positions.
/
Governor Spring
(attached
to
bottom)
Governor Lever
n
Fig.
13
4-4-
10 CARBURETOR
Replace the old gasket with
a
new one, and install
the carburetor.
Note: Tightening torque
.
.
.
.
. .
.
.
80
2
IO
kg-cm
4-4-
11 MUFFLER (MUFFLER COVER)
Replace the old gasket with a new one, and tighten
the muffler to the cylinder.
Note: Tightening torque
. .
.
. .
.
.
.
80
f
IO
kg-cm
4-4-
12 WOODRUFF
KEY
Drive the woodruff key into the keyway in the crank-
shaft using a mallet.
Note: Drive it parallel
to
the shaft axis.
4-4-
13
IGNITION
COIL
TEMPORARY
n
TIGHTENING
With the high-tension cord (to be connected
to
the
spark plug) up, temporarily tighten the ignition
coil.
-
10
-