Sounds to signalise end of charge:
There is a choice of 10 different melodies for signalling. Pressing the Start-button will play the selected melody.
Sound repeat will select the time to repeat the signal after charging is completed and may be set between 0 and 50 seconds. This will make
sure that any accidental cut-off will be noticed. To switch off the signal press any key or disconnect the battery.
CHARGING
Connecting a battery:
Connect the battery to charge to the front side wires - red to the positive (+) pole and black to the negative (-) pole. Reverse connecting the
battery sounds an alarm.
To start charging:
Correctly connected batteries will show "RDY" and the battery voltage on the mutlifunctional display.
Pressing the Start-button will start the charging process. The control LED lights up to confirm the charging process. The charging current,
battery voltage, temperature and time elapsed since start will be shown on the display.
End of charging:
Charging will be terminated automatically whenever the Delta Peak voltage or the preset temperature is reached and will be made heard
by a melody. The time for charging and charged capacity will be shown on the display.
To manually terminate the charging process just press the Start-button again (LED goes off).
Preset profiles:
TIP:
For better battery care we recommend our Robitronic Equalizer Discharge Tray (# RS111).
Regular use of our discharge tray should prolonge lifetime and enhance performance of your packs.
Specifications:
·
Quick single cell discharge of saddle or side-by-side packs.
·
Automatic cut-off at 0,8 V/cell to prevent deep discharge.
·
Equalises discharge level for all cells.
·
LED indiactor for single cells.
·
Suited for packs with or without soldered socket connectors.
TROUBLESHOOTING
Asterix in current display:
Whenver an asterix is shown on the display near the charging current the current had to be reduced because of overload conditions.
To correct this problem reduce the supply voltage or reset the charging current to a lower setting.
Wrong display of temperature:
Strange or constantly changing values for the temperature display indicate a broken wire to the probe. As this may lead to false cut-off one
should disable the temperature cut-off as a quick work-around. Repair of the defective temperatue probe is recommended.
Charging won't start:
"OFF" is still displayed after pressing the Start-button: Check for correct connections, broken wires or defective cells.
Robitronic EXPERT Charger - Instructions
Features:
·
EXP-3P-Software for Expert-charging control in 3 steps
·
Programmable charging modes for NiMH and NiCd batteries
·
Charging capability: 4 to 8 cell packs
·
Charge rate adjustable between 0,1 and 10 Amps
·
Peak voltage and/or temperature cut-off detection (may be used in combination)
·
6 different pre-programmed charge profiles (may be modified individually)
·
Backlit multifunctional display
·
Display of input voltage, charge time, capacity, charge current,
battery voltage, peak voltage and battery temperature
·
Internal resistance is displayed when using EXP-3P mode
·
Automatic charge resume after power source failure
·
Built-in delay timer for programmable start of charging
·
Adjustable trickle charge rate (may be switched off for NiMH)
·
Input Voltage between 12 and 15 V= (automotive battery or stabilised power supply)
·
Overload protected power MOSFETs
·
Reverse voltage protection circuit
·
Select one out of 10 melodies to signalise "charging completed"
·
User selectable repeat rate for charging completed melody
·
Choice of temperature display in Celsius or Fahrenheit
General information:
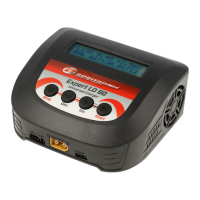
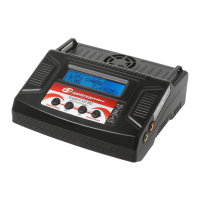
The Robitronic Expert is a computerised high performance charger. It was developed with ergonomics and reliability in mind. The backlit
multifunctional display provides total information about the charging progress and the state of the battery on charge.
ATTENTION
When using high current settings internal pressure may build up during the recharging process causing a risk of explosion when charging
old or defective cells. Therefore always keep the charger and batteries on charge well away from small children.
When charging from an automotive battery avoid contact between output leads and car body. Positive wire is connected straight through
from input to output shorting out the car battery when this happens.
CONNECTIONS
Connect the red wire (positive) and the black wire (negative) from the backside(!) of the Expert Charger
to a suitable power supply.
Suitable power supplies are automotive batteries or stabilised power supplies with a high enough output
current rating and an output voltage between 12 and 15 V=.
Connecting the charger the wrong way will trigger an electronic protection circuit. If this happens there is
no need to change a blown fuse, just connect the charger correctly (red wire to + and black wire to -).
MULTIFUNCTIONAL DISPLAY
Overview:
!
Robitronic Electronic Ges.m.b.H.
-
Stutterheimstrasse 16-18/2
*
A-1150 Vienna
*
Austria
Tel.: +43-1-982 09 20
*
Fax: +43-1-982 09 21
*
Em@il: info@robitronic.com
*
Homepage: http://www.robitronic.com/
Input +/-
Output +/-
Multifunctional Display
Minus (-)
button
Plus (+)
button
Led
Start/Stop
Setup
Menu
Sound
Repeat
Rate:
0 sec
Sound
Nr:
1
Play
=
START
Key
No. Method Current setting Delta Peak Peak-Lock Temperature Trickle Best for
1 Linear 5.0A 8mV/cell 0min 50°C No NiMH
2 EXP-3P 9.0A / 6.0A / 4.0A 50°C No NiMH
3 Linear 5.0A 20mV/cell 0min 50°C Ye s NiCd
4 EXP-3P 9.0A / 6.0A / 4.0A 50°C Yes NiCd
5 Linear 4.5A 8mV/cell 5min 50°C No NiMH reduced current setting
6 EXP-3P 7.5A / 4.5A / 3.5A 50°C No NiMH reduced current setting
Attaching the temperature probe
English
1
Main display
Timer display
Charging profil
Charging mode
Linear
Temperature and trickle
Select melody
Select repeat rate
CHG
23.5 C
03:14
6.0A
9.25
0264
o
--->>
SETUP
<---
StartTimer
0min
Profil
#:
1
Chg-MMode:
EXP-33P
Chg-MMode:
Linear
Current
:
5.0A
Current:
3-PPhase
9.0A
6.0A
4.0A
Current:
5.0A
Overcharge:
3min
Peak:
8
mV/cell
Peak-LLock:
0min
CutOffTemp: 50 C
Trickle
:
No
Sound
Repeat
Rate:
0 sec
Sound
Nr:
1
Play
=
START
Key
o
Charging mode
EXP-3P
Peak Voltage
Peak Lock
4. charging
phase
Version 2