5
You can also watch how
to set up Robo C2:
robo3d.com/c2-qsg
x4
x4
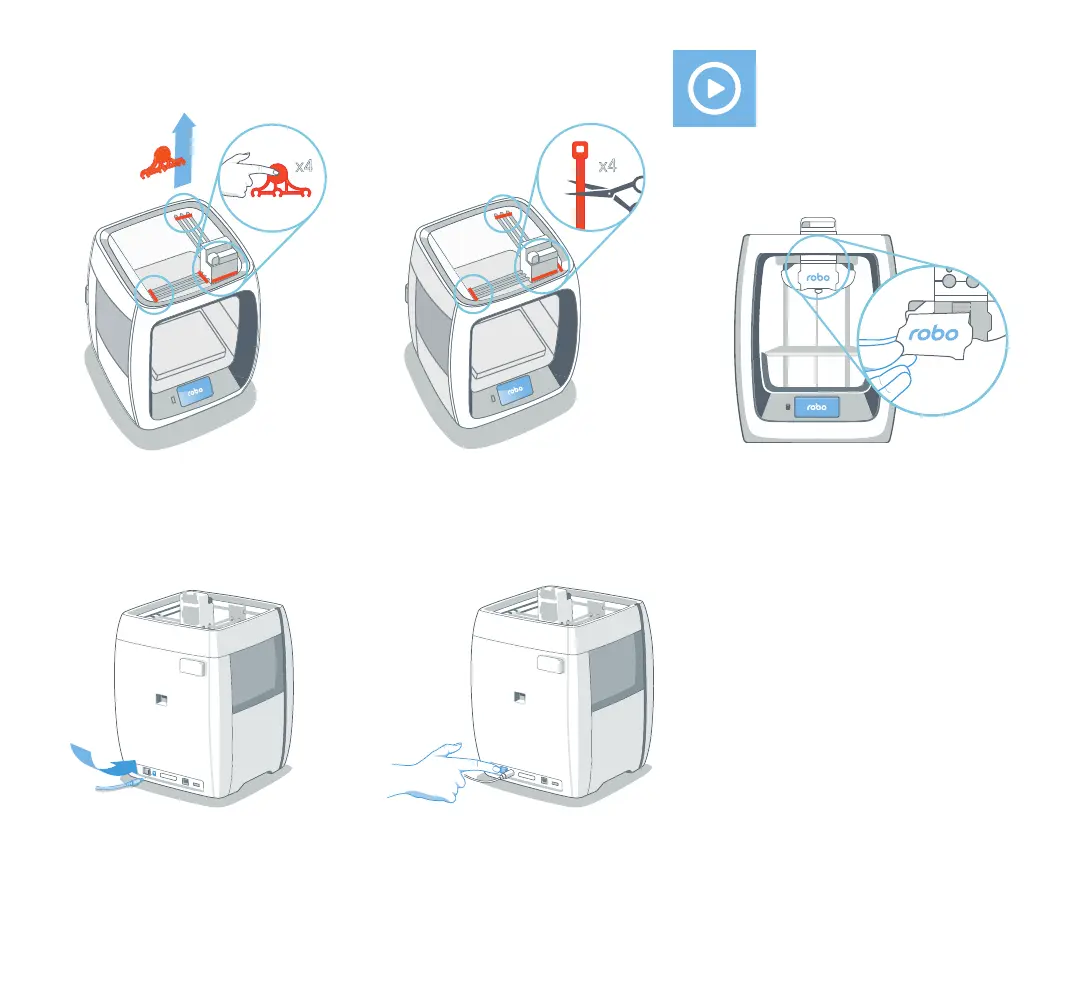
Step 2 Initial set-up
1. Remove the four orange protective
gantry clips by pushing them over
sideways with your thumb on the clip’s
round area (do not pull straight up).
2. Cut four zip ties.
5. Turn on Power Switch.
3. Magnetically attach Extruder Face
Plate to extruder assembly.
4. Connect Power Supply and cable, then
plug into power outlet.
Note: Only use Power Supply provided.