EasyManua.ls Logo

Robomow RS User Manual

Robomow RS
4 pages
To Next Page IconTo Next Page
Page #1 background imageLoading...
Page #1 background image
* 0-5 Min.= CHF 0.08/Min. ab/à partir de 6 Min.= CHF
1.40/Min. beim schweizerischen Festnetz. Pour
le téléphone fixe Suisse Mobilfunkkosten können
abweichen/Les coûts téléphoniques mobiles
peuvent dévier.
** Max 0.35 p/m.
Mowing Schedule is On
Mowing Schedule is Off
Mower is in winter charging
Battery is in charging
Battery is fully charged
Next operation time
Mowing Height
Indicator
Mowing Adjustment Knob
(Push & Turn)
Safety Switch
Chap. 3.1
Docking
Indicator
On/Off
Button
Wire
Indicator
Operating
Indicator
Chap. 2.9
button is used to
cancel selection and to
move one step back in
the menu
Reference
Rain Sensor
GO button is used to
select menu option or
to confirm displayed
message.
Current Day and Time Anti-theft is activated Scroll arrows for menu selection
DOC6013E
For all MS models:
AT. 01/ 267 59 45
BE. 070.660.124**
CH. 0900.888.101*
CZ. 800.909.898
DE. 0691 532 00808
DK. 70 25 23 23
FI. 093 157 9150
FR. 03.68780407
IT. 840.22.22.00
LU. 0900.4300.4090**
NL. 0900.762.6669**
NO. 32 82 99 40
PL. +48.58.770.94.45
SE. 08 5250 8480
For all RS models:
AT. 01/ 267 59 45
BE. 070.660.124**
CH. 0900.888.101*
CZ. 800.909.898
DE. 0691 532 00808
DK. 70 25 23 03
FI. 093 157 9150
FR. 03.68780407
IE. 0862 550801
IT. 840.22.22.00
LU. 0900.4300.4090**
NL. 0900.762.6669**
NO. 4000.7719
PL. +48 58 770 94 45
RU. +7(495)544.24.14
SE. 0771.895.895
GB. 01522 283007
Question and Answer IconNeed help?

Do you have a question about the Robomow RS and is the answer not in the manual?

Robomow RS Specifications

General IconGeneral
Rain SensorYes
Mobile AppYes
Perimeter WireYes
Battery TypeLithium
Slope Capability20 degrees
Charging Time90-110 minutes
GPS NavigationNo

Summary

Robomow Reference Guide

Mower Status and Indicators

Displays key operational states like mowing schedule, battery charge, and system alerts.

Control Panel Features

Details buttons, menu options, and settings for mower operation and customization.

Physical Controls Overview

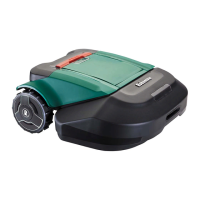
Identifies physical components such as height adjustment, safety switch, and power buttons.

Wire Setup Instructions

Base Station Location

Guidelines for positioning the charging base station, including distance from corners.

Wire Direction and Distance

Instructions on laying the perimeter wire, its direction, and spacing from edges.

Corners and Wire Bending

Recommendations for handling corners, including angles and wire spacing.

Obstacles in the Lawn

Guidance on how to manage obstacles, both soft and hard, with wire placement.

Multiple Zones and Narrow Passes

Strategies for setting up multiple lawn zones and navigating narrow passages.

Completing Wire Installation

The final steps for connecting the perimeter wire to finish the setup.

Base Station Installation Steps

Charging Adaptor Handling

Instructions on removing and assembling the charging adaptor for the base station.

Wire Connection

Procedure for connecting the perimeter and boundary wires to the base station.

Stake Installation

Guidance on inserting stakes to secure the base station and wire connections.

Power Box and Setup

Power Box Installation

Steps for installing the power box and connecting it to the mains power.

One-Time Setup Process

Initial setup tasks including inserting the fuse and language selection.

Related product manuals