16
Robomow S models
Chapter 3 Preparing Robomow
Before using Robomow for the first time, you have to perform
some simple preliminary settings. Once preparations are complete,
your Robomow will be ready to mow your lawn.
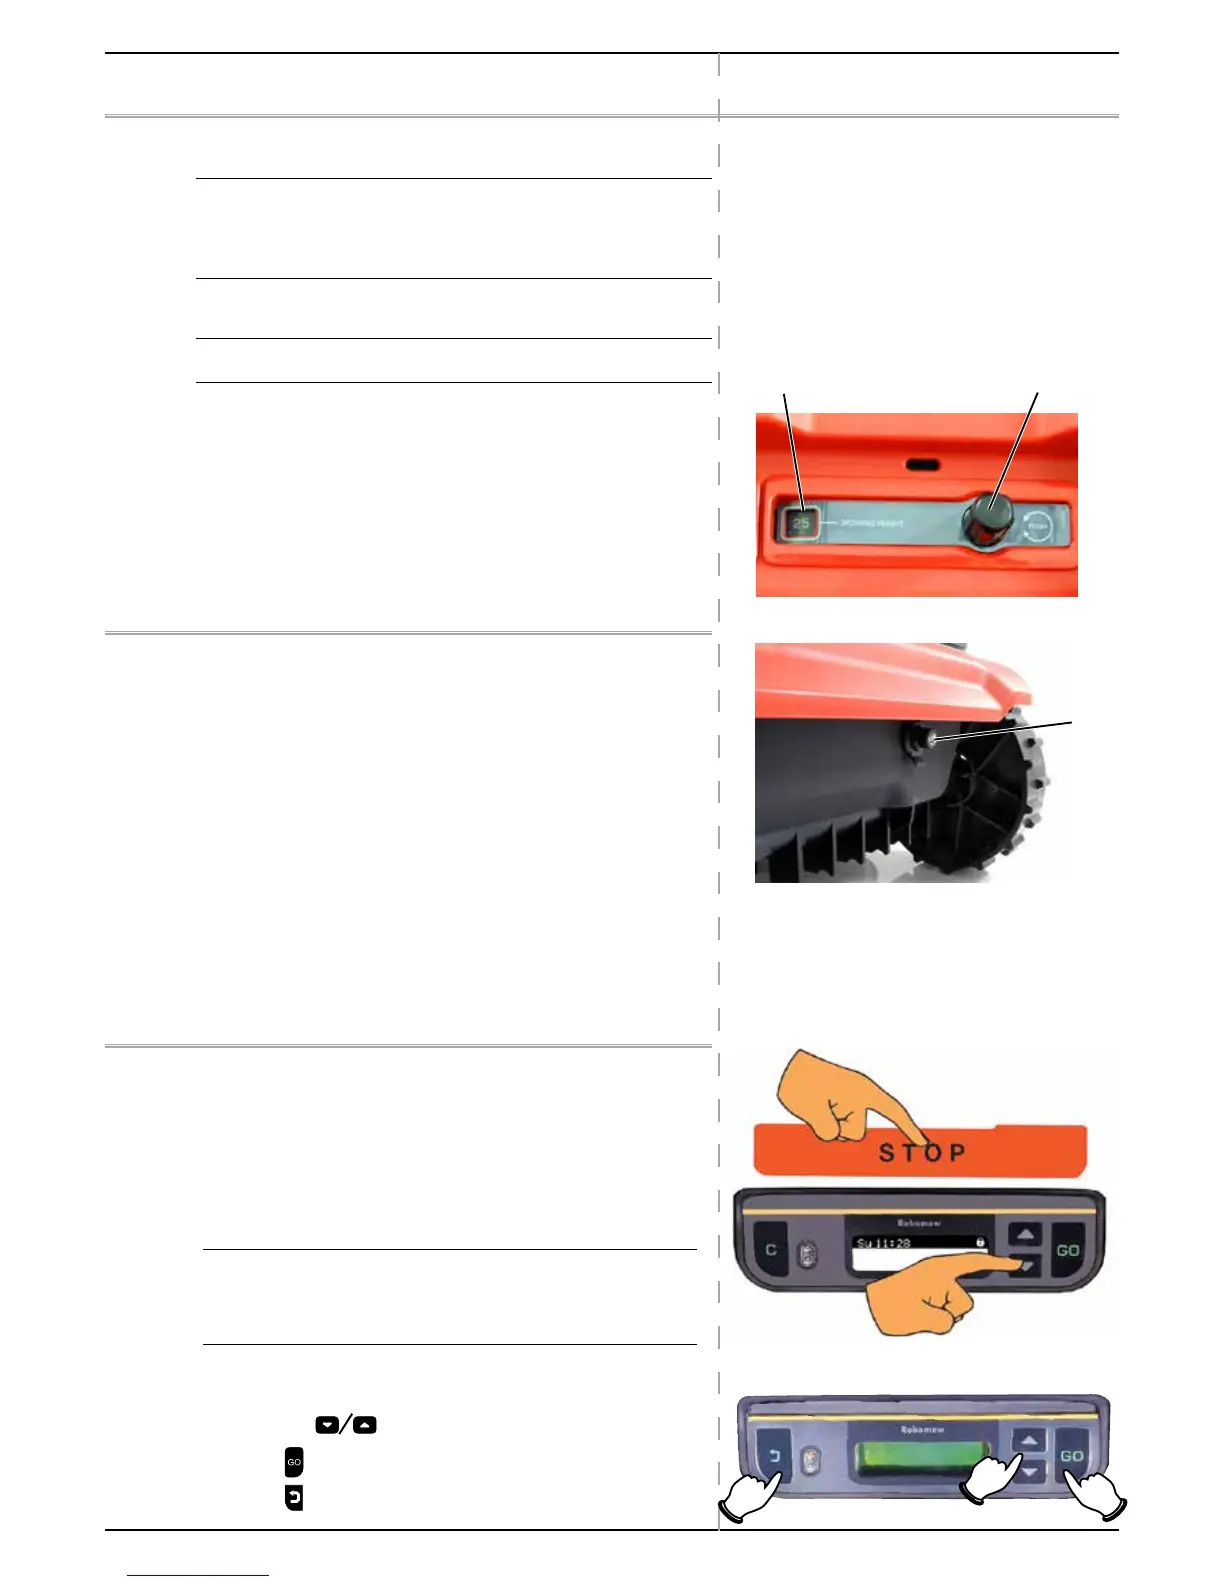
3.1 Adjust the Cutting Height
Blade Cutting Range: 20 – 80 mm (0.8 – 3 inches)
To adjust the cutting height of the blade, do the following:
P Lift the Door panel at the top of the mower.
P Turn the knob (A) while pushing it down.
) To raise the cutting height, turn Anti Clockwise.
) To lower the cutting height, turn Clockwise
P The cutting height (B) is displayed to the left of the knob (A).
3.2 Insert the Fuse
Your Robomow is shipped with the fuse removed.
The fuse is packed in a plastic bag attached to the top
of the Mower.
P Remove the fuse from the small plastic bag provided.
P Unscrew the fuse holder (C) from the mower.
P Place the fuse into the fuse holder.
The fuse can be inserted in either direction.
P Insert the fuse with holder back into the mower, and screw until
fully closed.
Robomow will now power up (wake up).
The batteries are sufficiently charged to allow for performing
the One-Time Setup.
3.3 One-Time Setup (Step By Step)
Once the fuse is inserted, we are ready to perform the One-Time
Setup process.
P Make sure the Power Box is plugged in.
P Place Robomow inside the lawn, approximately 3 m (10 ft.) in
front of the Base Station, facing the Perimeter Wire.
IMPORTANT ! In order to restart the One-Time Setup at any point
press and hold STOP + Down arrow buttons together for more than
4 seconds, as shown on the drawing to the right. This will invoke
the Factory Default settings of the mower.
Use the buttons on the Front Panel as follows:
P Press the
arrows until your selection is displayed.
P Press
to select the value shown on the display.
P Press
to go back or to cancel.
AB
C
Front Panel buttons
 Loading...
