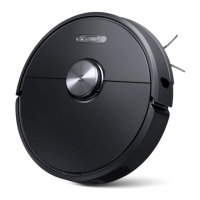
10
C9
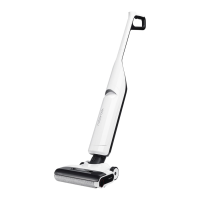
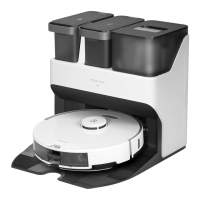
Drying
Drying starts automatically after self-
cleaning is completed. To manually start
or stop drying, press the
button on the
docked vacuum cleaner.
Routine Maintenance
D
To maintain optimal performance of the
product, refer to the following table for
routine maintenance.
Parts
Maintenance
Frequency
Replacement
Frequency
Roller 2–4 weeks 6–12 months
Filter 1 month 6–12 months
Cleaning head
and dirty water
pipe
1 month N/A
Dirty tank 1 month N/A
Charging dock As needed N/A
D1–1—Take out the dirty tank, pull out the
cover, and take out the filter from the
cover. Remove any trash attached
to the filter using the provided
maintenance brush. If the filter is
dirty, rinse it with cold water and
Product Maintenance
Wipe and clean the vacuum cleaner with a
soft and dry cloth. Before cleaning, remove
the vacuum cleaner from the charging dock
and switch it off.
Cleaning the Vacuum Cleaner
If this product is left unused for a
prolonged period of time, fully charge it and
unplug it before storing it in a cool and dry
place. Do not place the product in humid
locations or under direct sunlight. Charge
it at least once every 3 months to avoid
overdischarge.
D1
Cleaning the Dirty Tank and
Filter
The frequency of replacement may vary with the
actual situation. If abnormal wear occurs, replace the
parts immediately.
Note:
Notes:
• The product is equipped with a built-in high-
performance lithium-ion rechargeable battery pack.
To maintain battery performance, keep the product
charged for normal use.
• Self-cleaning can only be used when the vacuum
cleaner is charging and the battery level is ≥10%. Do
not lift the vacuum cleaner during the self-cleaning
process.
• Always place the vacuum cleaner on the charging
dock after use to prevent water stains.
Parts
Maintenance
Frequency
Replacement
Frequency
Charging
contacts
1 month N/A
Roller cover 2–4 weeks N/A
then shake off the residual water.
Notes:
• Use a second filter if necessary.
• Do not touch the filter with your hands, brushes, or
sharp objects to avoid damage to the filter.
D1–2—Dry all parts thoroughly before
installing them back in place.
• Use the maintenance brush carefully to avoid injury.
• Before you clean the roller, make sure that the
vacuum cleaner is switched off or in upright and
locked position
Notes:
D2–1—
D2–2—
D2–3—
D2–4—
Press the release buttons on both
sides of the cover simultaneously and
lift the cover upwards to detach it.
Press the buttons on one side of the
roller and pull the roller out from
the side. Remove any dirt attached
to the roller using the provided
maintenance brush, and rinse it with
clean water.
Rinse the detached roller cover with
clean water.
Reinstall the roller and roller cover in
the correct order.
D2
Cleaning the Roller and
Roller Cover