08
Product Introduction
A
Product Installation
B
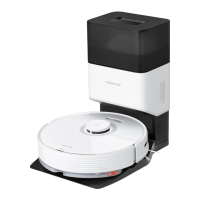
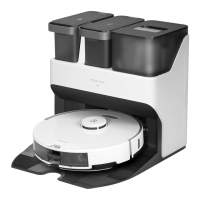
A3–1—Charging Contacts
B1–1—
B2–2—
B2–3—
B2–1—
B1–2—
Insert the handle into the vacuum
cleaner until it clicks in place. The
screen should face forward.
Place the charging dock on a flat,
hard surface and then plug it into
the socket.
The maintenance brush can be
placed in the groove behind the
charging dock.
Place the charging dock upside
down, connect the power cord into
the bottom of the charging dock, and
store the extra cord inside the power
cord storage slot as required.
To remove the handle, hold the
handle firmly and pull it out while
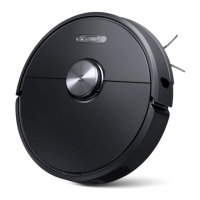
• Press: Start/Pause
• Press and hold for 2 seconds while in
upright and locked position:
Switch off
• Press while charging: Start/
Stop drying
• Press: Switch to AUTO/MAX/
ECO mode
• Press while charging: Start/
Stop self-cleaning
• Press and hold for 2 seconds while
charging: Start DEEP mode
—Power
—
Change Mode
—Self-Clean
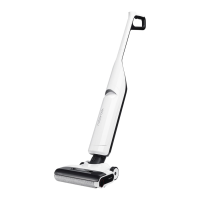
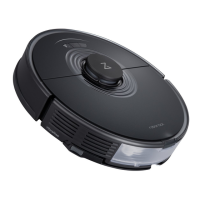
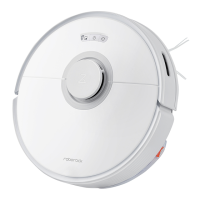
A1–1—Handle
A1–2—Handle Release
A1–3—Dirty Tank Release
A1–4—Dirty Tank
A1–5—LED Display
A1–6—Clean Tank Release
A1–7—Clean Tank
A1
Vacuum Cleaner
A2
Screen Functions
A3
Charging Dock
A4
Power Cord
A5
Filter
A6
Maintenance Brush
B1
Installing and Removing
the Handle
B2
Connecting the Charging
Dock
Power cord can exit from either side.Note:
Do not place the charging dock in humid
locations or near any heat sources, such as bathrooms,
kitchens, or radiators.
Note:
A2–1—Dirt Level
A2–2—ECO Mode
A2–3—Charging
A2–4—Battery Level
A2–5—AUTO Mode
A2–6—MAX Mode
A2–7—Error
A2–8—Drying
inserting a hard object into the hole
on the back of the vacuum body to
press the release button.
Instructions for Use
C
• Press: Adjust volume/Turn on or off
• Press and hold for 5s while charging:
Enter language selection mode,
short press to switch languages,
press and hold to select current
language
—
Voice
Language Selection
1. Place the vacuum cleaner on the
charging dock and press and hold
for 5 seconds, enter language selection
mode.
2. Press
to switch languages. When you
hear the language you want to use, press
and hold
for 5 seconds to select the
language.
A1–8—Cleaning Head
A1–9—Roller Cover Release
A1–10—Roller Cover
A1–11—Roller