This document is a user manual for the Roborock Q7+ Robotic Vacuum Cleaner. It provides comprehensive instructions for its operation, maintenance, and troubleshooting, along with important safety warnings and compliance information.
Function Description
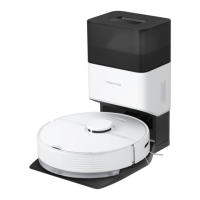
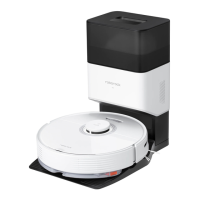
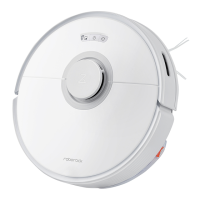
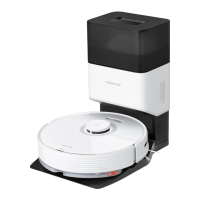
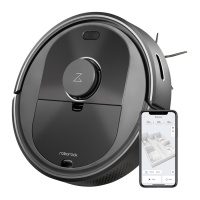
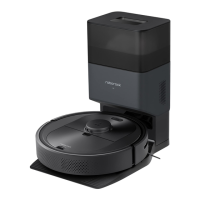
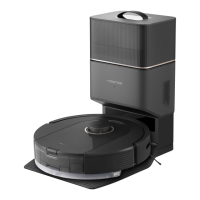
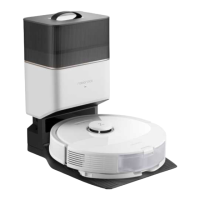
The Roborock Q7+ is a robotic vacuum cleaner designed for automated floor cleaning. It features both vacuuming and mopping capabilities to efficiently clean various floor types. The device can be controlled manually via buttons on the robot or remotely through a dedicated mobile application (Roborock or Mi Home app). It is equipped with a charging dock that also functions as an Auto-Empty Dock, allowing the robot to automatically empty its dustbin after cleaning.
Usage Features
Power and Cleaning Control:
- On/Off: Press and hold the Power/Clean button to turn the robot on or off. The power indicator will show the battery level (white for ≥20%, red for <20%).
- Start Cleaning: Press the Power/Clean button to initiate a cleaning cycle. The robot plans its route by scanning the room, splitting it into zones, drawing zone edges, and then cleaning in a zigzag pattern.
- Spot Cleaning: Press and hold the Docking/Spot Cleaning button to start spot cleaning. The robot will clean a 1.5 m x 1.5 m square area centered on itself. After spot cleaning, it returns to its starting point and enters Standby mode.
- Docking/Charging: Press the Docking/Spot Cleaning button to send the robot back to its charging dock. The power indicator pulses while charging. If the robot fails to find the dock, it will return to its starting location, and you may need to place it on the dock manually.
- Pause: Press any button to stop the robot during operation. Press the Power/Clean button to resume cleanup or the Docking/Spot Cleaning button to send it back to the dock and end the current cleanup.
- Sleep Mode: If paused for over 10 minutes, the robot enters sleep mode, and the power indicator flashes slowly. Press any button to wake it up. The robot will not sleep while charging and will automatically shut down if left in sleep mode for more than 12 hours.
- Auto-Emptying: Auto-emptying begins when the robot returns to the dock after cleaning. You can also manually trigger emptying by pressing the Dock button on the Auto-Empty Dock. Press any button to stop emptying.
Mopping Module Usage:
- Water Flow Adjustment: The mopping module allows for adjustable water flow. Slide the switch down to increase water flow and up to decrease it.
- Water Tank Filling: Remove the water tank stopper, fill it with clean water (avoiding cleaning fluid or disinfectant to prevent corrosion), and close it.
- Mop Cloth Installation: Dampen the mop cloth, wring it until it stops dripping, and insert it into the bottom attachment slot, sticking it firmly in place.
- Mopping Module Installation: Slide the mopping module along the back of the robot until it clicks into place.
- Mopping Recommendations: For best results, vacuum floors at least three times before initial mopping. Use No-Go Zones or roll up carpets to prevent the robot from mopping them. Clean the mop cloth after 60 minutes of mopping to maintain performance.
- Mopping Module Removal: After cleaning, press the latches on both sides of the mopping module and slide it backward to remove it. Wash the mop cloth after each use and regularly empty the water tank to prevent odor. Remove the mopping module when not mopping.
App Connectivity:
- Downloading the App: Download the "Roborock" or "Mi Home" app from the App Store or Google Play.
- Resetting WiFi: Open the robot's upper cover, find the WiFi indicator, and press and hold the Power/Clean and Docking/Spot Cleaning buttons until you hear "Resetting WiFi." The WiFi indicator will flash slowly, indicating it's ready for connection.
- Adding Device: Open the chosen app, tap "Search for device" or "+" in the top right corner, and follow the in-app instructions to add the robot. The robot supports 2.4 GHz WiFi. If it waits more than 1 hour for a connection, WiFi will be automatically disabled, requiring a reset to reconnect.
App Features:
- Cleaning Map: Multi-Map Management, Real-Time Vacuum and Mop Route, Map Zoning, Map Editing.
- Custom Cleaning Modes: Scheduled Cleaning, Selective Room Cleaning, Zone Cleaning, No-Go Zones & Invisible Wall, Custom Modes, Carpet Boost.
- Cleaning Mode Switch: 4-Level Suction Power.
- Robot Information: Cleaning History, Battery Level, Care & Maintenance.
- More Features: Firmware Upgrade, Volume Adjustment, DND Mode, Voice Assistance Support.
Do Not Disturb (DND) Mode:
- The default DND period is 22:00 to 08:00. This can be disabled or modified via the app. When DND is active, the robot will not automatically resume cleanup, the power indicator light dims, and voice prompts are quieter. Auto-emptying will not be triggered if the robot returns to the dock in DND mode.
Maintenance Features
Regular maintenance is crucial for optimal performance and longevity of the Roborock Q7+.
Main Brush:
- Cleaning: Clean every 2 weeks. Turn the robot over, press the latches to remove the main brush cover, pull out the main brush, and remove the main brush bearing. Rotate the main brush caps in the unlock direction to remove them. Remove tangled hair or dirt from both ends of the main brush. Reinstall the caps, main brush, and cover, ensuring all four tabs are hidden.
- Replacement: Replace every 6-12 months.
- Notes: Wipe with a wet cloth and air dry away from direct sunlight. Do not use corrosive cleaning fluid or disinfectant.
Side Brush:
- Cleaning: Clean every month. Unscrew the side brush screw, remove the brush, clean it, and reinstall, tightening the screw.
- Replacement: Replace every 3-6 months.
Omni-Directional Wheel:
- Cleaning: Clean as needed. Use a small screwdriver to pry out the axle and wheel. Rinse the wheel and axle with water to remove hair and dirt. Air-dry, reinstall, and press the wheel and axle back in place. The wheel bracket cannot be removed.
Main Wheels:
- Cleaning: Clean every month with a soft, dry cloth.
Dustbin and Washable Filter:
- Cleaning: Clean every week. Open the upper cover of the robot, take out the dustbin, and remove the washable filter. Empty the dustbin. Fill the dustbin with clean water, gently shake, and pour out the dirty water (use only clean water, no cleaning liquid). Rinse the washable filter repeatedly and tap it to remove dirt.
- Replacement: Replace the filter every 6-12 months.
- Notes: Do not touch the filter surface with hands, brushes, or hard objects to avoid damage. Leave the dustbin and washable filter to dry completely before reinstalling.
Mop Cloth:
- Cleaning: Clean after each use. Remove the mop cloth from the mopping module, wash, and air dry.
- Replacement: Replace every 3-6 months.
- Notes: Always remove the mop cloth after cleaning to prevent dirty water from leaching back into the clean water tank. A dirty mop cloth compromises washing performance.
Filter Components (in Mopping Module):
- Replacement: Replace every 1-3 months. Move your finger along the notch to remove each filter and insert new ones, ensuring proper installation. This depends on water quality and usage frequency.
Dust Bag (Auto-Empty Dock):
- Replacement: Replace as needed. Remove the dustbin cover vertically, lift the dust bag out, and discard it. The dust bag handle seals the bag to prevent leakage. Install a new dust bag along the slot and replace the dustbin cover. Clean the filter with a dry cloth.
Air Duct (Auto-Empty Dock):
- Cleaning: Clean as needed. Unscrew the 10 screws, remove the cover, and wipe the air duct and cover with a dry cloth. Reinstall the cover and screw it back in place.
Robot Sensors:
- Cleaning: Clean every month. Use a soft, dry cloth to wipe all sensors, including the Dock Locator, Wall Sensor, and four Cliff Sensors.
Charging Contact Areas:
- Cleaning: Clean every month. Use a soft, dry cloth to clean the charging contacts on both the dock and the robot.
Battery Care:
- The robot uses a high-performance lithium-ion rechargeable battery. To maintain battery performance, keep the robot charged during normal use. If storing the robot for a long period, turn it off, charge it fully, and store it in a cool, dry place. Recharge it at least every three months to prevent over-discharge.
Troubleshooting and Error Handling:
- The manual provides a detailed table of common errors (e.g., LiDAR blocked, bumper stuck, wheels suspended, main brush jammed, low battery) and their solutions, often involving cleaning sensors, relocating the robot, or restarting.
- For persistent problems, contact Roborock support.
Environmental Protection:
- The built-in lithium-ion battery contains chemical substances that can cause environmental pollution. When disposing of the robot, remove the battery (after it's fully drained and the robot is off and disconnected from the dock) and hand it to a professional recycling facility. Avoid damaging the battery pack to prevent short-circuits or leakage. In case of accidental contact with battery fluid, rinse with water and seek medical care.