4
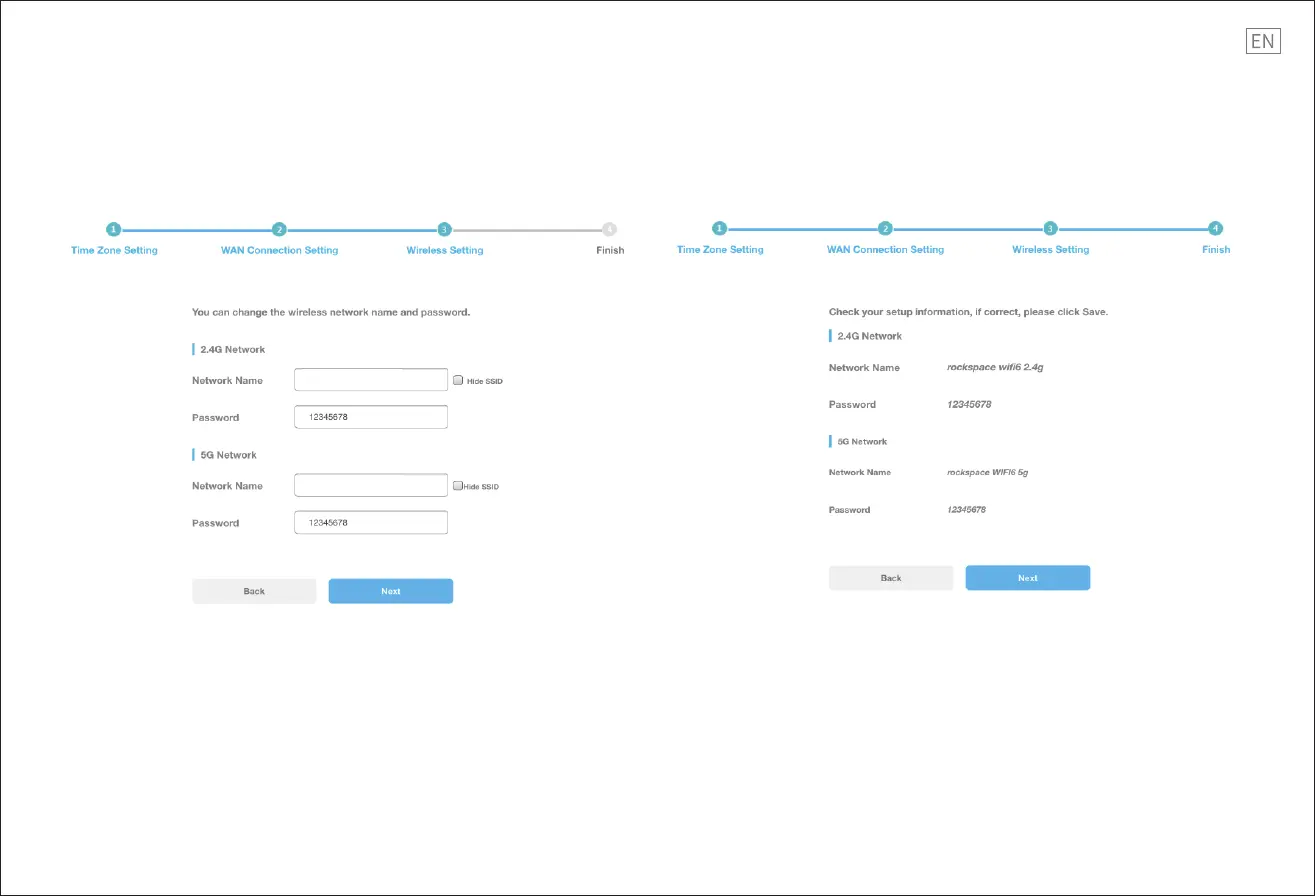
Step 5: Finish setting.
Conrm your network name and password and click ”Next”.
Note: After this setting, the router will reboot again. Go to your WI-FI network list and nd the
SSID named by yourself. The WiFi-enabled devices can connect to the AX1800 router by entering
the new password. And the wired devices connected to the router can access the internet
directly now. If you want to modify the settings, please log in the management page (IP address
is 192.168.1.1) again after completing the initial settings.
Note: If you have hidden one or two network name, you should follow the instructions below
after nishing the setup.
Turn on the smart phone. Then click “Settings>WLAN>Add Network”. And ll in the network
name you have hidden. Such as ”rockspace-WiFi6-2.4g”. Click “Connect”, and enter the new
password. You will connect the network successfully.
Step 4: The wireless setting.
Customize your Wi-Fi name (SSID) and Wi-Fi password. You can also hide the SSID, and click
“Next”.
rockspace-WiFi6-2.4g
rockspace-WiFi6-5g

 Loading...