Do you have a question about the rock space RSD0617 and is the answer not in the manual?
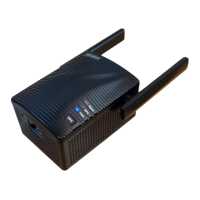
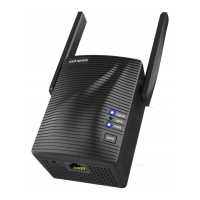
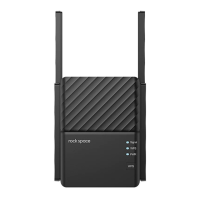
Identifies and explains the function of Signal LED, WPS LED, and Power LED indicators.
Instructions for powering on the extender and waiting for the Power LED.
Configure the extender via a web browser using its IP address.
Connect the extender to the router using the WPS button for quick pairing.
Guidance on finding the optimal placement for the extender between the router and dead zones.
Details on connecting wireless devices and Ethernet-enabled devices to the extender.
Recommendations for positioning the extender's antennas for best Wi-Fi performance.
Instructions on accessing and managing the extender's settings via its network.
Answers to common issues regarding setup, connection, and extender management.
Information on FCC regulations, interference, and user guidelines for the device.
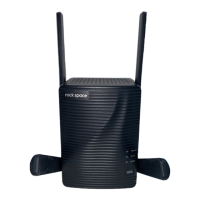
This document describes the rock space AC2100 Dual Band Wi-Fi Range Extender, Model No. RSD0617, a device designed to extend the coverage of an existing Wi-Fi network.
The rock space AC2100 Dual Band Wi-Fi Range Extender is a network device that boosts and extends the signal of an existing Wi-Fi router, eliminating Wi-Fi dead zones and providing a stronger, more reliable internet connection throughout a home or office. It operates on dual bands, AC2100, indicating its capability to deliver high-speed Wi-Fi performance. The extender acts as a bridge, receiving the Wi-Fi signal from the main router and re-transmitting it to areas where the signal is weak or non-existent. It supports both wireless and wired connections, allowing users to connect devices either over Wi-Fi or via an Ethernet cable for a stable, high-speed link.
1. Easy Setup Methods:
* Method 1: Via a Web Browser:
* Connect a computer or smartphone to the extender's default network ("rockspace_EXT").
* Access the web management page by entering 192.168.0.254 or re.rockspace.local in a web browser.
* Follow on-screen instructions to select the existing Wi-Fi network, enter its password, and create an admin password for the extender.
* The extender can use the same SSID as the router by default, simplifying network management.
* Method 2: Via the WPS Button:
* Press the WPS button on the main router.
* Within two minutes, press the WPS button on the extender.
* The Signal LED turning blue indicates a successful connection.
2. Flexible Relocation: * After initial setup, the extender should be placed approximately halfway between the main router and the Wi-Fi dead zone. * The Signal LED serves as a visual guide for optimal placement: blue indicates a good connection, while red suggests moving the extender closer to the router. * Avoid placing the extender too close to the router (which won't cover dead zones) or too far (which will lose connection).
3. Dual-Band Operation: * Leverages both 2.4 GHz and 5 GHz bands to provide versatile connectivity options, supporting a wide range of devices and applications, from basic browsing to high-bandwidth streaming and gaming.
4. Ethernet Port: * Allows for a stable, wired connection for devices such as smart TVs, gaming consoles, or desktop computers that benefit from a direct link to the network. This also enables the extender to function as a wireless adapter for wired-only devices.
5. Antenna Placement Guidance: * The manual provides specific recommendations for antenna orientation to maximize Wi-Fi coverage: * Single-storey building: Upper antennas straight up, lower antennas uptilted. * Multi-storey building: Upper antennas straight up, lower antennas straight down. * Users are advised not to block ventilation holes on the antennas for optimal performance.
6. Web Management Interface:
* Allows users to manage the extender's settings, including changing the extended network name (SSID), after initial setup by logging into http://re.rockspace.local.
1. Reset Functionality: * A dedicated Reset Pinhole allows users to restore the extender to its factory default settings. This is useful for troubleshooting persistent issues or reconfiguring the device. To reset, press the pinhole button for 8 seconds while the extender is powered on.
2. Troubleshooting Guide (FAQ): * The manual includes a comprehensive FAQ section addressing common issues: * Cannot access web management page: Provides steps like verifying network connection, trying different browsers, resetting the extender, and checking IP/DNS settings. * How to reset the extender: Detailed instructions for using the reset pinhole. * Extender cannot connect successfully to the router:
3. Technical Support:
* Offers FREE 24/7 online after-sales service via a QR code or https://rockspace.afterservice.vip.
* Provides a hotline: +1(833)816-6558 and email: techsupport@rockspace.cc.
* Service time: EST 9:00-17:00 / PDT 06:00-14:00, Monday to Friday.
* Users are encouraged to provide router model, extender model, and attempted solutions when contacting support.
4. Warranty:
* The manufacturer provides a 24-month warranty, emphasizing reliance on their official website (https://www.rockspace.cc) for information.
5. FCC Compliance: * The device complies with FCC rules (Part 15, Class B digital device), ensuring it meets standards for preventing harmful interference. * Includes a Radiation Exposure Statement, advising a minimum distance of 20cm between the radiator and the user's body. * Caution against unauthorized modifications to the equipment. * Recommends using a shielded RJ45 cable to avoid unnecessary radiation interference. * Restricted for indoor use.
| Brand | rock space |
|---|---|
| Model | RSD0617 |
| Category | Extender |
| Language | English |