Do you have a question about the rock space RSD0607 and is the answer not in the manual?
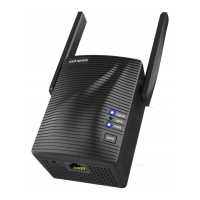
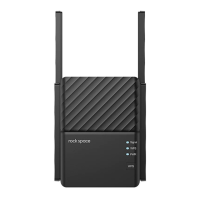
Describes the status of the Power LED: solid on, blinking, or off, indicating power status.
Details the WPS LED states: on, blinking, or off, related to WiFi security and connection.
Explains the Signal LED colors (solid blue, solid red, off) indicating connection quality.
Initial steps for placing the extender and applying power in the same room as the router.
Guide to connecting to the extender's WiFi and configuring network extension via web browser.
Instructions for moving the extender to an optimal location between the router and weak signal areas.
Initial placement and power-up for the WPS connection method.
Steps to connect using the WPS button on the router and extender.
Guidance on moving the extender after a successful WPS connection.
Troubleshooting steps for inability to log in to the repeater's web interface.
Instructions on how to perform a factory reset on the WiFi range extender.
Guidance on correctly pressing the RST button for a factory reset.
Advice for when the repeater fails to detect the existing WiFi network.
Solutions for login issues before and after extending the WiFi network.
Troubleshooting tips for not seeing the desired WiFi network.
Solutions for recurring failures during the WiFi extension process.
Interpreting indicator lights and troubleshooting weak signal or connection failures.
Steps to resolve issues where there is no internet access after extending the network.
Tips for improving poor extended WiFi signal strength.
Troubleshooting connection loss after a successful WiFi extension.
Resolving intermittent connection losses between devices and the repeater.
Diagnosing and fixing network unavailability issues post-extension.
Troubleshooting slow network speeds after extending WiFi.
Addressing the issue of strong signal but reduced speed after extension.
Resolving single frequency extension prompts and configuration issues.
Information regarding compliance with FCC radiation exposure limits.
This document describes the rock space AC750/AC1200 Dual Band WiFi Repeater (Models: RSD0607/RSD0608), a device designed to extend an existing WiFi network.
The rock space WiFi Repeater acts as a range extender, boosting the signal of an existing WiFi router to cover areas with poor or no WiFi signal. It supports dual-band operation (AC750/AC1200), allowing it to connect to both 2.4GHz and 5GHz networks. The device can be set up using two primary methods: a web browser setup or a WPS (Wi-Fi Protected Setup) button. Once configured, it creates an extended WiFi network, allowing client devices to connect to it for improved coverage. It also features an Ethernet port, enabling wired devices to connect to the extended network.
The repeater offers flexible setup and operation:
| Product Name | rock space RSD0607 |
|---|---|
| Category | Extender |
| Wireless Speed | Up to 1200Mbps |
| Security | WPA-PSK/WPA2-PSK |
| Button | WPS Button, Reset Button |
| Standards | IEEE 802.11ac/n/g/b |
| Frequency Band | 2.4GHz and 5GHz |
| Ports | 1 x 10/100Mbps Ethernet Port |
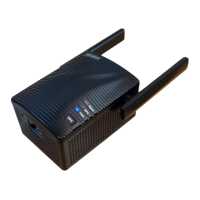
| Antennas | 2 External Antennas |
| LED Indicators | Power, WPS |