7
Check Rockler.com for updates to these instructions. If you have
further questions, please contact our Technical Support Department
at 1-800-260-9663 or support@rockler.com
4. Open the legs so that they form an “X.” Position the Angled
Leg Bracket Connector (18) under the cross joints of the
Leg Bracket assemblies so that the predrilled holes align
with the holes in the Leg Bracket assemblies.
5. At each hole, slide a Small Washer (20) onto a 5/16"-18 TPI
Hex Cap Bolt (19) and insert the Hex Cap Bolt (19) through
the hole. Install another Small Washer (20) on the other end
and secure with a 5/16" Nylon Nut (21) on each bolt.
6. Fully tighten the 3/8" Nylon Nuts (21) on the center Hex
Cap Bolts (19).
Attaching the Tabletop
1. Place the router table facedown on a blanket or other soft
surface to prevent scratching.
2. Turn the stand upside down and center it on the table
side-to-side, with the outside edge of the rear mounting
flange 1/2" in from the back of the table.
3. Mark the locations of the mounting holes. Remove the stand.
4. Drill 1/8" pilot holes at those locations, taking care not to
drill all the way through the table.
5. Attach the stand to the table with the included #12 x 7/8"
Mounting Screws (25).
Installing the Fence and Plate
1. Position the fence assembly on the Tabletop (8) so the heads
of the 5/16"-18 x 2
3
⁄4" T-Bolts (7) fit into the holes at the end
of the slots. Slide the fence forward and secure by tightening
the 5/16"-18 T-Knobs (4).
2. Use the Insert Mounting Screws (13) to attach the Plate
Insert (10) to the 8
1
⁄4" x 11
3
⁄4" Phenolic Plate (9).
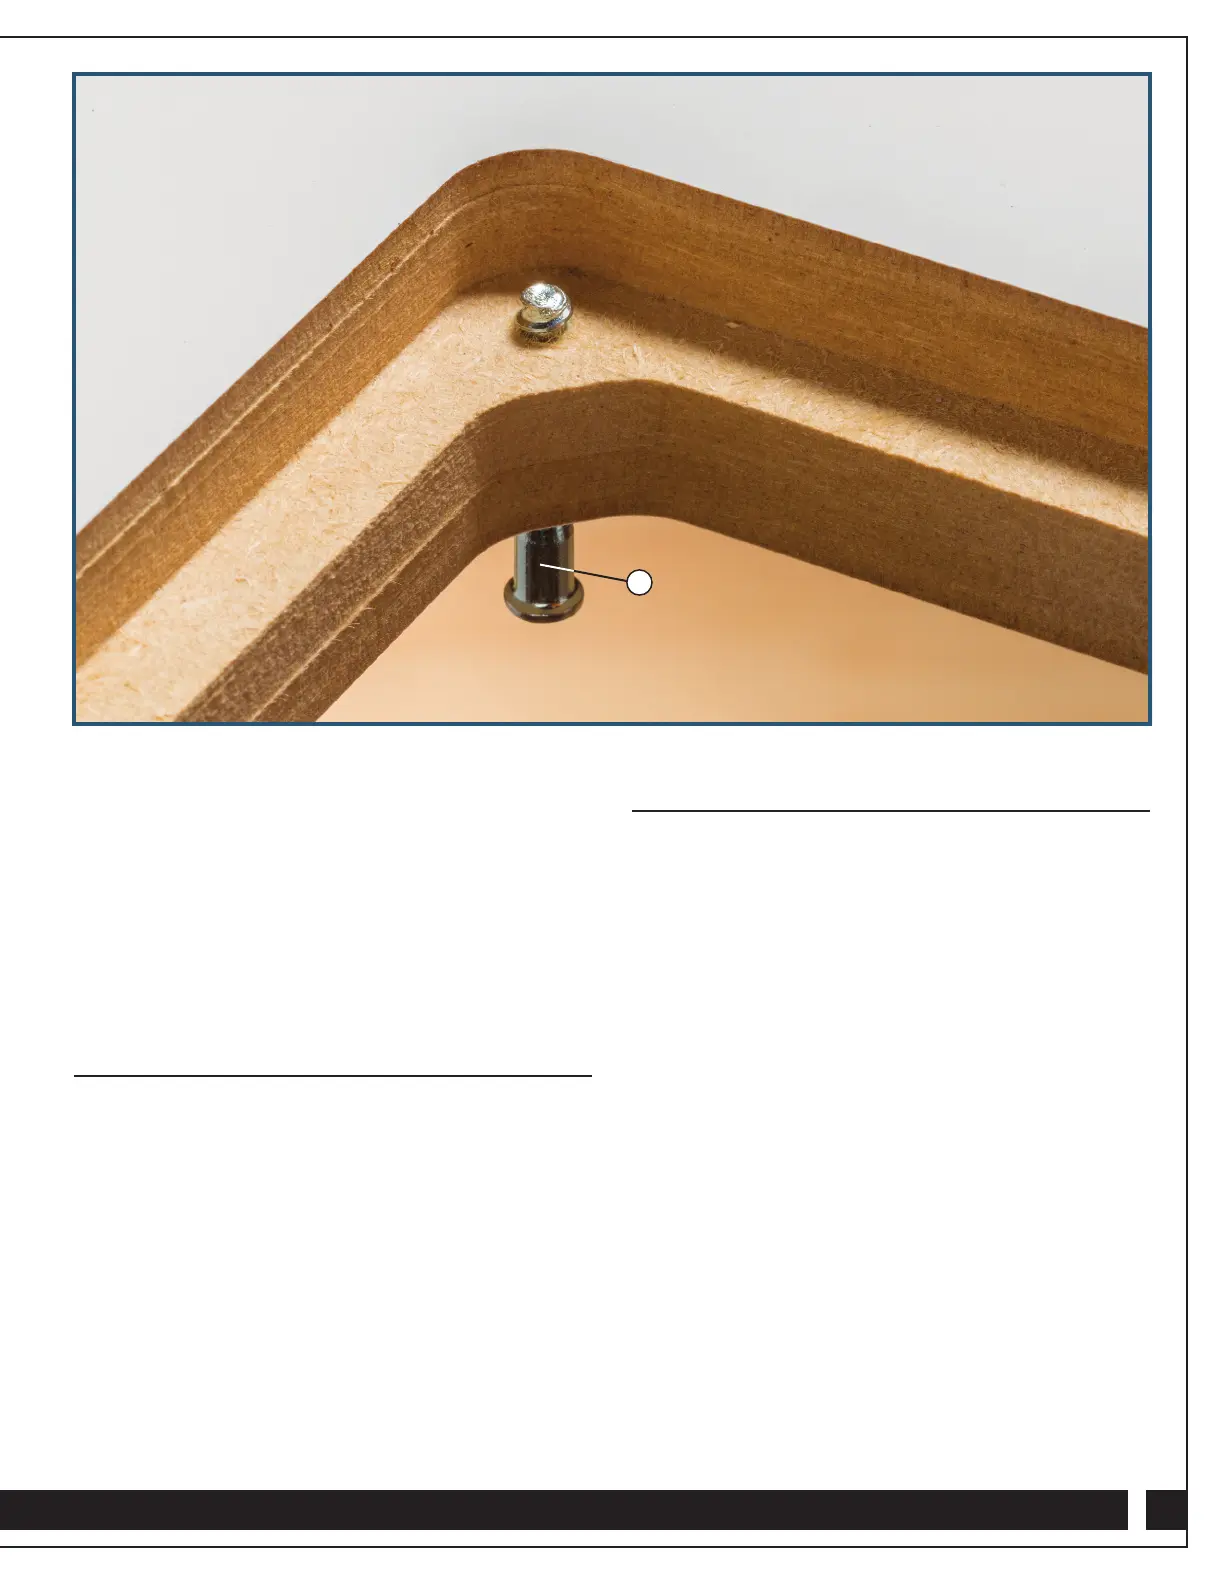
3. From underneath the Tabletop (8), install the Plate Leveling
Screws (12) in the predrilled holes at the corners of the lipped
opening for the plate. Fig. 1.
4. Place the 8
1
⁄4" x 11
3
⁄4" Phenolic Plate (9) in the lipped opening
in the Tabletop (8). Adjust the Plate Leveling Screws (12)
until the plate is flush with the table
Fig. 1
12