EasyManua.ls Logo

Rockwell Automation 22B-D6P0N104 User Manual

Rockwell Automation 22B-D6P0N104
18 pages
To Next Page IconTo Next Page
Page #1 background imageLoading...
Page #1 background image
Quick Start
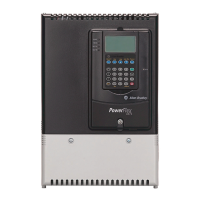
PowerFlex 40 Adjustable
Frequency AC Drive
FRN 3.xx
This Quick Start guide summarizes the basic steps needed to install,
start-up and program the PowerFlex 40 Adjustable Frequency AC Drive.
The information provided Does Not replace the User Manual and is
intended for qualified drive service personnel only.
For detailed PowerFlex 40 information including EMC instructions,
application considerations and related precautions refer to the
PowerFlex 40 User Manual, Publication 22B-UM001… on the CD
supplied with the drive or at
www.rockwellautomation.com/literature.
General Precautions
!
ATTENTION: The drive contains high voltage capacitors which take
time to discharge after removal of mains supply. Before working on
drive, ensure isolation of mains supply from line inputs [R, S, T (L1,
L2, L3)]. Wait three minutes for capacitors to discharge to safe voltage
levels. Failure to do so may result in personal injury or death.
Darkened display LEDs is not an indication that capacitors have
discharged to safe voltage levels.
!
ATTENTION: Equipment damage and/or personal injury may result
if parameter A092 [Auto Rstrt Tries] or A094 [Start At PowerUp] is
used in an inappropriate application. Do not use this function without
considering applicable local, national and international codes,
standards, regulations or industry guidelines.
!
ATTENTION: Only qualified personnel familiar with adjustable
frequency AC drives and associated machinery should plan or
implement the installation, start-up and subsequent maintenance of the
system. Failure to comply may result in personal injury and/or
equipment damage.
!
ATTENTION: This drive contains ESD (Electrostatic Discharge)
sensitive parts and assemblies. Static control precautions are required
when installing, testing, servicing or repairing this assembly.
Component damage may result if ESD control procedures are not
followed. If you are not familiar with static control procedures,
reference A-B publication 8000-4.5.2, “Guarding Against Electrostatic
Damage” or any other applicable ESD protection handbook.
!
ATTENTION: An incorrectly applied or installed drive can result in
component damage or a reduction in product life. Wiring or application
errors, such as, undersizing the motor, incorrect or inadequate AC
supply, or excessive ambient temperatures may result in malfunction of
the system.
Question and Answer IconNeed help?

Do you have a question about the Rockwell Automation 22B-D6P0N104 and is the answer not in the manual?

Rockwell Automation 22B-D6P0N104 Specifications

General IconGeneral
Model22B-D6P0N104
Product TypeDC Drive
Output Current6 A
Frame SizeNEMA 1
BrakingDynamic Braking
Communication InterfaceRS-485
Input Voltage230 VAC
Output Power1.5 HP
Enclosure TypeIP20
Operating Temperature0 to 40 °C
Storage Temperature-40°C to 70°C
Relative Humidity5...95% noncondensing

Summary

Quick Start Guide

General Precautions

Provides essential safety warnings and precautions for handling the drive.

Mounting and Environmental Considerations

Mounting Considerations

Details requirements for mounting the drive upright on a flat, vertical surface.

General Grounding Requirements

Provides instructions for proper grounding of the drive system.

Technical Specifications and Features

Protective Features

Outlines the drive's built-in protective mechanisms.

Motor Protection

Details overload protection for the motor, providing Class 10 protection.

Overcurrent

Specifies the drive's hardware and instantaneous overcurrent limits.

Over Voltage

Lists trip points for overvoltage conditions based on AC input voltage.

Under Voltage

Lists trip points for undervoltage conditions based on AC input voltage.

Power Wiring

Power Terminal Block

Illustrates the power terminal block layout for B and C frames.

Input Power Conditions and I/O Wiring

Input Power Conditions

Lists common input power conditions and their corrective actions.

I/O Wiring Recommendations

Recommends wire types and insulation ratings for I/O wiring.

Control Terminal Block

Control Wiring Block Diagram

Diagram showing connections for control inputs, outputs, and communication.

Control I/O Terminal Designations

Drive Start-Up Procedures

Before Applying Power to the Drive

Lists critical checks to perform before applying power to the drive.

Applying Power to the Drive

Provides instructions for applying AC power and control voltages.

Start, Stop, Direction and Speed Control

Explains how to control the drive using the integral keypad by default.

Integral Keypad Operation

Keypad Menu Structure

Describes the different menu groups available on the keypad.

Keypad LED Status Indicators

Explains the meaning of different LED states on the keypad.

Keypad Functions

Details the function of each key on the integral keypad.

Viewing and Editing Parameters

Parameter Navigation and Editing

Illustrates the process of viewing, navigating, and editing drive parameters.

Basic Program Group Parameters

P031 [Motor NP Volts]

Sets the motor nameplate rated voltage.

P032 [Motor NP Hertz]

Sets the motor nameplate rated frequency.

P033 [Motor OL Current]

Sets the maximum allowable motor current for overload protection.

P036 [Start Source]

Sets the control scheme for starting the drive (e.g., keypad, 3-Wire).

Advanced Group Parameters

P037 [Stop Mode]

Defines the active stop mode for all stop sources.

P038 [Speed Reference]

Sets the source of the speed reference for the drive.

A051 [Digital In1 Sel]

Configures the function of Digital Input 1.

A052 [Digital In2 Sel]

Configures the function of Digital Input 2.

A053 [Digital In3 Sel]

Configures the function of Digital Input 3.

Fault Codes

Related product manuals