OPERATING INSTRUCTIONS
NOTE: Before using the tool, read the instruction book
carefully.
BLADERUNNER
®
—A compact, easy-to-use table-top tool for
cutting wood, metal, plastic, and ceramic tile. Lightweight and
portable for use right at the work area. Blade is stationary while
user moves the material for easier, more precise work.
BEFORE PUTTING THE MACHINE INTO OPERATION
1. All covers and safety devices have to be properly fitted before
the machine is switched on.
2. It must be possible for the blade to run freely.
3. When working with wood that has been processed before, watch
out for foreign bodies such as nails or screws etc.
4. Before you turn on the machine, make sure that the saw blade
is correctly fitted and that the machine’s moving parts run
smoothly.
5. If the cutting operation will produce a high amount of dust,
especially hazardous dust such as ceramic tile or treated wood,
connect an effective vacuum to the vacuum port (10)
ASSEMBLY
WARNING: To avoid injury from unexpected starting or
electrical shock during assembly or adjustment, do not plug
the power cord into a source of power.
WARNING: Make sure the saw is securely mounted to a
workbench or other surface so that it cannot tip, slide or walk
during operation.
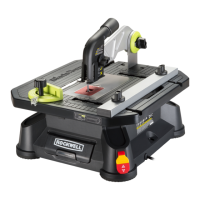
1. MOUNTING THE SUPPORT ARM
(See Fig. A1,A2,A3)
a) Place the support arm on work table. Using the two screws
provided (a), loosely attach the support arm to the table. The
screws are located in the small plastic bag with the vacuum
adapter. Do not tighten the screws completely yet. (See Fig A1)
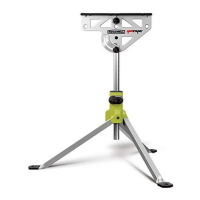
b) Insert the blade into the blade holder following the instructions
outlined in the next section of this manual.
c) Lower the guard arm. Make sure the blade rests between the
guide rollers. (See Fig. A2)
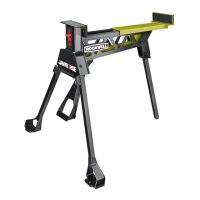
d) Hold the support arm in place and make sure the blade remains
placed in an exact position between the blade rollers while
tightening the screws. (See Fig. A3)
NOTE: For your convenience, the guard arm has already
been fixed to the support arm and adjusted to be aligned
with the placement of the blade at the factory. However, you
may also adjust it if needed (See Adjustment, 2).
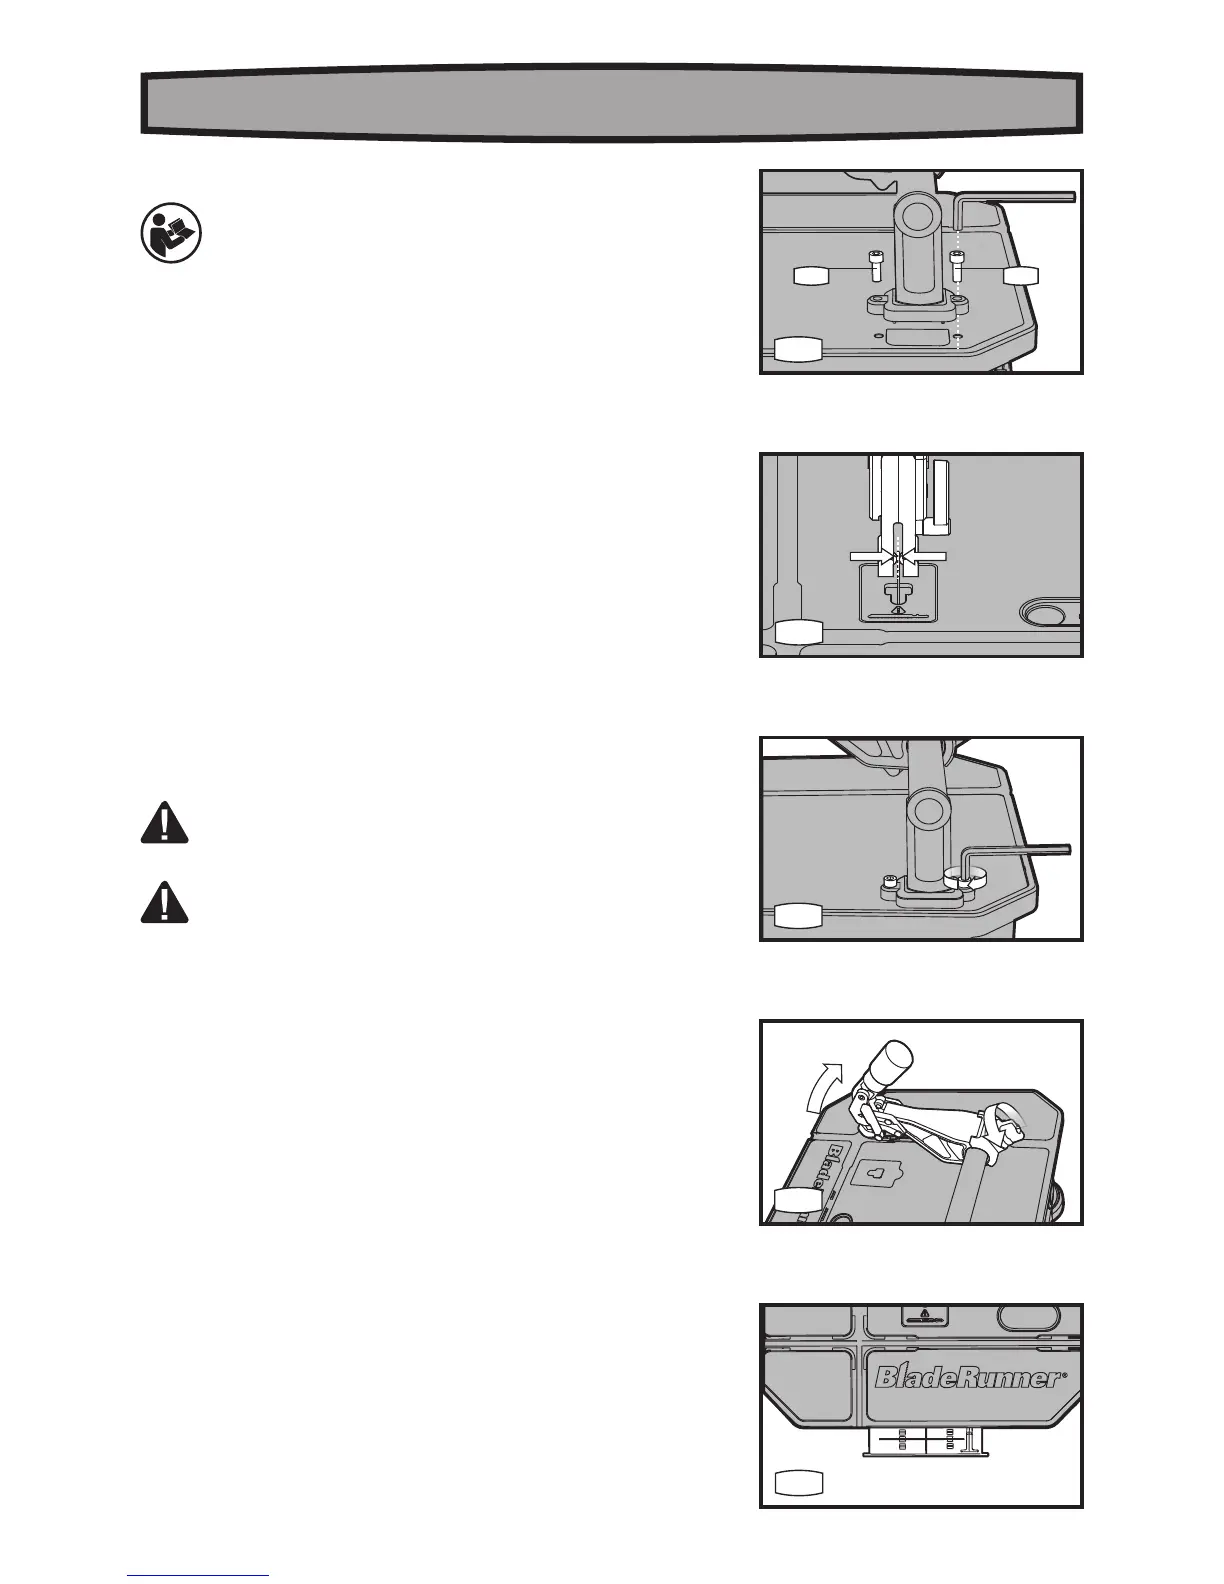
2. CHANGE THE BLADE (See Fig. B1, B2, B3, B4, B5)
Make sure the saw is unplugged. Slacken the guard arm clamp knob