EN
11
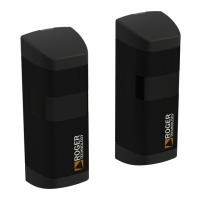
5 Indicators
LED ON / FLASHING OFF
L1 (TX)
Mains power. Non power or incorrect connecon.
L2 (RX)
ON: beer signal
In the rst 20 minutes aer giving power, the LED is
o in the absence of a received infrared signal.
Aer 20 minutes from power on, the LED remains o.
Flashing rapidly: strong signal.
In the rst 20 minutes aer switching on, the LED
ashes or is on steady if it receives an infrared signal.
Flashing slowly: weak signal.
L3 (RX)
Normally on. N.C. contact closed. Obstacle detected. N.C. contact open.
6
• The mounng surfaces for the photocells must be clean, perfectly level and not subject to vibraon.
• The maximum range is set in the factory to 15 m.
• For installaons with a distance of less than 2.5 m between the transmier TX and the receiver RX,
remove the lenses from the transmier and receiver, taking care not to damage the photocell.
• The minimum permissible distance between transmier and receiver is 80 cm.
7
1. Open the photocell units and remove the electronic circuit boards.
2. With the system disconnected from mains electricity, make the electrical connecons as shown in g. 4,
5 and 6.
3.
4. Congure one pair of photocells as the MASTER pair (see g. 4) using the jumpers ID1 and ID2.
5. Congure, using the jumpers ID1 and ID2, any other pairs of photocells as SLAVE1, SLAVE2, SLAVE3, see g.
5 and 6.
6. Connect the photocells with the synchronisaon wire (SYNC).
7. Up to 4 pairs of synchronised photocells may be installed (1 MASTER + 3 SLAVEs).
8. Perform the alignment procedure before closing the photocells permanently, see chapter 8.
8
The alignment procedure must be performed on one pair of photocells at a me.
1. Turn on the power supply.
2. Posion the RX receiver and the TX transmier by aligning the two devices opcally.
3. For M90/F4ESO only. Adjust the orientaon of the light beam as shown in g. 7.
(±105°), loosen the screws 1 and move the bracket 3 into the correct
posion. Tighten the screws 1.
(±5°), turn the screw 2 clockwise or anclockwise to set the correct posion.
4. For the rst 20 minutes aer switching on, the LED L2 ashes faster the more signals are received, unl it
remains on steady with a maximum signal. LED L2 switches o aer 20 minutes. To check the alignment
again, turn the power o and on again.”
5. LED L3 must remain on to indicate that the N.C. contact is closed. If it is o, it means that the contact is open
and that the photocell detects an obstacle.
6. Fix the photocell permanently.
7. Permanently close the photocell casing and securing it with the supplied screws.
 Loading...