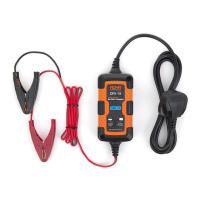
1. First connect the red charging lead to the positive on the battery.
2. Connect the black charging lead to the negative on the battery.
3. Select your required output voltage, mode and setup options on the battery charger:
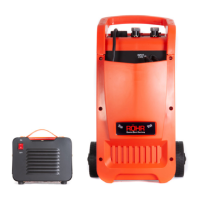
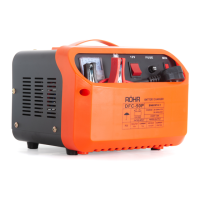
a) For DFC-650P models, turn the operation dial to either jump start or charge modes, the higher the number,
the higher the amperage. The timer dial must be used with numbers 4, 5 and 6 on the operation dial.
b) For DFC-650P models insert 3 x 50a fuses into the fuse holder. For DFC-450P models use 2 x 50a fuses.
c) Select your required output voltage or jump start mode (applies to specic models).
4. Connect the charger to a power outlet and turn it on.
5. The charger will begin charging, if your battery is / becomes full charged, the charger will automatically switch to
trickle charge / stop charge.
6. For jump start operation, only apply a jump start for a maximum of 5 seconds and then allow a 20 second cool
down time.
7. After use, switch off the battery charger and disconnect from the power outlet.
8. Disconnect the black charging lead from the negative terminal of the battery.
9. Disconnect the Red charging lead from the positive terminal of the battery.
10. Screw or press the battery plugs back into position.
Safety Features
This battery charger features a range of safety features. In the event of a blown fuse, the fuse must be replaced with
an identical fuse. The automatic circuit breaker will stop charging in the event of overheating. This will automatically
start charging again after cooling.
The battery must be disconnected from the vehicle prior to connecting the battery to the charger. Failure to do so may
extensively damage the vehicle and or chargers electric systems.
Quick Start Guide
2
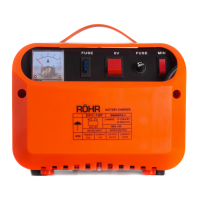
Voltage Selection
For models with a switch - change the switch to alter the voltage.
For models with terminals - the negative wire is hard wired, swap the positive wire to the desired voltage position.
Amperage Selection
For models with a dial - turn the dial to increase the Amp output. Higher numbers produce a higher Amperage.
For models with a switch - change the switch to alter the amperage. MIN - trickle charge / MAX - fast charge
Pulse Repair Technology
Older batteries can lose their ability to hold charge due to becoming sulphated. This charger features highly advanced
pulse rectier boost battery repair technology that actively repairs this damage. This battery restoration feature can
get almost any battery back to full health.
Mode Icons
For models with both charge and jump start functions - there are two symbols to indicate the function type:
Charging mode Jump Start Mode
Functions and Controls