Warning
When the vacuum cleaner is attached to the magnetic wall mount, keep children and pets away from the vacuum to avoid bumping and potential damage.
7
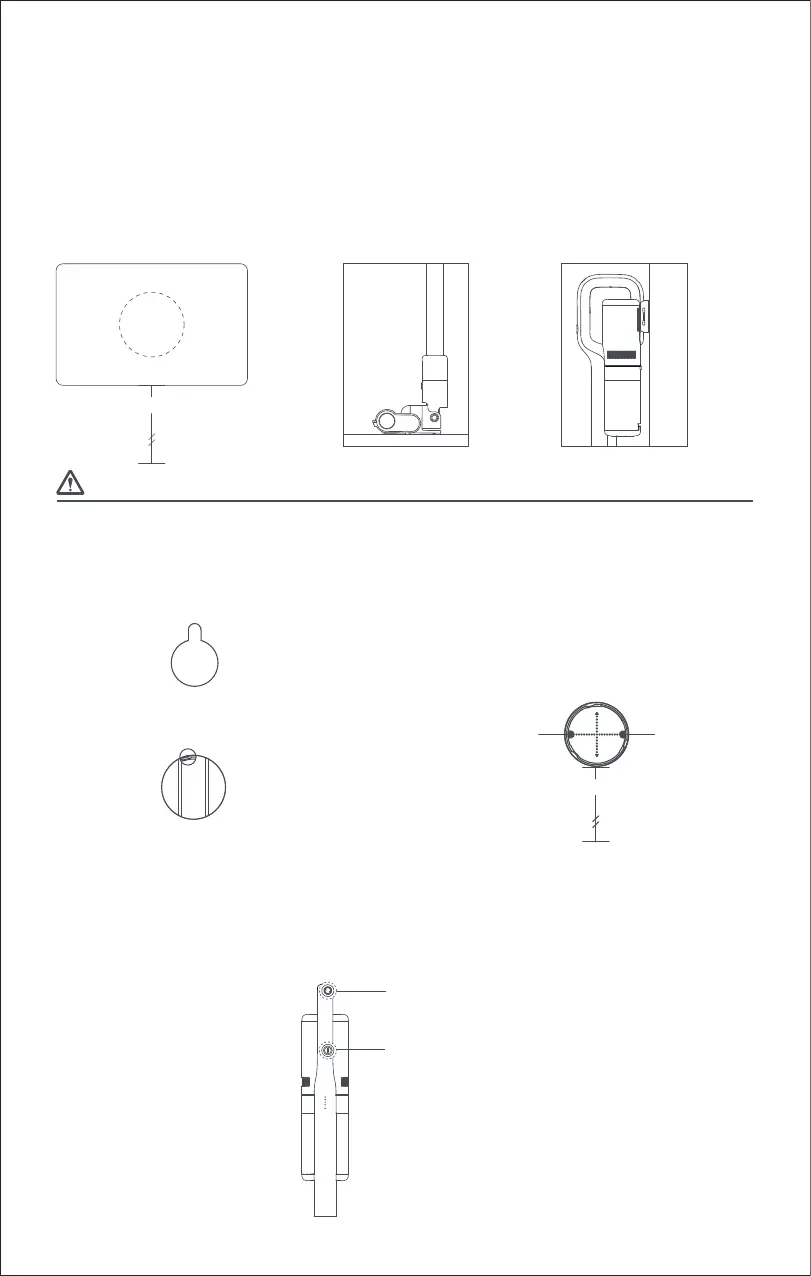
Storage
1. Paste transparent sticker to the wall, 88cm above the ground, as in figure 1;
2. Remove the protective film of the magnet wall mount and paste it to the position of the transparent sticker on the wall;
3. Place the electric brush horizontally on the ground, as in figure 2;
4. Move the vacuum cleaner close to the magnetic wall mount until it is fixed, as in figure 3.
Installation without Nails: Fix the magnetic wall mount with washable glue.
Recommended for use on glass and ceramic walls;keep the wall clean before installing, no dirt, impurities, etc.
3. Align the vertical direction to the chassis clamping position, and
rotate the fixing box clockwise for installation.
1. Read the instructions carefully and remove the protective film before
installing the magnetic wall mount.
Installation with Nails: The magnetic wall mount needs to be fixed with expansion screws in the wall.
2. Attach the magnetic wall mount to the wall, unlock the back base with
anticlockwise rotation, drill the expansion screw into the wall according
to the corresponding position.
88cm above the ground
Protective Film
92cm
Screw Orifice
Magnetic Wall Mount Base
Screw Orifice
Magnetic Wall Mount
Product Usage
Long press on the button of the power switch to start the machine in normal mode;
Click the shift button, and the suction power will switch between the normal mode and powerful mode;
Press the power switch button for 0.5 seconds, to turn off the machine.
Power On/Off and Suction Power Switch
Shift Switch
Power Switch
Place the electric brush
horizontally on the ground
Fix the vacuum on the wall
mount parallel to the wall
Figure 1 Figure 2 Figure 3
 Loading...