EasyManua.ls Logo

Rola 59820 User Manual

Rola 59820
4 pages
To Next Page IconTo Next Page
Page #1 background imageLoading...
Page #1 background image
59820
FITTING INSTRUCTIONS:
PART No:
CARRYING CAPACITY:
Pg 1 of 2
2. To remove the Covers, firmly grip the
edge of the cover with your fingers (as
shown by arrow in Fig. 2), and pull the
cover towards you - (arrow in Fig. 2). Set
the Covers and keys aside.
Your cross bars come pre-assembled.
Some disassembly is required to install
these cross bars onto the vehicle’s side
rails.
3. Remove the bottom straps (see fig 3) by
unscrewing the (4 ) anti-theft bolts with the supplied
“T” wrench tool.
Un-lock Covers
4. Prior to placing the cross-bar assembly on
the vehicle side rails, pull the Top Straps out
slightly (5 to 6 mm) to allow Cross Bars to fit
onto the vehicle Rail Bars.
Place Cross Bars on the
vehicle at the
recommended positions
shown along the Rail Bars
( Fig. 4).
grip
pull
bottom strap
700 mm
MIN.
Fig 1
Fig 4
Fig 3
Fig 2 covers removed
350mm
(13 3/4”)
Front of vehicle
75 kgs
165 lbs
1. Un-lock the cylinder by rotating 1/4 turn anti-
clockwise. (Fig 1) Repeat this process for all 4
covers.
VW JETTA WAGON 2009 - On
with Side Rails
59820N Rev 5-13-11
Question and Answer IconNeed help?

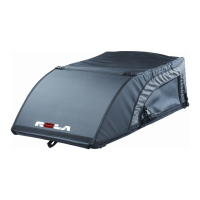
Do you have a question about the Rola 59820 and is the answer not in the manual?

Rola 59820 Specifications

General IconGeneral
BrandRola
Model59820
CategoryAutomobile Accessories
LanguageEnglish

Summary

Fitting Instructions

Un-lock Covers

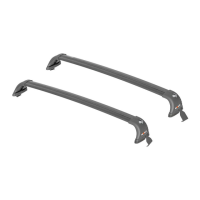
Unlock the cylinder by rotating 1/4 turn anti-clockwise. Repeat this process for all 4 covers.

Remove Covers

Firmly grip the edge of the cover and pull towards you to remove. Set the covers and keys aside.

Remove Bottom Straps

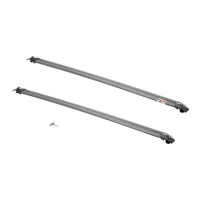
Remove the bottom straps by unscrewing the (4) anti-theft bolts with the supplied "T" wrench tool.

Position Cross Bars

Pull Top Straps out slightly to allow Cross Bars to fit onto the vehicle Rail Bars. Place bars at recommended positions.

Fasten Bottom Straps

Insert Star Head Bolt through End Support & Straps. Fasten using T-Handle wrench, tightening alternatively.

Re-Install Locking Covers

Insert cover ribs into designated channels on End Supports and slide until they positively engage.

General Usage Information

Regularly check strap tightness, secure loads evenly, and drive with caution. Check function of doors and sunroof.

Related product manuals