EasyManua.ls Logo

Roland 2500s - W@ Stand Assembly; CC Ceccccessteceeeneeee

Roland 2500s
32 pages
Print Icon
To Next Page IconTo Next Page
To Previous Page IconTo Previous Page
Loading...
MIHOW
TO
ASSEMBLE
THE
KS-2500
(Optional)
p
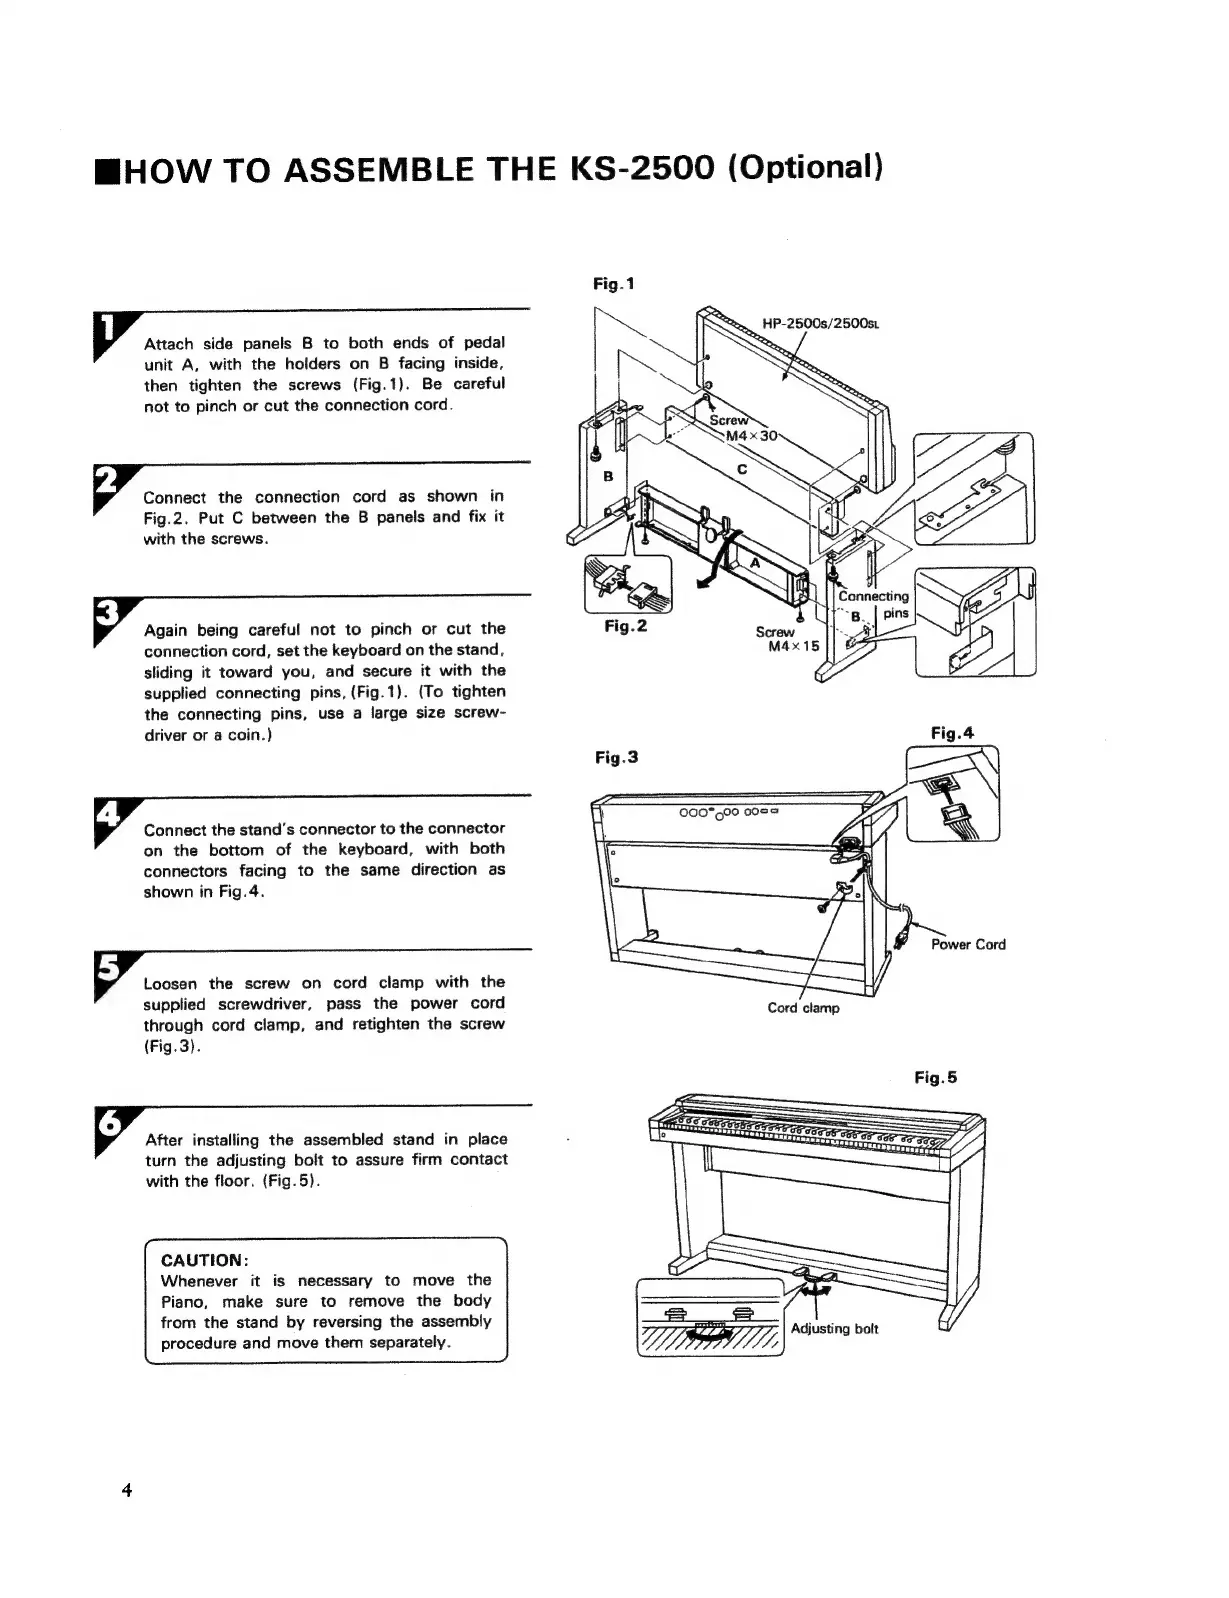
Attach
side
panels
B
to
both
ends
of
pedal
unit
A,
with
the
holders
on
B
facing
inside,
then
tighten
the
screws
(Fig.1).
Be
careful
not
to
pinch
or
cut
the
connection
cord.
2
Connect
the
connection
cord
as
shown
in
Fig.2.
Put
C
between
the
B
panels
and
fix
it
with
the
screws.
Again
being
careful
not
to
pinch
or
cut
the
connection
cord,
set
the
keyboard
on
the
stand,
sliding
it
toward
you,
and
secure
it
with
the
supplied
connecting
pins,
(Fig.1).
(To
tighten
the
connecting
pins,
use
a
large
size
screw-
driver
or
a
coin.)
4
Connect
the
stand’s
connector
to
the
connector
on
the
bottom
of
the
keyboard,
with
both
connectors
facing
to
the
same
direction
as
shown
in
Fig.4.
5
Loosen
the
screw
on
cord
clamp
with
the
supplied
screwdriver,
pass
the
power
cord
through
cord
clamp,
and
retighten
the
screw
(Fig.3).
6
After
installing
the
assembled
stand
in
place
turn
the
adjusting
bolt
to
assure
firm
contact
with
the
floor.
(Fig.5).
CAUTION:
Whenever
it
is
necessary
to
move
the
Piano,
make
sure
to
remove
the
body
from
the
stand
by
reversing
the
assembly
procedure
and
move
therm
separately.