21
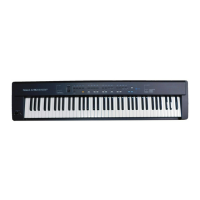
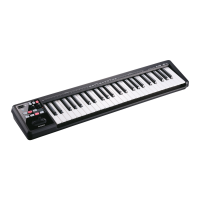
Mar. 2010 A-300PRO, A500PRO, A-800PRO
Updating the System
Items Required
• Computer (Windows XP, equipped with a USB connector)
• USB cable
• Update program (obtained via Service Net)
• UpdSMF.exe (obtained via Service Net [Info No. 102333])
Update Procedure
1. Switch off the power to the unit.
2. At the underside, change switch EXT A to its unmarked side and switch
EXT B to the side indicated by a star.
3. Using the USB cable, connect the unit and the computer.
4. Switch on the power to the unit.
5. Start UpdSMF.exe.
6. Set MIDI Out Device to A-PRO.
7. Click the Path button and specify the folder containing the update
program (SMF).
8. Click the Scan SMF button.
9. Select the displayed update program.
10. Press the VALUE control on the unit.
A random button is displayed on the LCD screen.
11. Press the displayed button.
Another random button name is displayed.
12. Press the displayed button.
The message Please Send SMF. is displayed.
13. Go to the UpdSMF window and click the Send button.
Sending of the update program starts. After several minutes, the update
ends and the message Completed! appears.
14. Switch off the power to the unit.
15. Quit UpdSMF.exe.
16. At the underside of the unit, change both the EXT A and EXT B switches
to the side indicated by a star.
Test Mode
Items Required
• AC adaptor (PSB-1U)
• Foot switch (DP-2, DP-10, etc.)
• Expression pedal (EV-5, EV-7, etc.)
• MIDI cable x 1
• USB cable x 1
• Computer (Windows XP)
• MIDI sound module
Making the Connections
1. Connect the AC adaptor to the DC IN jack.
2. Connect the foot switch to the HOLD jack.
3. Connect the expression pedal to the EXPRESSION jack.
4. Connect the MIDI sound module to the MIDI OUT connector and switch
on the power to the MIDI sound module.
Entering the Test Mode
* In the Test Mode, at 1. SYSTEM, inputting the system version is necessary.
Before entering the Test Mode, first refer to Verifying the Version Number
(p. 20) and make a written note of the version.
1. Adjust all slide and rotary volume controls to their minimum settings.
2. Hold down B1 and B4 and set the POWER switch to DC.
The Test Mode initial screen appears.
3. Press the VALUE control.
TEST MENU is displayed.
Quitting the Test Mode
Switch off the power.
Selecting Test Items
1. While TEST MENU is displayed, turn the VALUE control to select the test
item.
1. SYSTEM (p. 22)
2. KEYBOARD (p. 22)
3. SW/LED (p. 22)
4. LCD/ENC (p. 22)
5. RVR/SVR (p. 22)
6. PAD/AFT (p. 23)
7. BENDER (p. 23)
8. MIDI/USB (p. 23)
2. Press the VALUE control to move to the selected test item.
* When executing 2. KEYBOARD, holding down SHIFT and pressing
KEYBOARD SPLIT returns to TEST MENU. When executing 3. SW/LED,
holding down SHIFT for 3 seconds or longer returns to TEST MENU. When
executing any other item, pressing SHIFT returns to TEST MENU.

 Loading...