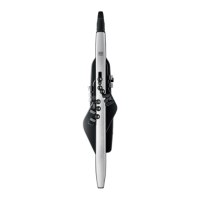
4
Panel Descriptions
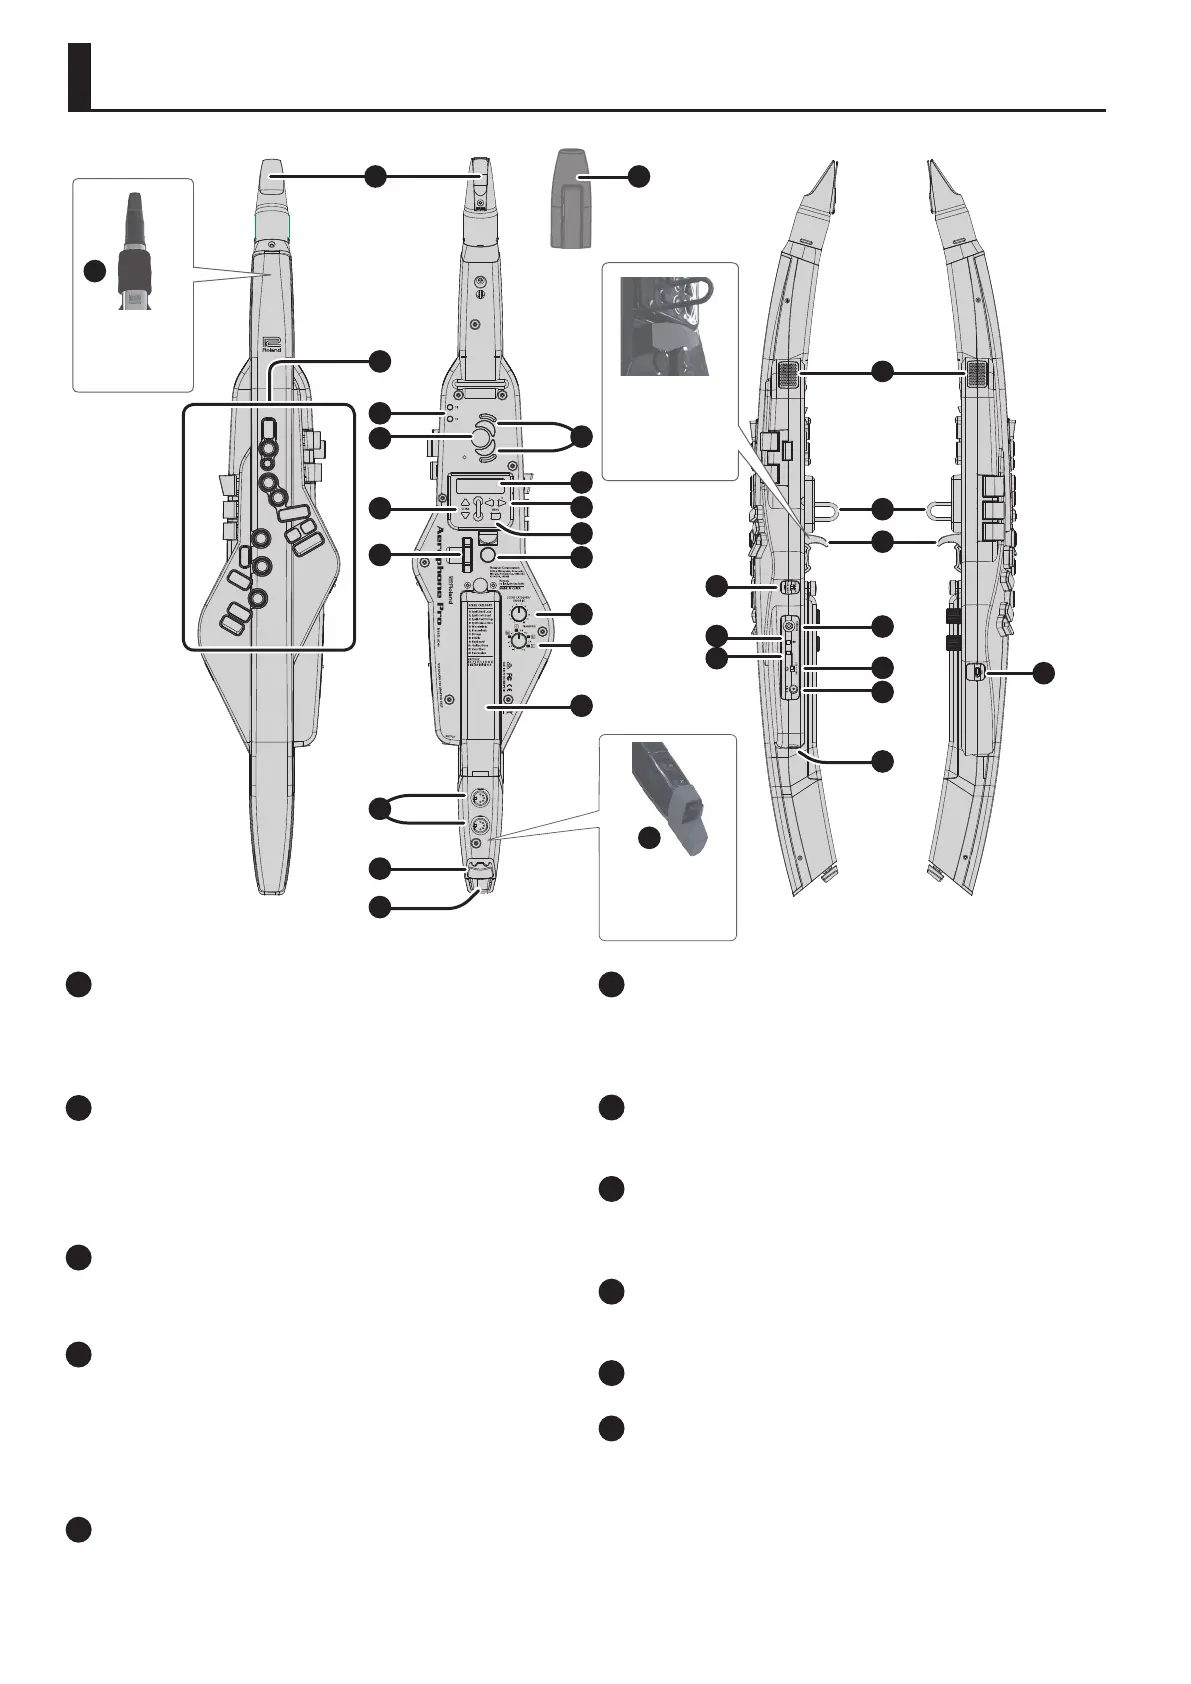
1
Mouthpiece Cap
Protects the mouthpiece. When you’re not playing, leave the
mouthpiece cap attached. Press it on until you hear it click into place.
* When removing or attaching the mouthpiece cap, take care not to touch the
reed.
2
Mouthpiece
A dedicated mouthpiece for the Aerophone that is constructed as a
single unit with the reed.
& “Embouchure” (p. 7)
* When attaching the mouthpiece, take care not to pinch your nger between
the movable part and the body of the instrument.
3
Band
Prevents saliva from reaching the unit during performance,
and entering the interior from around the buttons, switches, or
performance keys.
4
Performance keys
These keys are used for performance. They allow performance using the
same ngering as a saxophone. Some keys, such as the side keys, allow
you to assign various functions or parameters.
& “Pressing the Performance Keys” (p. 7)
& “Assigning Functions to Controllers (ASSIGN)” (p. 15)
& Fingering Chart of “Aerophone Pro Parameter Guide” (PDF)
5
[S1] / [S2] buttons
You can assign a variety of functions or parameters to these buttons.
& “Assigning Functions to Controllers (ASSIGN)” (p. 15)
6
Octave keys
These buttons switch octaves. You can assign them to switch ±2 or ±3
octaves, or to sax compatible mode. Operate them using the left-hand
thumb.
& “Aerophone Pro Parameter Guide” (PDF)
7
Thumb rest
Place your left thumb here.
& “Holding the Aerophone Pro” (p. 7)
8
Display
This indicates the scene (sound) name and various parameters.
* The display of this unit automatically turns o when a certain length of time
has elapsed since the unit was last operated (p. 14).
9
[SCENE] (
=
/
?
) buttons
Use these buttons to select scenes (sounds).
& “Making Sound Settings” (p. 8)
10
[-][+] (
C
/
A
) buttons
Use these buttons to select menu items or edit values.
11
[MENU] button
Use this button to specify the details of the system, scene, assign, and
MIDI control settings.
By long-pressing the [MENU] button you can access a screen where you
can register user scenes and favorite scenes.
& “Making Settings in the Menu” (p. 13)
& “Storing a user scene” (p. 9)
“Registering a favorite scene” (p. 10)
7
6
A
Attach the
band to this
position.
3
8
9
11
12
13
14
15
16
17
21
23
B
24
25
26
C
E
2 1
4
5
20
19
Attach the water
basin to this
position.
18
D
22
10
Attach the
thumb hook
cover to this
position.
 Loading...