19
Fantom-XR
TEST MODE
Required items
1. Monitor speakers
2. MIDI cables
3. Audio cables
4. Coaxial (phono) cables
5. USB cable
6. PC card (memory)
7. 512MB DIMM (For the DIMM specifications, refer to Main Specifications.)
8. Wave expansion boards: SRX series, 6 pcs.
9. Computer (with USB connector; Windows Me, Windows 2000, or
Windows XP operating system)
Test mode procedure
Before you begin test mode, make sure that the power is turned off, then
remove the EXP COVER located on the top of the unit and insert the DIMM
and expansion boards you prepared.
Entering test mode
1. Power-on the Fantom-XR.
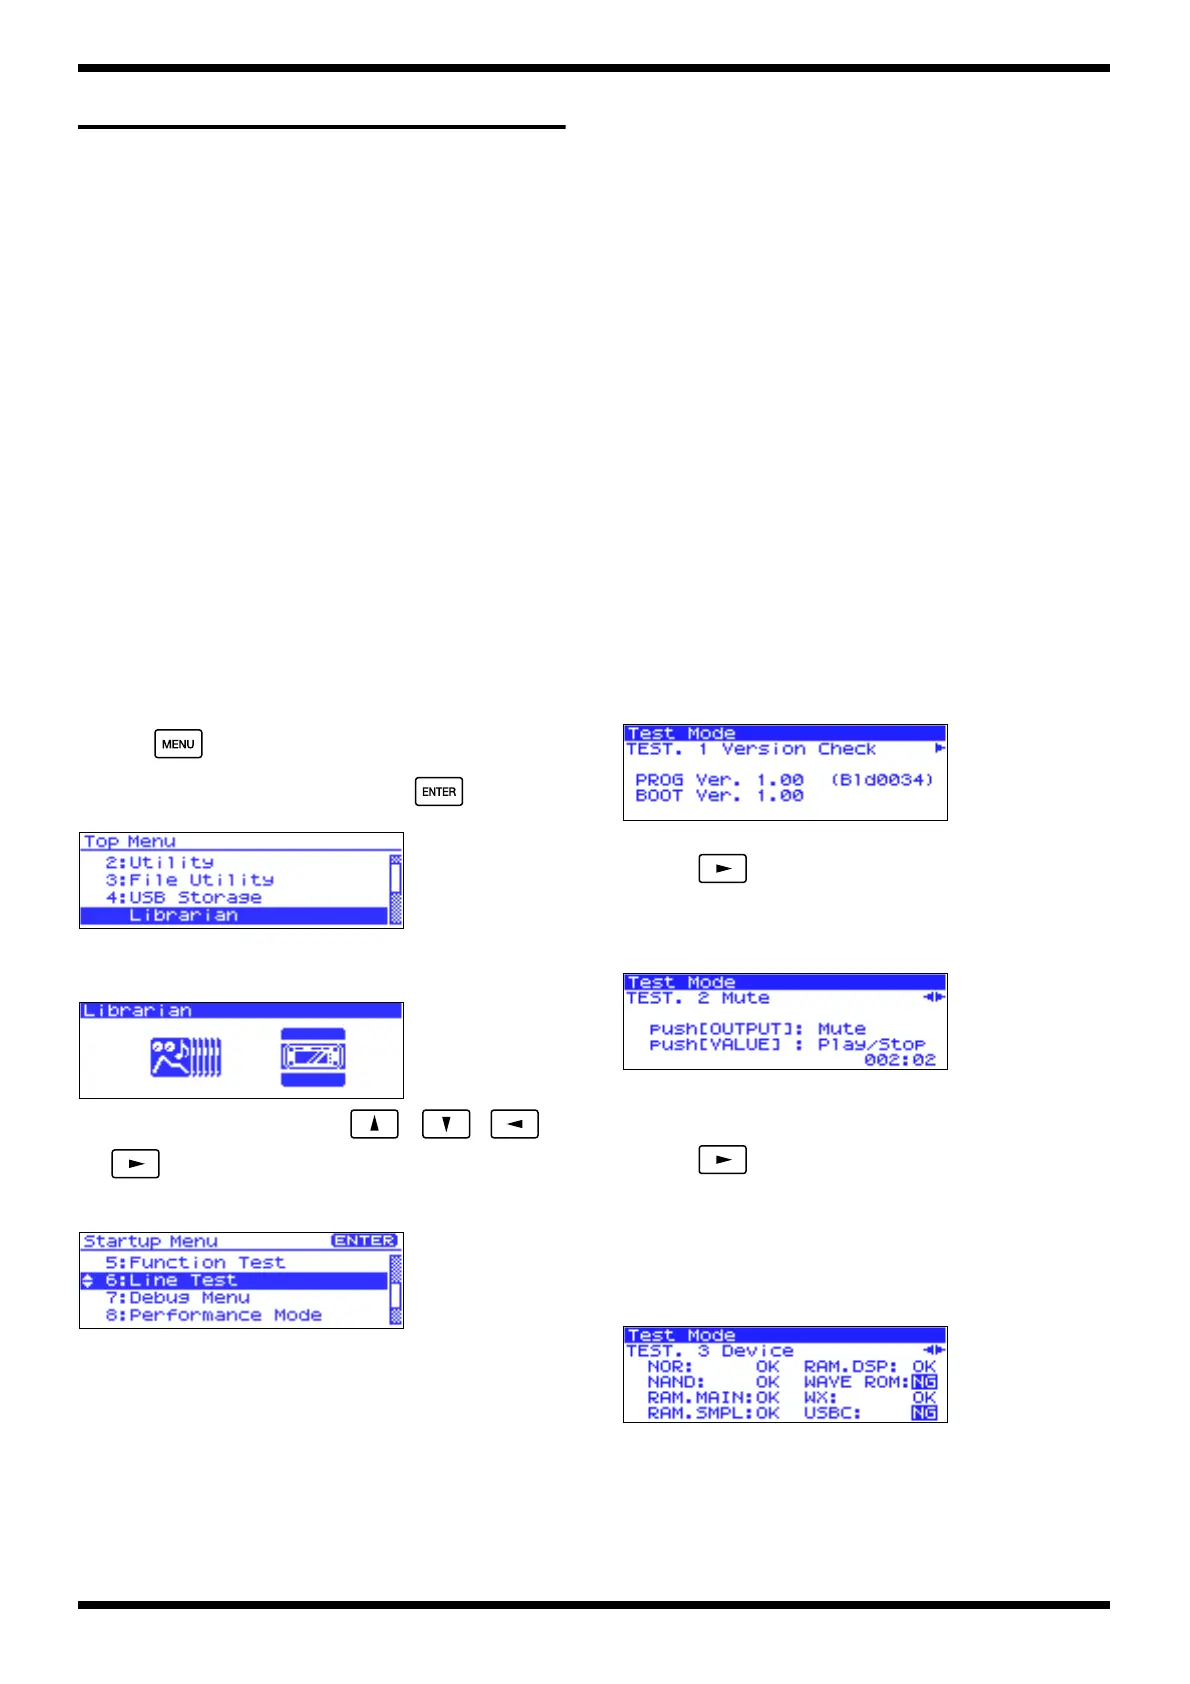
2. Press .
3. Turn [VALUE] to select “5:librarian,” and press .
fig.t-topmenu
4. While the following screen is displayed, perform the following
operations.
fig.t-librarian
Press the buttons in the order of [VALUE], , , ,
and .
5. The START UP MENU will appear. Select “6:Librarian.”
fig.t-linetest
Exiting test mode
Turn off the power.
Test items
1. Version Check
2. Mute
3. Device
4. DIMM
5. Expansion Board
6. MIDI
7. Card
8. Encoder
9. Switch1 & LED
10. Switch2
11. LCD
12. Sound
13. USB
14. Noise
15. Factory Reset
16. (Completed)
Test procedure
1: Version Check
fig.ltest-version
• Check the version.
• Press to proceed to the next test item.
2: Mute
fig.ltest-mute_100
• Verify that the demo song is played correctly.
• Verify that the audio output is muted while the [OUTPUT] knob is
pressed.
• Press to proceed to the next test item.
3: Device
This checks the operation of the parts on the mainboard.
If any problems are detected, an indication of NG will be displayed for the
corresponding part.
fig.ltest-device_100
• If all tests are OK, you will automatically proceed to the next test item.
4: DIMM
This checks the DIMM socket and performs a DIMM read/write test.
Install the DIMM before you proceed.
The Fantom-XR must be powered-off when installing the DIMM.

 Loading...