FP-E50 User Guide for Additional Roland Cloud Contents (Ver. 1.10)
22
Saving Downloaded Files To a USB Flash Drive
* If you’re using the USB ash drive for the rst time, format it using
the FP-E50.
Ø “Initializing a USB Flash Drive (Format USB Memory)” (Reference
Manual)
1. Connect the USB ash drive to your computer.
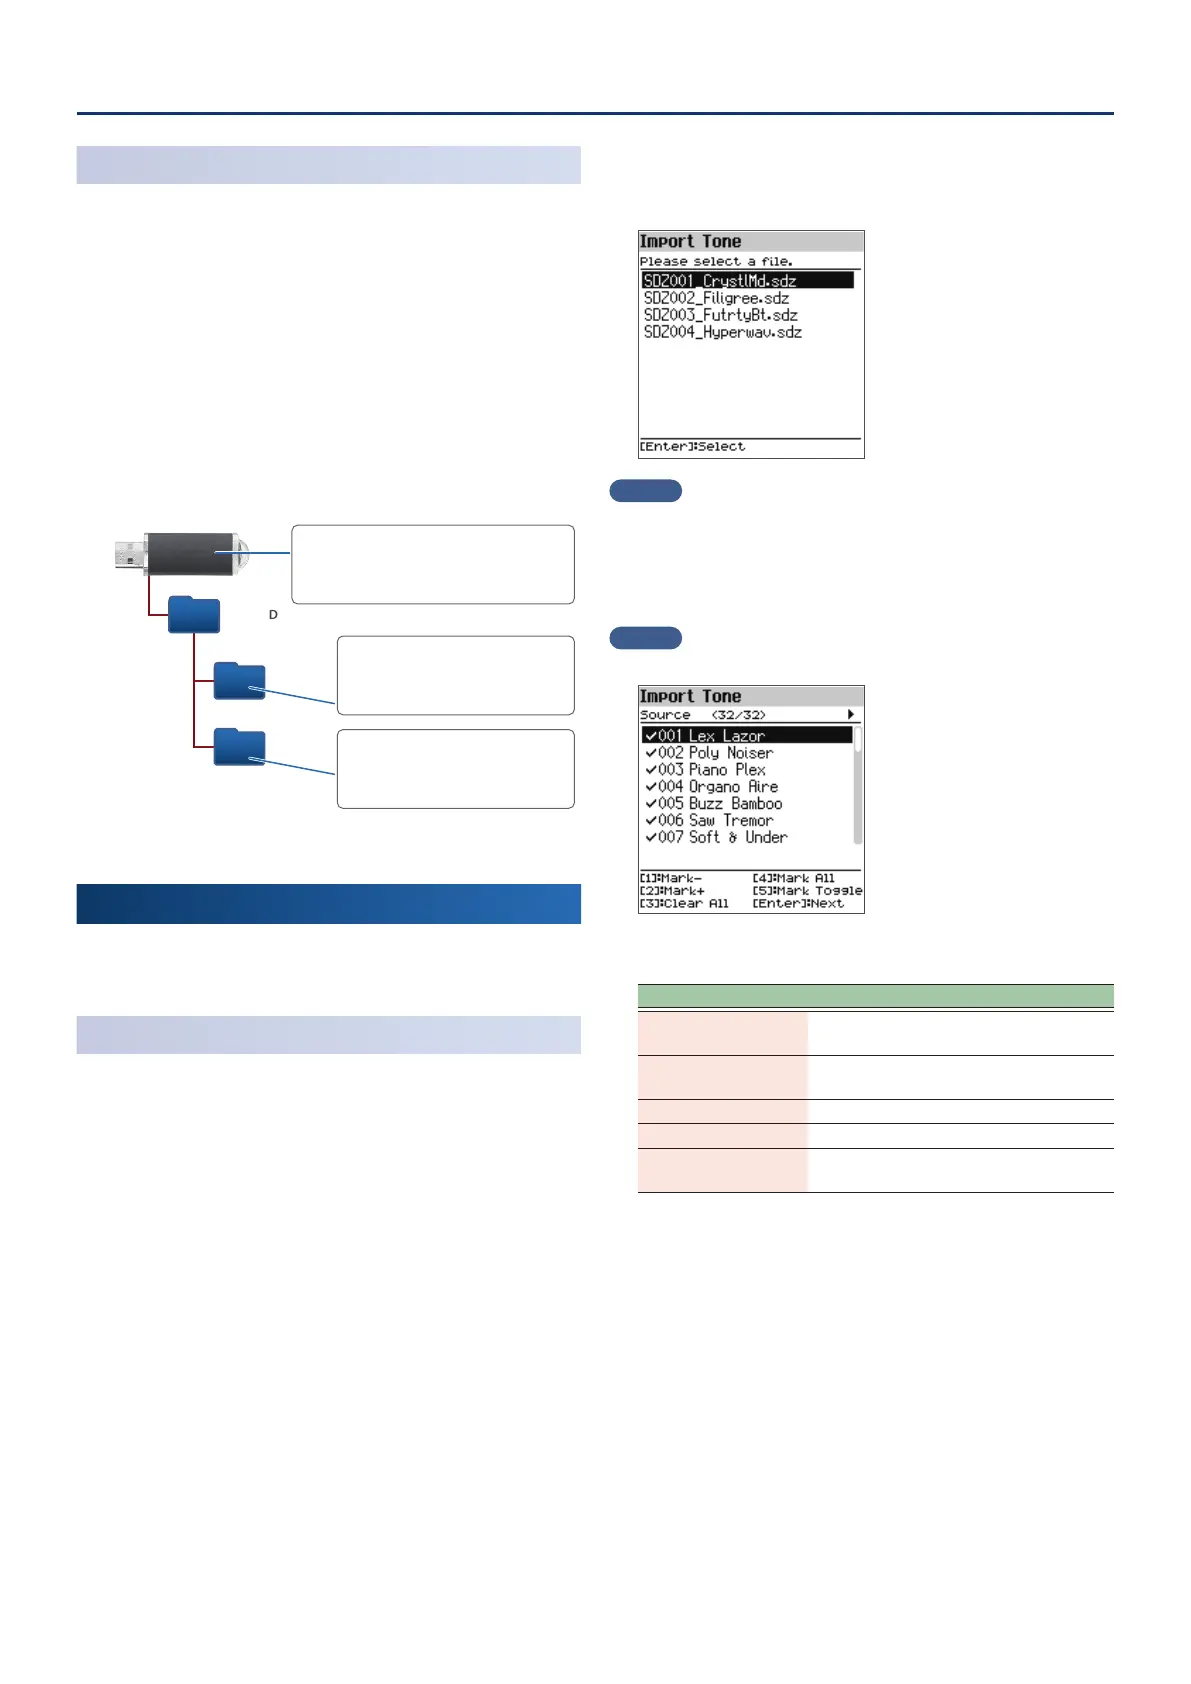
2. Save the le in the appropriate directory of your USB
ash drive.
Wave Expansion (extension: .exz): Root directory
Sound Pack (extension: .sdz): ROLAND/SOUND folder
Style Pack (extension: .sdz): ROLAND/STYLE folder
USB ash drive folder architecture
ROLAND
SOUND
STYLE
Copy the Wave Expansion files (.exz) to
the root directory.
Copy the Sound Pack files (.sdz)
to the ROLAND/SOUND folder.
Copy the Style Pack files (.sdz)
to the ROLAND/STYLE folder.
3. Disconnect the USB ash drive from your computer.
Adding the Sounds
Depending on the sounds that you are adding, perform the
steps described in “Importing a Sound Pack” or “Installing a Wave
Expansion” (p. 3).
Importing a Sound Pack
1. Connect the USB ash drive in which you saved the
Sound Pack le to the FP-E50.
Ø “Saving Downloaded Files To a USB Flash Drive” (p. 2)
2. Press the [MENU] button.
3. Use the [ää] [åå] buttons to select “Utility”, and then
press the [Enter] button.
4. Use the [ää] [åå] buttons to select “Import/Export”, and
then press the [Enter] button.
5. Use the [ää] [åå] buttons to select “Import Tone”, and
then press the [Enter] button.
6. Use the [ää] [åå] buttons to select the le that contains
the tones that you want to import, and then press the
[Enter] button.
MEMO
The rst time you import, the user license registration screen appears.
7. Use the [ää] [åå] buttons to select the tone (Source) that
you want to import, and then use the [1]–[5] knobs to
add a check mark.
MEMO
All tones are already selected when this screen appears.
How to select with the check marks
Controller Explanation
[1] Mark-
Removes the check mark and moves the
cursor forward one scene.
[2] Mark+
Adds a check mark and moves the cursor
forward one scene.
[3] Clear All Removes all check marks.
[4] Mark All Adds all check marks.
[5] Mark Toggle
Switches between adding and removing the
check marks.
You can check the number of tones onscreen (meaning the number of
tones that are selected as the import source, out of all tones included in the
import source le).
8. Press the [Enter] button.