Editing a Synth Tone
2
Volume and On/O Settings for Each
Partial
Here’s how to turn individual Partials on/o and select a Partial to
be edited.
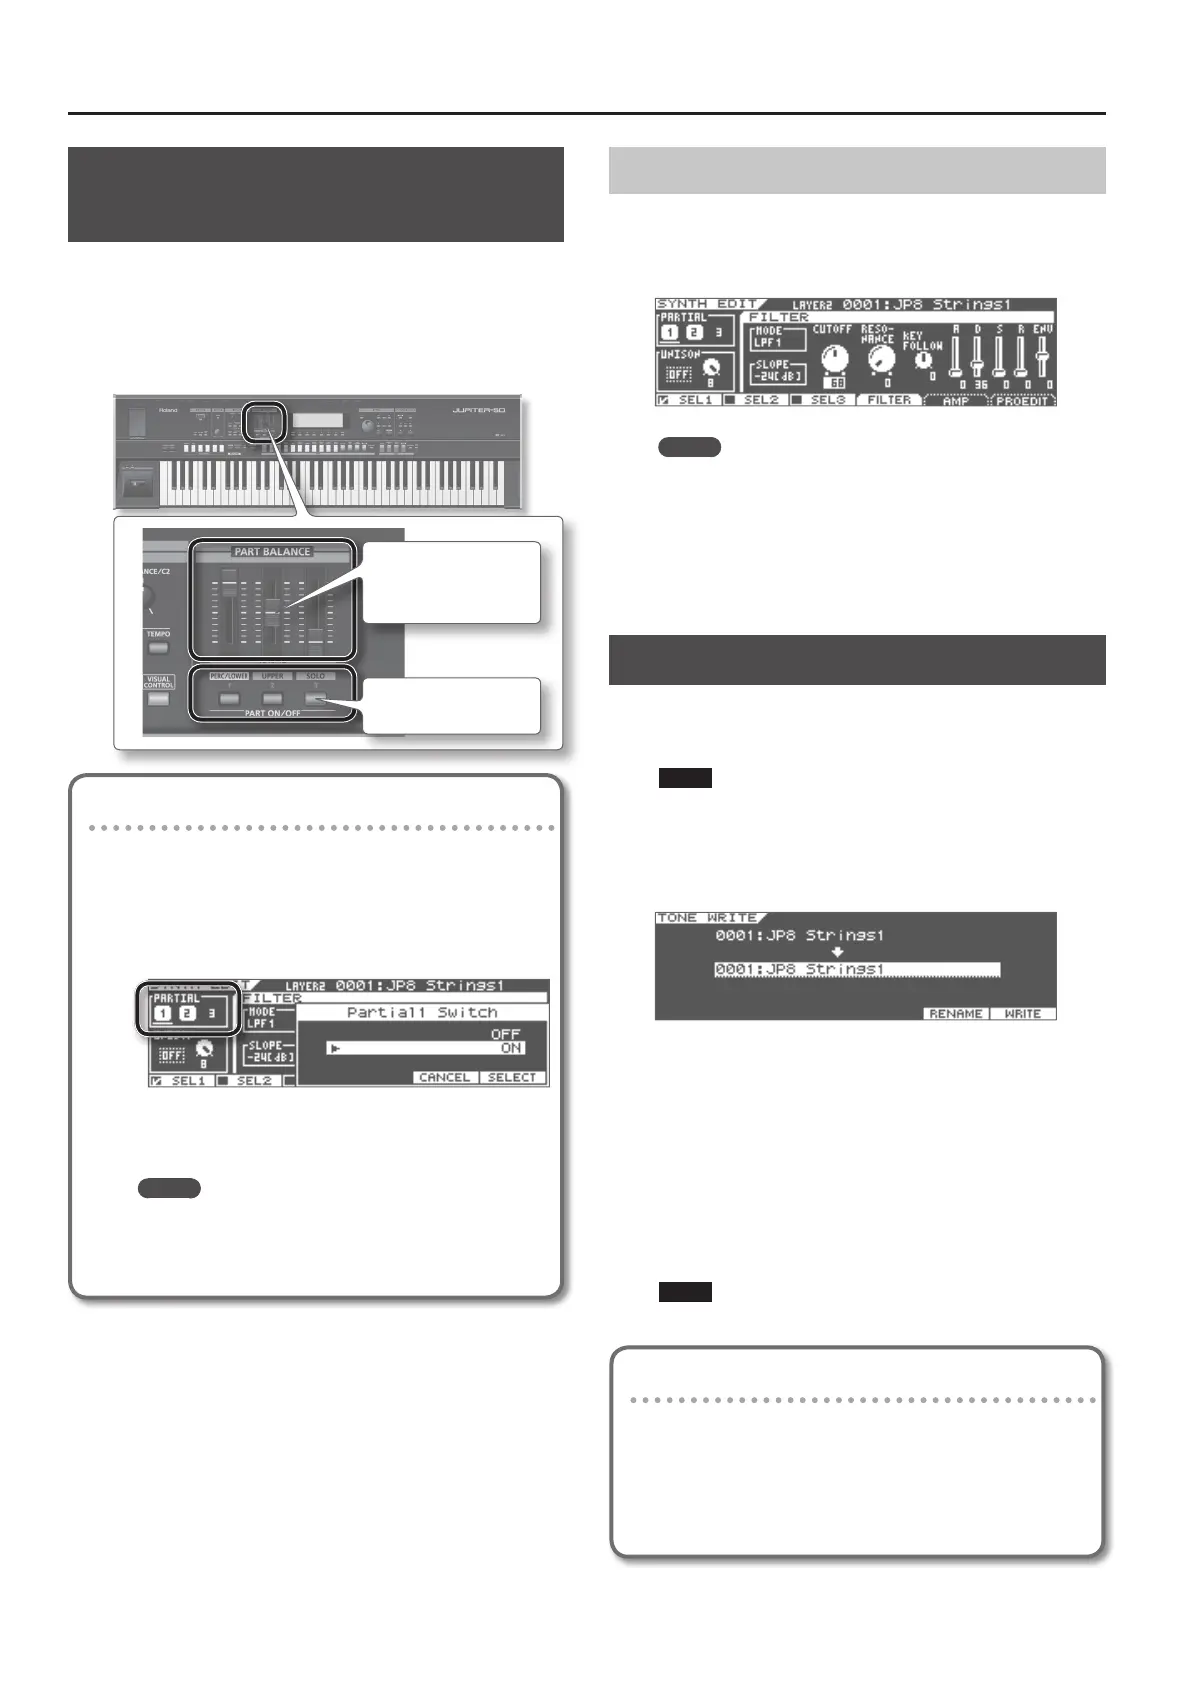
When the SYNTH EDIT screen is displayed, you can use the PART
BALANCE area of the panel to turn on/o the three partials and
adjust their volume.
Use the [LEVEL] sliders to
adjust the volume of each
partial.
Turn each partial on/o.
Turning Partials On/O
Partials can also be turned on/o by following the procedure
below.
1. In the SYNTH EDIT screen, move the cursor to the
PARTIAL 1–3 and press the [ENTER] button.
The Partial Switch screen will appear.
2. Move the cursor to “OFF” or “ON” and press the [F6]
(SELECT) button.
MEMO
A Partial can also be turned on/o by holding down
[SHIFT] while you press [F1] (PTL1), [F2] (PTL2), or [F3]
(PTL3).
Selecting the Partial to Edit
Here’s how to select the Partial to be edited.
1. In the SYNTH EDIT screen, press a button from [F1] (SEL 1)
through [F3] (SEL 3).
MEMO
• The Partial to be edited can also be selected by holding down
[SHIFT] while you press the PART ON/OFF [PERC/LOWER],
[UPPER], or [SOLO] button.
• If you want to edit multiple Partials, press buttons [F1] (SEL 1)
through [F3] (SEL 3) at same time. Alternatively, you can hold
down the [SHIFT] button while you press the PART ON/OFF
button for the Partial you want to edit.
Saving a Synth Tone
A Synth Tone you edit is temporary; it will be lost if you turn o
the power or select another tone. If you want to keep a Synth Tone
you’ve edited, you must save it.
NOTE
When you save, the data in the save destination will be
overwritten.
1. In the SYNTH EDIT screen, press the [WRITE] button.
The TONE WRITE screen will appear.
2. Use the VALUE dial or the [DEC] [INC] buttons to select the
destination at which to save the Tone.
3. Press the [F6] (WRITE) button.
A message will ask “Are you sure?”
4. To save the Tone, press the [F5] (OK) button.
A message will indicate “Completed!”
The Synth Tone has been saved in the save-destination
SuperNATURAL Synth Tone number you specied.
NOTE
Never turn o the power while data is being saved.
Naming a Tone
If you want to rename the Tone, press the [F5] (RENAME)
button of step 2.
The TONE NAME screen will appear.
For details on assigning a name, refer to “Assigning a Name”
(Owner’s Manual; p. 34).

 Loading...


