EasyManua.ls Logo

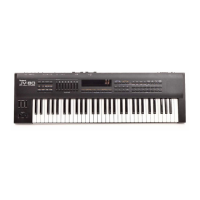
Roland JV-80 - Part Switch; Switch

Roland JV-80
224 pages
To Next Page IconTo Next Page
To Previous Page IconTo Previous Page
Loading...
/.operation
Examples of the
JV-80
Multi Sound
Source
for
Desktop
Music
and
Home Studio
Applications
Reference
Performance-^ 116
TUTORIAL
[1 ]
In this
section, we'll
use the JV-80 to play
several
channels of music
data
recorded to
a
MIDI sequencer.
^
Only Part 1 and
Part 2 of this
Performance are set to receive
play data from
the
keyboard. Perform the following
steps so that
the other Parts
can be played.
(1)
Press
IINTTRANSl.
@
Press the
[
PART
SWITCH
|
of the
Part to be played,
making sure that the
indicator is lit.
Set the MIDI
receiving channel of
the Part. Parts I
—
8
of this Performance
are set to
receive
over MIDI channels
1
,
2,
3, 4, 5,
6, 7,
and
10,
respectively, as a
factory-set default. (See P.xx
for more on
setting the
MIDI
receive
channels.)
[
1
]
Press
i
LEVEL
|
and select the
Receive Channel page by
using
\W]
.
PE
F^' F
n
pr*t tT
Li
T R I fl L
-
R e c e- i me
C h-b n
i-i -e? 1
I 1
fEi *
II 2 1 3
1 4 B 5 1 6 I ?
I
1
[2]
Select the receiving
channel of the
Part
to
be changed by
using the
appropriate
Parameter Slider.
Select the Patch to be
assigned to the
Part.
[3]
Select the
Patch Select
page by using
[X]
.
F- E
R: F
Ci
R n
i F" -b t c
h
S
:-
1 e c- 1 F' 1
=
ur c h b
1
1-
i n
9
s
116
fGlSlHli
m74ir-l44ifi57IB13IB64 1
INT
[4]
Change
the Patch
numbers by using
the Parameter
Sliders. You
can also
move the cursor
wfith the
[a\
/
[^
buttons to
the Patch you
v^fish
to change,
then input the
number of the
Patch
directly by
selecting, in
order:
I
USER/PRESET
j/l
INT/CARD A/B
1/|
BANK
|/|
NUMBER
|.
Set the
receive switch to ON so
that only the
specified Part will receive
MIDI data.
[5]
Press the
appropriate
|
PART
SWITCH
]
buttons to select the
Parts to
receive MIDI
data. The
indicators of
the selected
Part Switches
should be
tit.
192

Related product manuals